Gurukul – All-in-One Educational Institution Management System
Gurukul is a comprehensive, multi-user management system designed to automate and streamline operations for educational institutions such as schools, colleges, and training centers.
By

Ver. 6.0.0
Email: support@qodeigence.com
Website: gurukul.qodeigence.com
Gurukul – All-in-One Educational Institution Management System
Gurukul is a comprehensive, multi-user management system designed to automate and streamline operations for educational institutions such as schools, colleges, and training centers.
🔐 User Roles (8 Distinct Panels)
-
Super Admin – Full control over the system.
-
Admin – Manages day-to-day operations with almost all features.
-
Receptionist – Handles all front office activities.
-
Teacher – Manages academic and student-related activities.
-
Accountant – Oversees student fees and institutional expenses.
-
Librarian – Maintains complete library system.
-
Student – Engages with academics, exams, class schedules, and teachers.
-
Parent – Tracks children’s academic progress and communicates with the institution.
📌 Core Features
📥 Student Management
-
40+ field student admission form with sibling, ID, RTE & document details.
-
Student promotion based on pass/fail or leaving school.
-
Profile system with 360° student view: personal, academic, fees, exams, documents.
-
Smart search & filtering by name, class, section, ID, and more.
-
Categorize students by caste, skills, etc.
💰 Fees & Accounting
-
Advanced fee module with configuration for types, groups, fines, and discounts.
-
Allot fees & discounts using 5+ criteria across individual or batch entries.
-
Collect fees with a detailed standing overview.
-
Create and track discounts (sibling, staff children, early admissions, etc.).
-
Record and categorize school income and expenses with receipt uploads.
-
Comprehensive fees reports: statement, balance, transaction, and graphical analysis.
📊 Reports & Analytics
-
Student, fees, exam marks, attendance, and transaction reports.
-
Export reports in PDF, Excel, CSV, or print format.
-
Beautiful, graphical dashboard with key metrics.
🧑🏫 Academic & Classroom Management
-
Manage classes, grades, sections, subjects (theory/practical).
-
Assign subjects & teachers, create class schedules.
-
Track and report attendance class-wise and monthly.
-
Exam creation, scheduling, marks entry, grading, progress reports.
📚 Library & Learning Resources
-
Full-featured library management: book inventory, issue/return, member tracking.
-
Add books with ISBN, author, rack info, quantity, price, etc.
-
Upload and manage downloadable content: syllabus, assignments, study materials.
-
Homework document management and file sharing.
🚍 Transport & Hostel
-
Manage school transport: vehicles, routes, drivers.
-
Hostel management: rooms, room types, occupancy tracking.
📩 Communication
-
Internal messaging system: send messages to students, parents, and staff.
-
Announcements via notice boards.
-
Supports multiple SMS gateways (Clickatell, Twilio, custom) and SMTP email engines.
🌐 Online & Utility Tools
-
Integrated online payment gateway support.
-
Database backup & restore options.
-
System-wide general settings for branding and configurations.
-
Responsive design for all devices (mobile, tablet, desktop).
-
Parent portal for multi-child monitoring and fee payments.
-
Export and print functionality for all modules.
💡 Summary
Gurukul offers everything you need to efficiently manage your educational institution — from admissions to accounting, academics to communication, and transport to hostel management. Whether you're running a small school or a large training institute, Gurukul brings all operations under one powerful, easy-to-use platform.
🔐 Experience Gurukul – Live Demo Access
Explore the power and flexibility of Gurukul through our live demo platform. Use the credentials below to log in as different users and experience the system from various perspectives.
🌐 Web Portal Access
Website Link: https://gurukul.qodeigence.com
Login URL: https://gurukul.qodeigence.com/site/login
| Role | Email Address | Password |
|---|---|---|
| Super Admin | hello@qodeigence.com | Gurukul@12345 |
| Admin | demoadmin@gurukul.com | Demo@Admin12345 |
| Accountant | demo-accountant@gurukul.com | demo-accountant123 |
| Librarian | demo-librarian@gurukul.com | demo-librarian123 |
| Teacher | demo-teacher@gurukul.com | demo-teacher123 |
| Receptionist | demo-reception@gurukul.com | demo-reception123 |
Student & Parent Access
Login URL: https://gurukul.qodeigence.com/site/userlogin
| Role | Username | Password |
|---|---|---|
| Student | std3 | q2mfrz |
| Parent | parent3 | 4uj96l |
We would like to thank you for purchasing Q Gurukul! We are very pleased you have chosen Q Gurukul for your institution, you will not be disappointed! Before you get started, please be sure to always check out these documentation files. We outline all kinds of good information, and provide you with all the details you need to use Q Gurukul. Q Gurukul can be used with any school, college, university, training/coaching institute.
If you are unable to find your answer here in our documentation you can visit our Help & Support. Chances are your question or issue have been brought up already and the answer is waiting to be found. If you are unable to find it anywhere, then please go our Support section and open a new Support Ticket with all the details we need. Please be sure to include your site URL as well. Thank you, we hope you enjoy using Q Gurukul!
Help & SupportUsing Q Gurukul
Q Gurukul - General Overview
Before start using Q Gurukul consider a general scenario of typical school of class 1 to 12th, each classes have sections like Section A, Section B. There will various subjects for different classes like some subjects are theory and some are practical. Exams are created using these subjects and classes. Students enter in classes by new admission or promoted by their previous class after successful passing of previous class. During course of student we will charge fees to students and collecting them at monthly or one time basis. We like to record attendance of our students. Our school may be providing transport facility to student. Our school have library for students have to maintain books inventory. Our school have hostels and providing hostel facility to our students. Obviously our school has teachers to teach and manage students. We like to communicate our teachers, students and parents. We like to record all the expenses done in our school like miscellaneous bills, salary payments etc. After everything we like to analyze various reports based on our school.
If you are using Q Gurukul for a training centre then may be you like to admit students in two classes, since version 5 we have introduce multi class feature where you can admit a single student in two classes simultaneously.
Apart from above we also like to provide access to our Q Gurukul to other users like Teachers, Accountants, Librarians, Students and their Parent. For these Q Gurukul have 8 inbuilt user's roles- SuperAdmin, Admin, Teacher, Accountant, Librarian, Receptionist, Student and Parent. Virtually you can create unlimited number of user roles for staff members.
Admin Panel
Login to Admin Panel through URL - https://gurukul.qodeigence.com/site/login
After successful login you will reach to Admin Dashboard. Below you can find navigational overview of user screen.
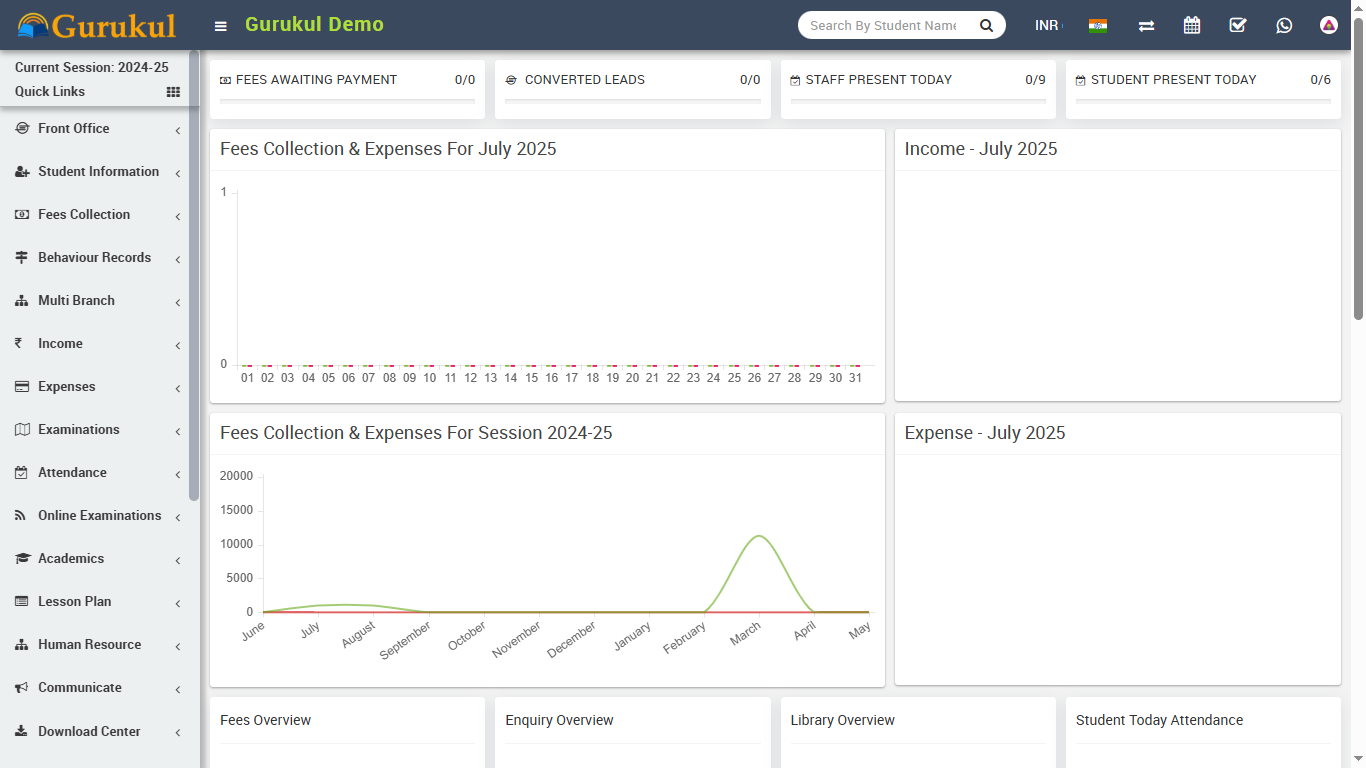
Admin Panel consist 26 modules listed below -
- Front Office - for all reception/front office related activities like enquiries, calls, visitors, postal receive/dispatch
- Student Information - for all the information related to student like student search, profile, student admission, student history
- Fees Collection - for all the details related to student fees collection, fees master creation, fees dues, fees reports
- Income - for all the income other than fees collection can be manage here like add income, search income, income head
- Expenses - for all the expenses related to school can be manage here like add expenses, search expenses, expense head
- Attendance - for managing student attendance and attendance report
- Examinations - for managing all the exams conducted by school like create exam, schedule exam, exam marks entry, marks grade
- Online Examinations - for managing online exams conducted by school
- Lesson Plan - for managing subject status and lesson plan
- Academics - for managing all the parameters / master data required to run school like classes, sections, subjects, assign teachers, class timetable, promote student to upper class
- Human Resource - for all the information related to staff members can be manage here like staff search, profile, attendance, payroll, leaves
- Communicate - it works like a notice board basically a messaging system for communication to students, parents and teachers
- Download Center - for managing downloadable documents like assignments, study material, syllabus and other documents need to distribute students and teachers
- Homework - teachers can give homework here and further evaluate them
- Library - all the books in your library can be manage here
- Inventory - manage all the assets of your school with stocks and store under inventory module
- Transport - for managing transportation service like routes and their fares
- Hostel - for managing hostels, hostel rooms and their fares
- Certificate - design and generate student certificate and ID Card here
- Front CMS - manage front public site of Q Gurukul here by creating pages, menus, events, gallery, news
- Alumni - for managing all pass out students or alumni records and events
- Reports - all the various reports related to different modules can be found here
- System Settings - configure Q Gurukul here for different settings like school, sessions, admin password, SMS, Paypal, backup / restore, languages
- Calendar & ToDo List - track and manage all daily/monthly activities and create your task in todo list
- Chat - chat for two way messaging staff and students
- One Click Updater - to install new in system
To understand how Q Gurukul works first we need to configure and setup it for our school. In this whole documentation we will consider our sample school which is Q Gurukul Demo.
Steps to setup your school -
- In the Admin panel go to System Settings > General Setting in upper right side click
on Edit button to update your school data.
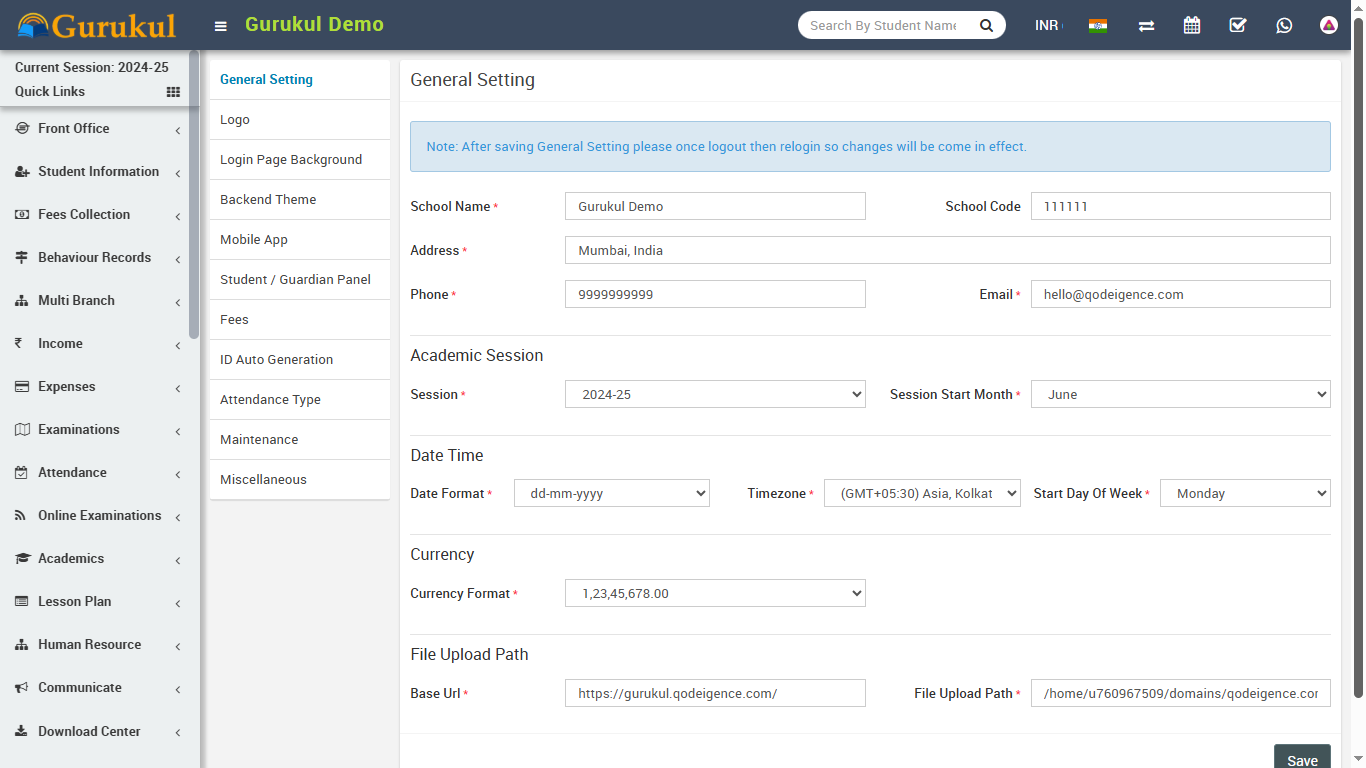
- Update your School Name, School Code (School Code is your school affiliation / accreditation no), Address, Phone, Email (for remaining settings please check System Settings section) now click on Save button to update record.
- For updating your school print logo (used in fees receipt and payslip print) go to System Settings > General Setting in lower left side click on Edit Print Logo button (it is recommended for logo to use .png image with transparent or white background and around 200px x 200px in size). Now drag and drop or select your logo file. By clicking on Edit Admin Logo and Edit Admin Small Logo you can set logo for admin panel. Edit App Logo to set logo for mobile app.
- For automated SMS messaging add any one of available SMS Gateway with the required details from System Settings > SMS Setting.
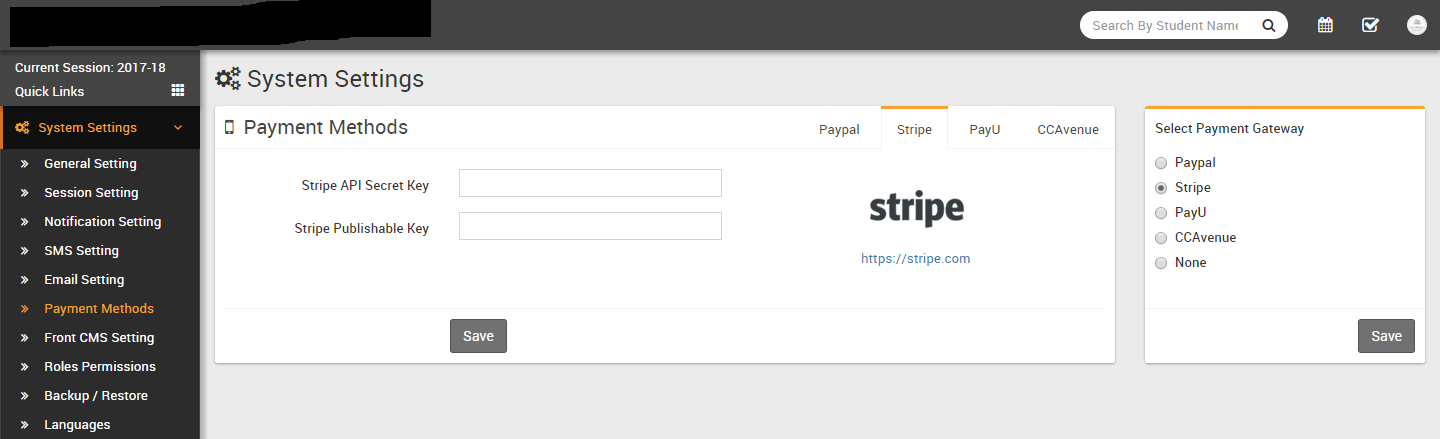
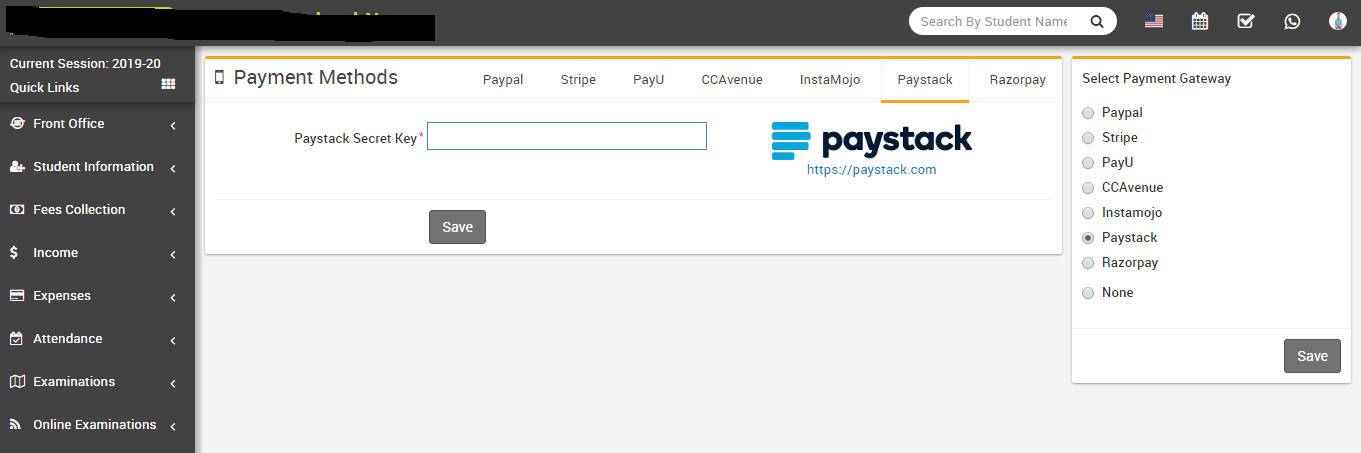
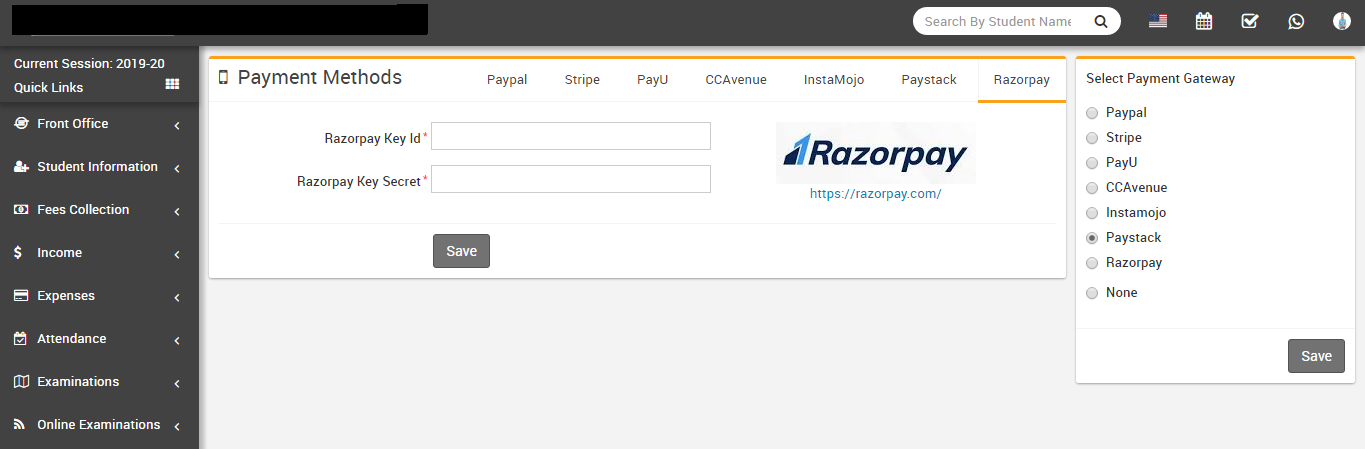
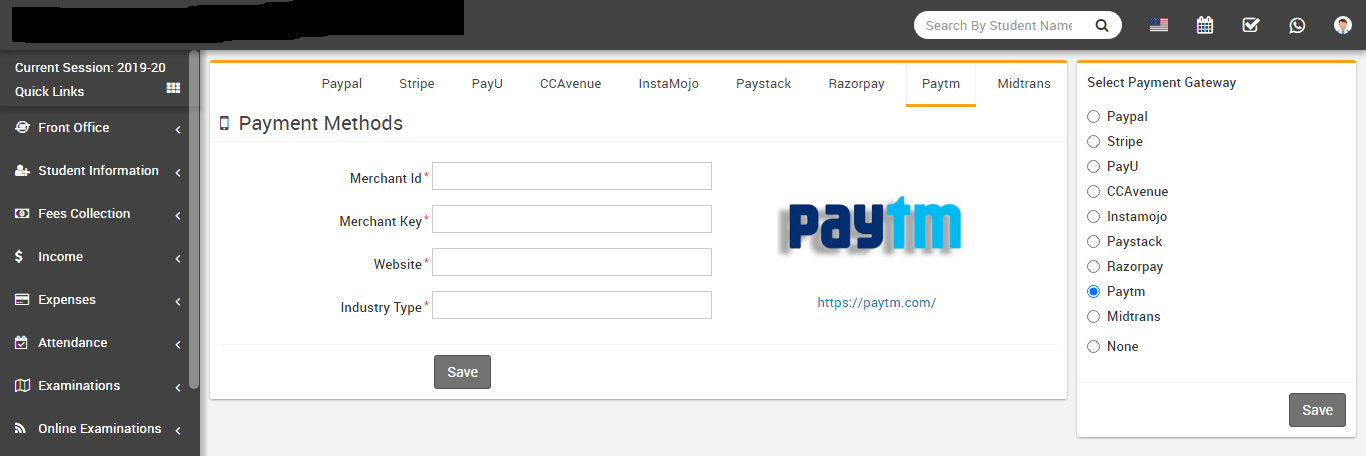
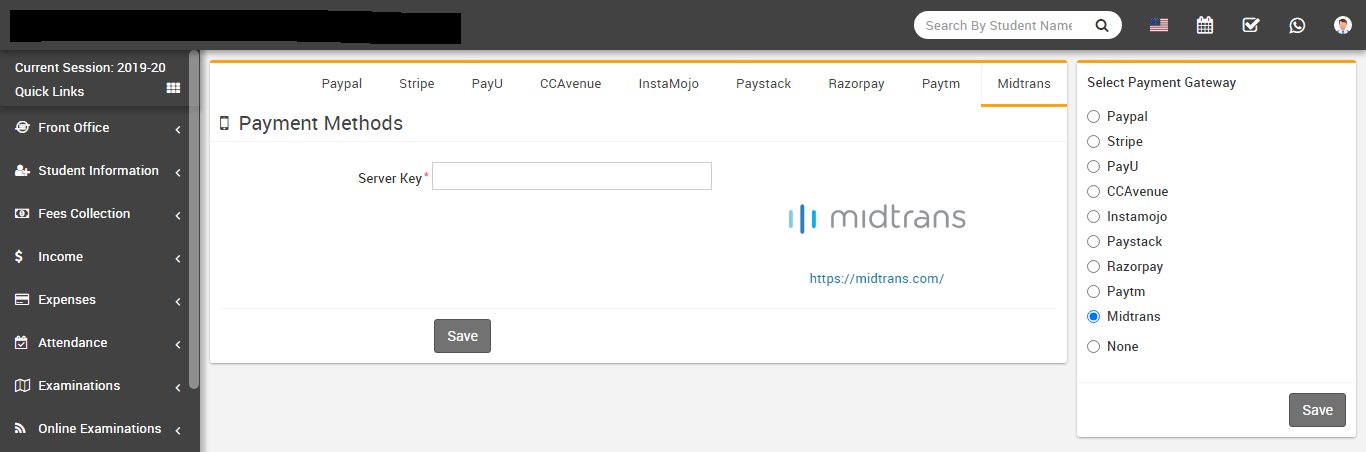
- To enabling online payment in Parent Panel and Student Panel update your payment gateway account details for this, go to System Settings > Payment Methods select your appropriate payment gateway and add you payment gateway account details then click on save button and enable it from right side box.
- At this point we have completed basic setup of our school. Now we will add our academics in Q Gurukul like Classes, Sections, Subjects, Teachers.
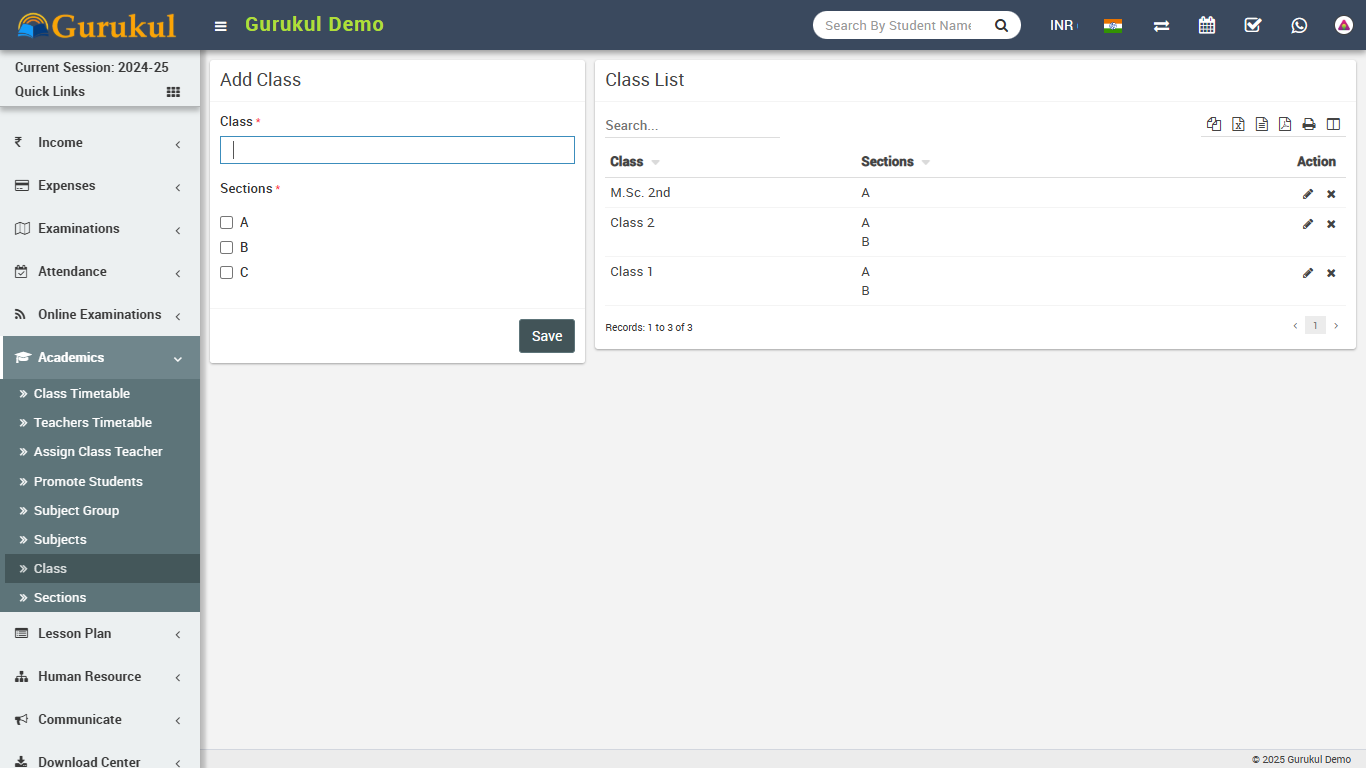
- For adding classes go to Academics > Classes, before adding classes first add
Sections from Academics > Sections. Select Sections comes under a Class when you
adding a Class. Classes can be add from left side Add Class form and added classes
can be see right side Class List. Add all classes running in your school here.
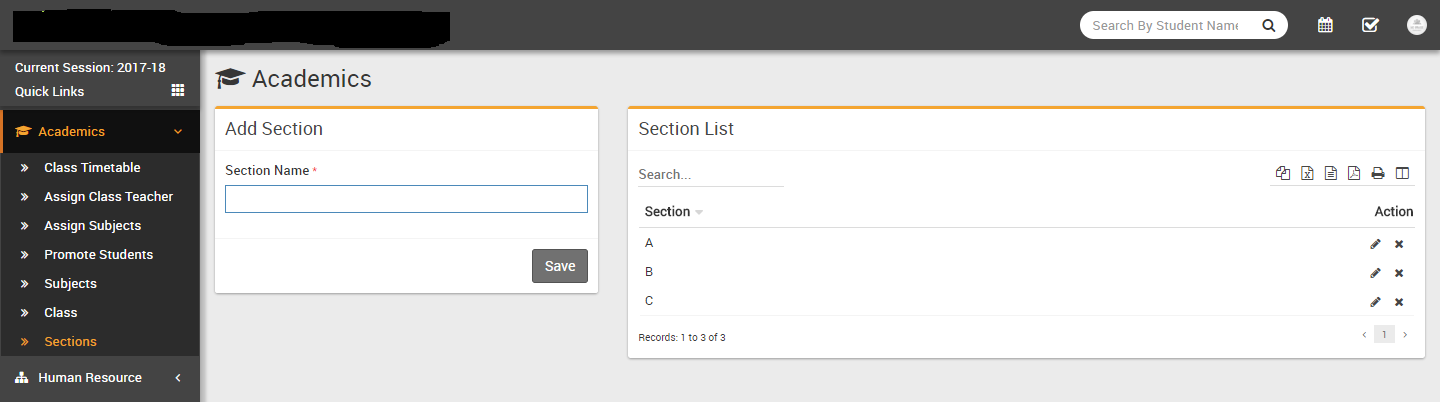
- For adding sections go to Academics > Sections, Sections can be add from left side Add Section form and added section can be see right side Section List. Add all section name used in your school here e.g. Class 1 has 3 sections A, B, C and Class 2 has only A, B sections then we will add 3 sections A, B, C here. After adding sections, select section comes in a Class when you adding Classes.
- For adding Teachers go to Human Resource > Staff Directory, Teachers can be add from top right corner Add Staff button. At this page you can add any staff by selecting its role. If we are creating teacher then we should select Teacher as role and designation as role.
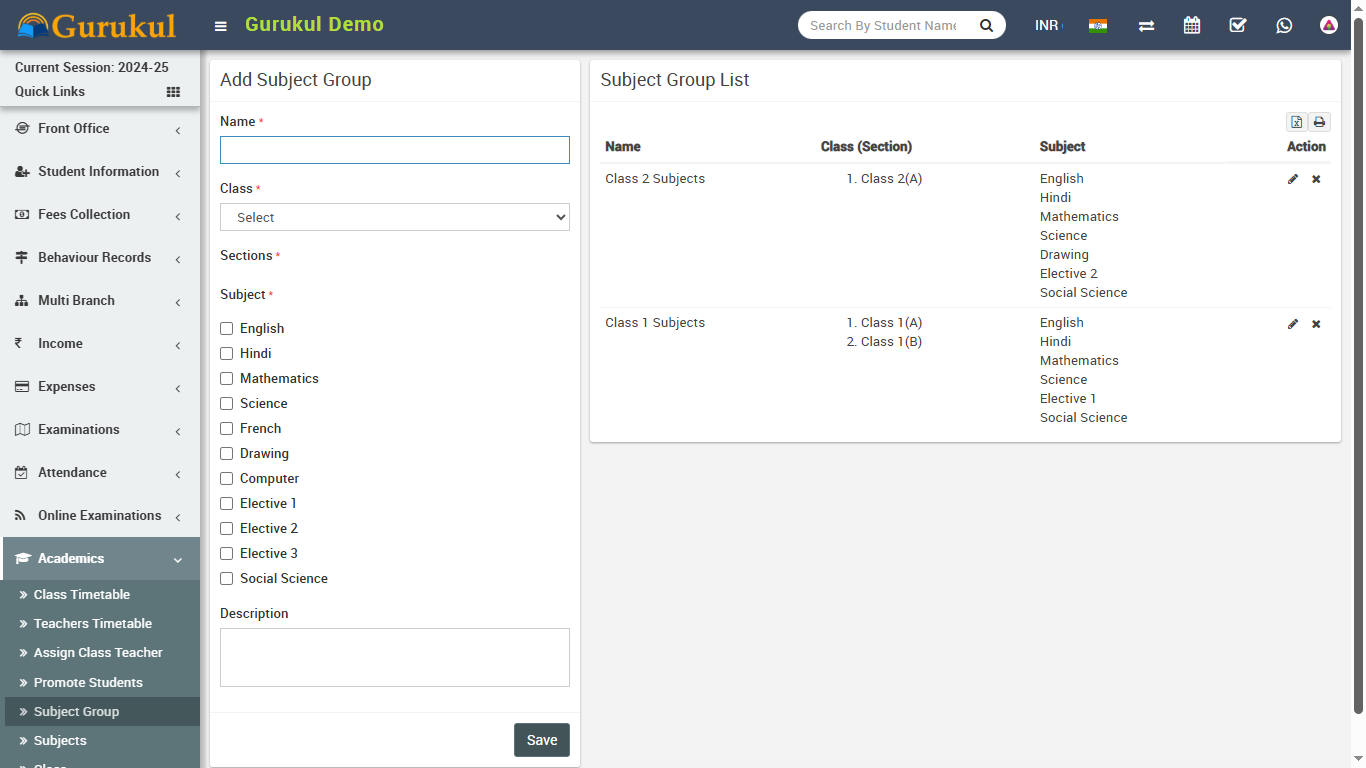
- For adding subjects go to Academics > Subjects, Subjects can be add from left side Add Subject form and added subjects can be see right side Subject List. Add all subjects including theory and practical in your school here. Subjects can be assign through Subject Groups to their classes in next step.
- For assigning subjects to their classes go to Academics > Subject Group enter Subject
Group then select Class and Section then select all subjects you want to include in this
class and section as group now click on Save.
- Great! you have completed your Q Gurukul setup. Now further we will understand working of all the modules 1 by 1 in detail.
Front Office
This module has 7 sections -
- Admission Enquiry
- Visitor Book
- Phone call Log
- Postal Dispatch
- Postal Receive
- Complain
- Setup Front Office
First we will Setup Front Office then we will manage student Admission Enquiry, daily Visitors Book, Phone Calls, Postal and Complain.
- Setup Front Office- Go to Front Office > Setup Front
Office here you will add Purpose, Complain
Type, Source, Reference data which will be
use in different sections of Front Office.
Enter Purpose then
Description and click on
Save button. All Purpose can be see right side of this page.
Follow same procedure to make entries for Complain Type, Source and Reference.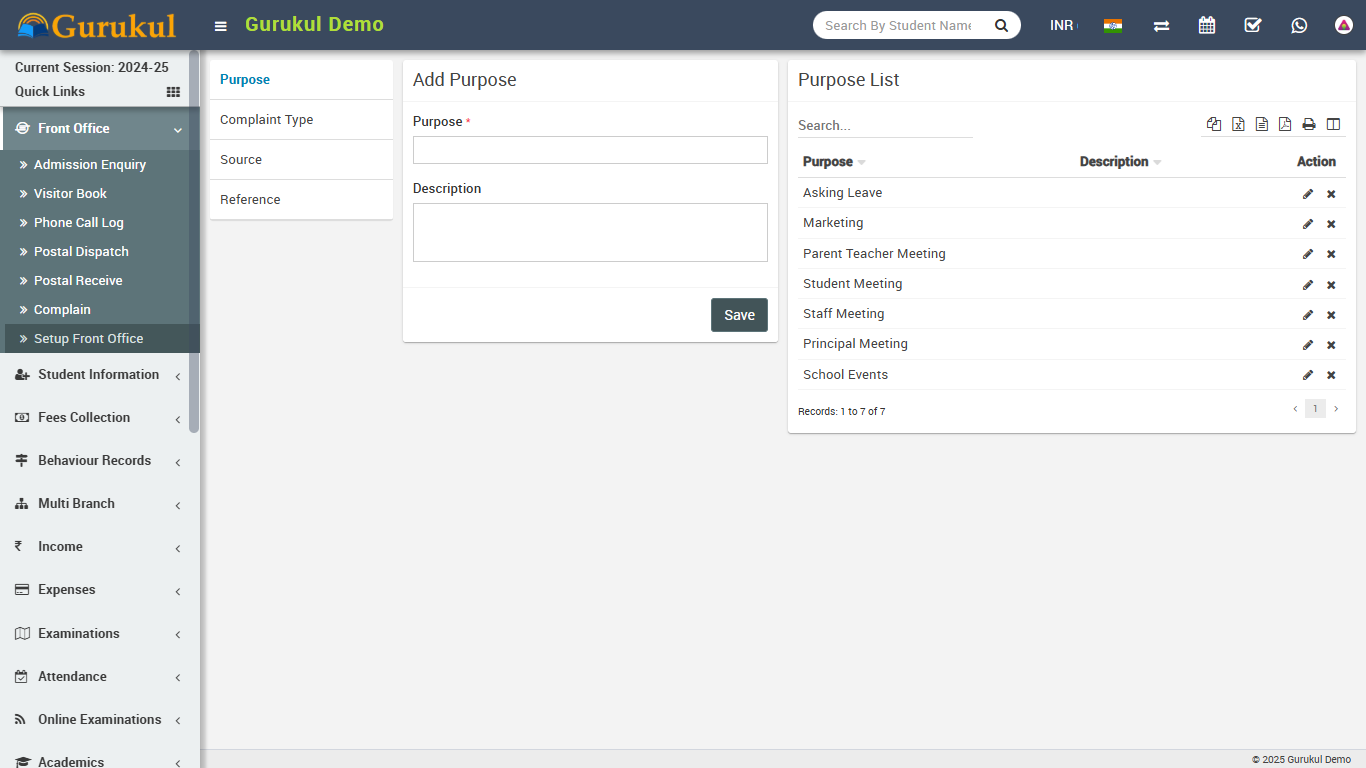
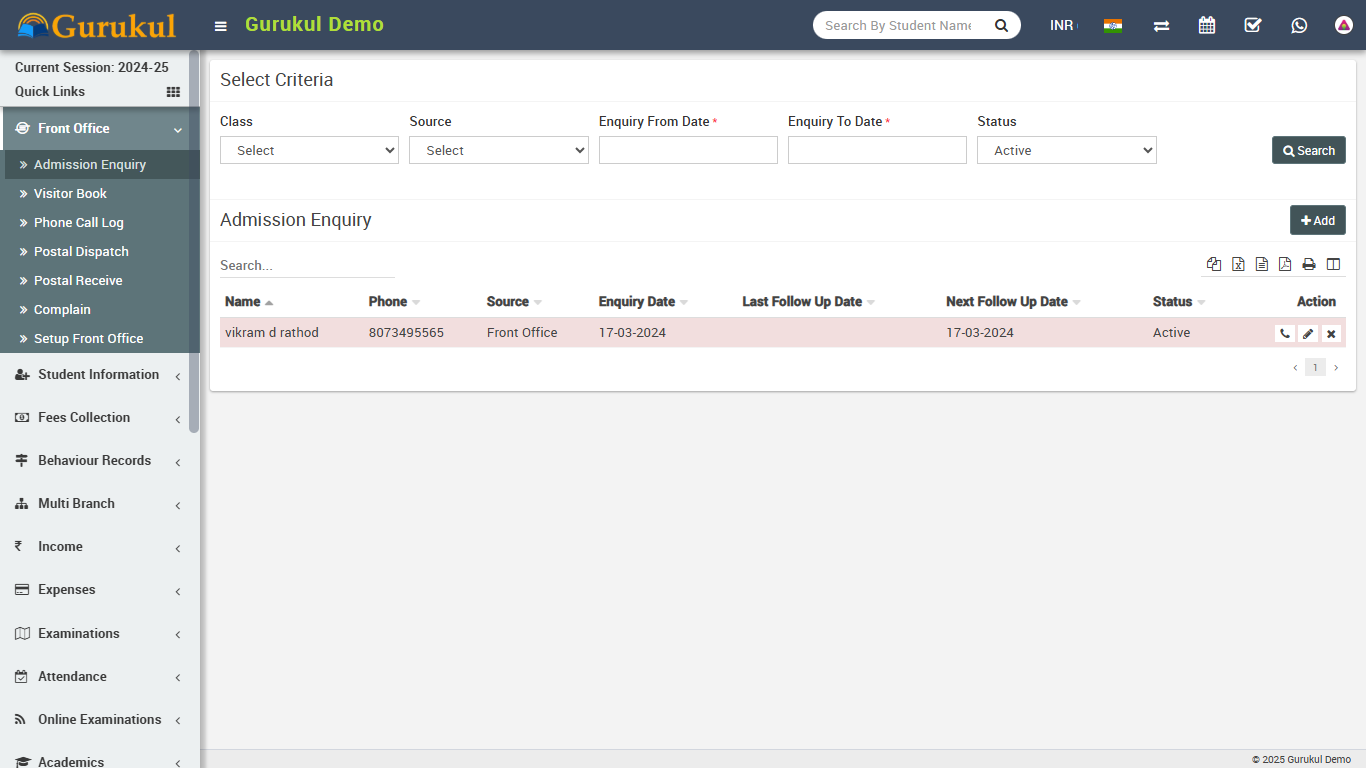
- Admission Enquiry- Admission Enquiry feature is dedicated for managing all
student admission related leads and enquiries. Its basically a lead management for student
admissions. Go to Front Office > Admission Enquiry
Here you can see all active Admission Enquiry. Admission Enquiries that have passed their
next follow up dates is marked as red. You can also search/filter Admission Enquiry by
Enquiry Date, Source or Enquiry Status. To add New Enquiry click on + Add
button. Here enter Name, Phone, Email, Address, Description, Note, Date, Next Follow
Up Date, Assigned, Reference, Source, Class and Number Of
Child then click on Save button. To edit or delete enquiry
simply click on Edit/Delete button from Action column. To
follow existing enquiries click on Follow Up button from Action column.
Here you can enter Follow Up Date, Next Follow Up Date
then person Response and your any Note. From right panel
of this window you can check Summary of this enquiry. You can also change
status of this enquiry from Status dropdown.
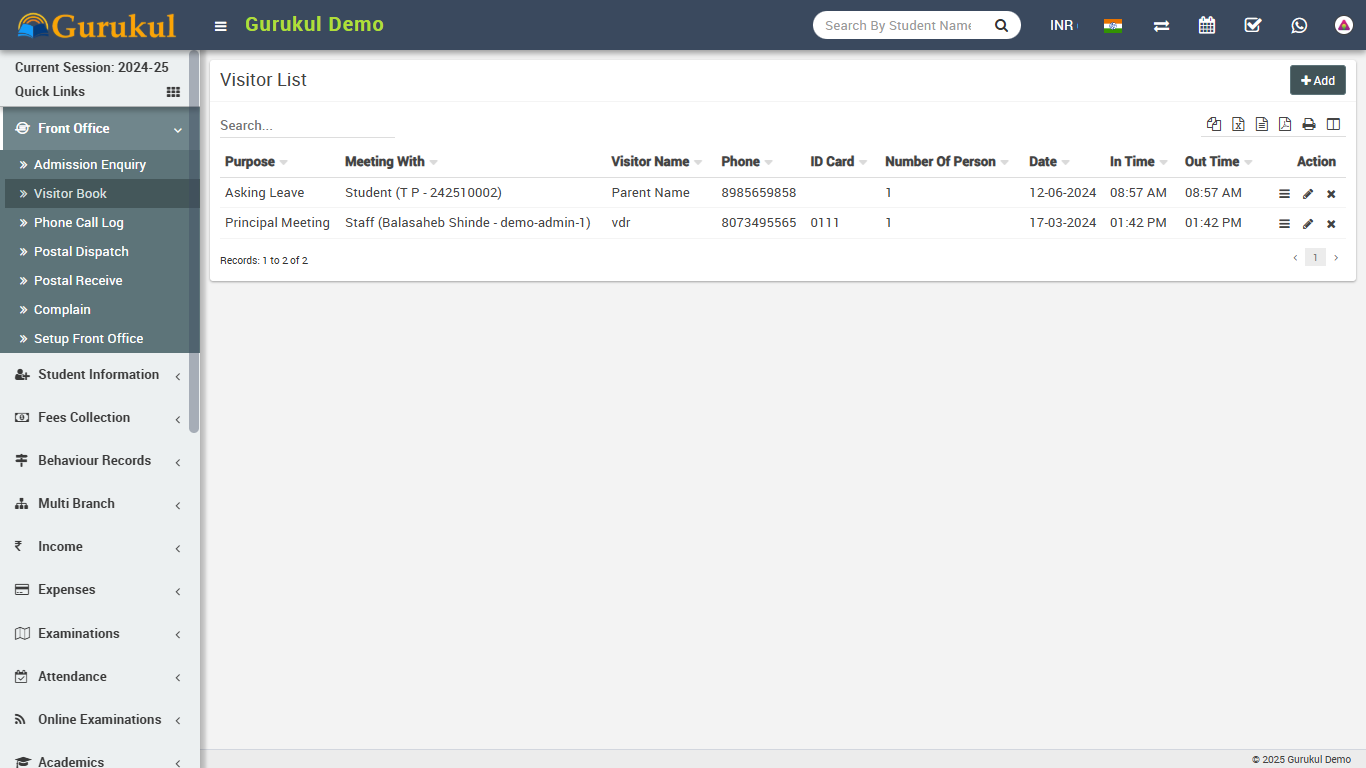
- Visitor Book- In Visitor Book we will keep records of all persons coming in
school reception for any purpose, e.g. student mother has come to meet their child, a book
company executive comes for general enquiry etc. Go to Front Office > Visitor
Book
enter Purpose, Name, Phone, ID Card, Number Of Person, Date, In Time, Out Time,
Note and Attach Document then click on Save
button. All Visitors details can be see right side of this page.
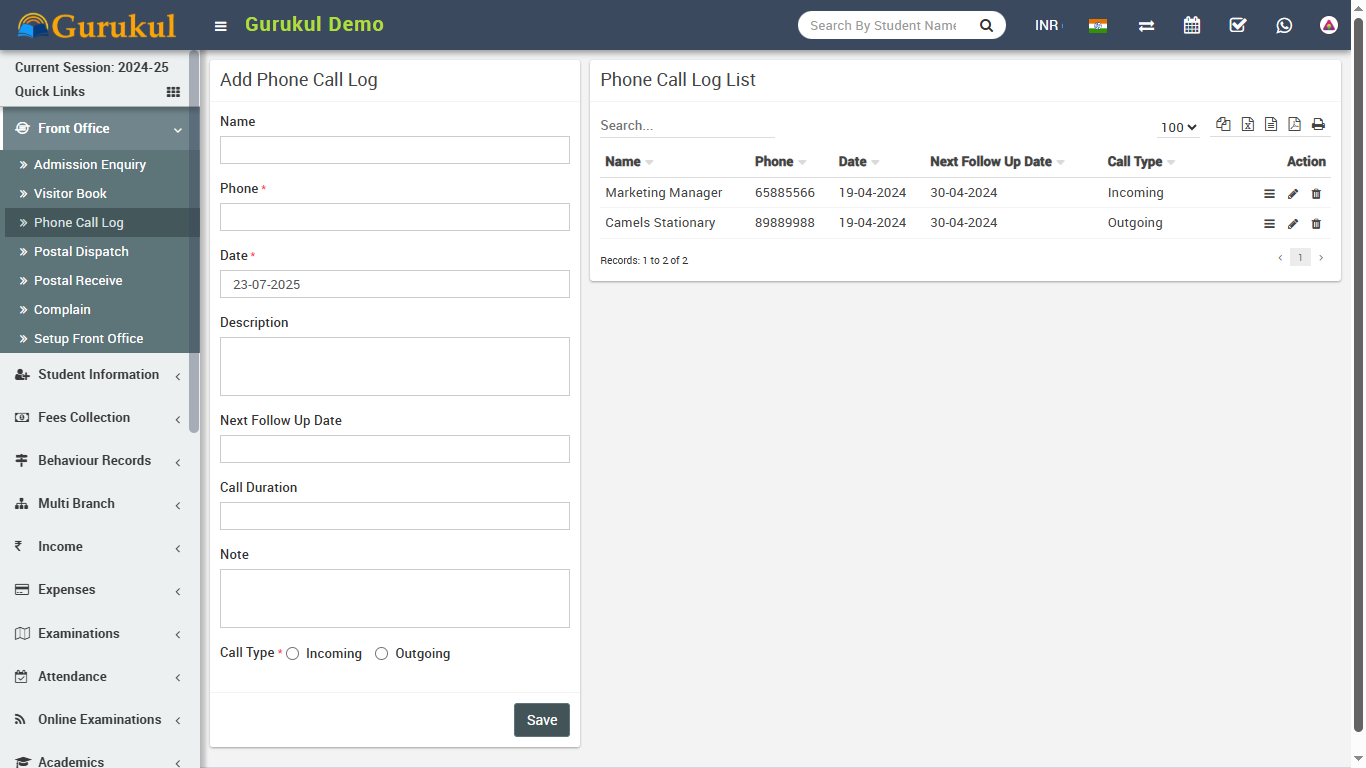
- Phone Call Log- Here we will keep all records for Incoming/Outgoing Phone
calls from reception. Go to Front Office > Phone Call Log
enter Name, Phone, Date, Description, Next Follow Up Date, Call Duration,
Note and Call Type then click on Save button.
All Phone Call Log details can be see right side of this page.
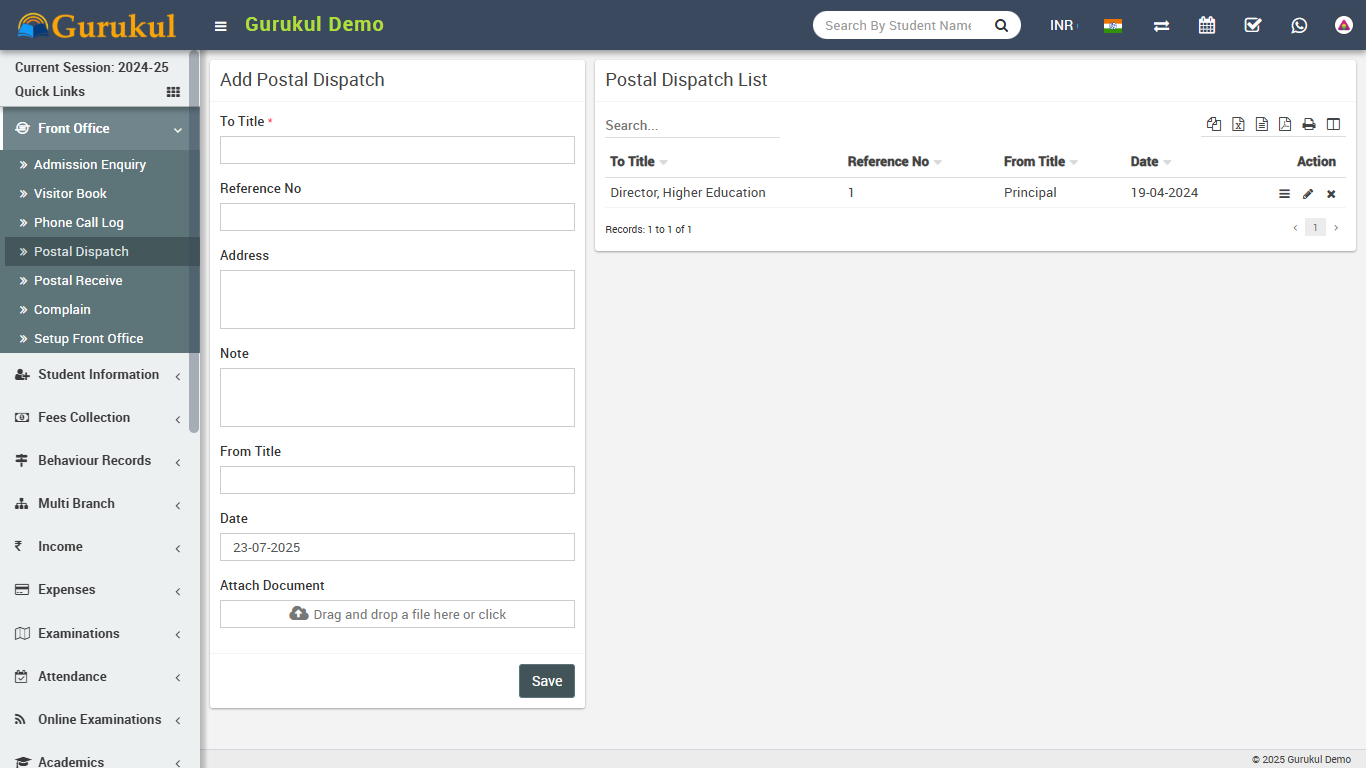
- Postal Dispatch- Here we will keep all records for all Postal items
dispatched from school to outside. Go to Front Office > Postal Dispatch
enter To Title, Reference No, Address, Note, From Title, Date and
Attach Document then click on Save button. All Postal
Dispatch details can be see right side of this page.
- Postal Receive- Here we will keep all records for all Postal items received
in school from outside. Go to Front Office > Postal Receive
enter From Title, Reference No, Address, Note, To Title, Date and
Attach Document then click on Save button. All Postal
receive details can be see right side of this page.

- Complain- Here we will keep all Complain records coming to reception or
from online front site complain page. Go to Front Office > Complain
enter Complain Type. Source, Complain By, Phone, Date, Description, Action Taken,
Assigned, Note and Attach Document then click on
Save button. All Complain details can be see right side of this page.

Student Information
This module has 9 sections -
- Student Details
- Student Admission
- Online Admission
- Disabled Students
- Multi Class Student
- Bulk Delete
- Student Categories
- Student House
- Disable Reason
First we will add Student Categories, School House then take Student Admission then Online Admission, Students Details. If you want to add additional fields in student admission form then you can use Custom Fields feature for this go to System Settings > Custom Fields and add your desired fields in Student. If you also don't want any default fields in student admission then you can disable it from System Settings > System Fields and disable student system fields.
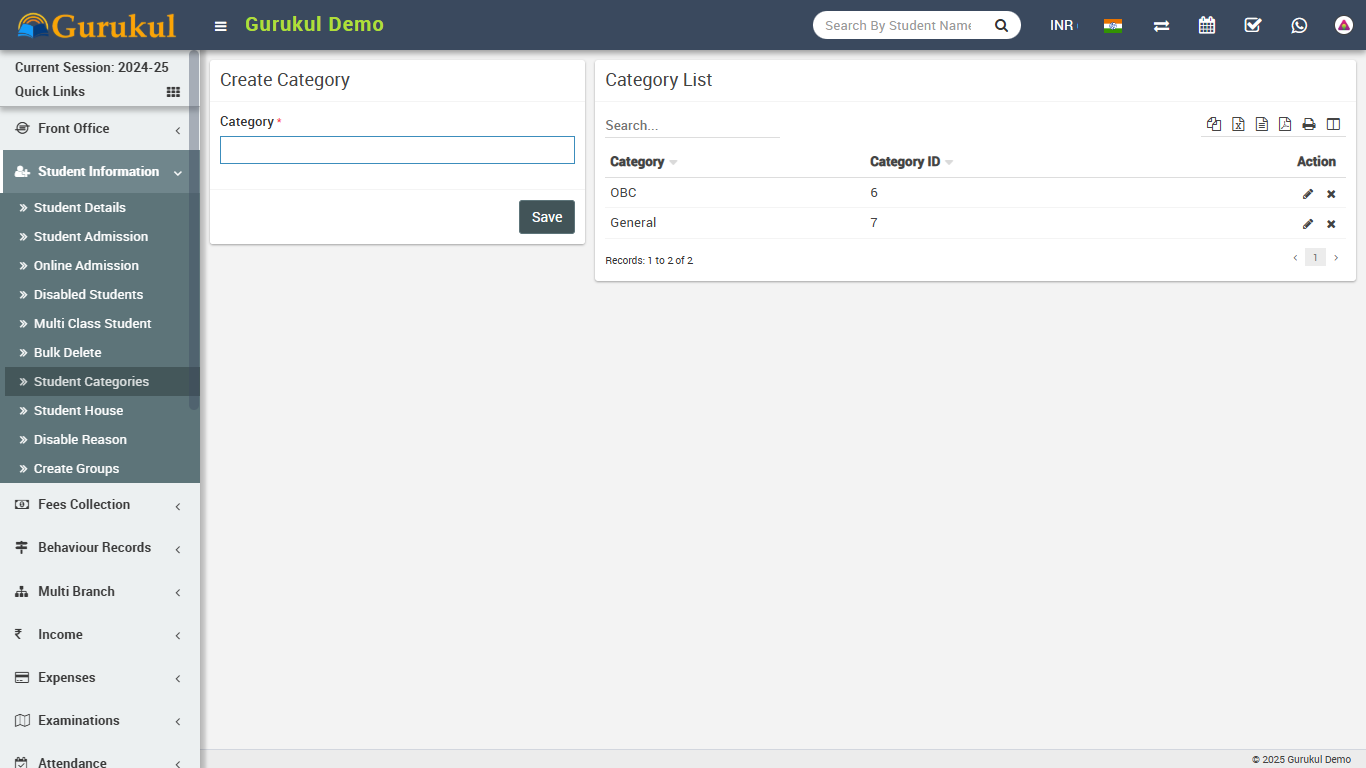
- Student Categories- Go to Student Information > Student Categories Add all
student categories here. Student categories can be caste, community or group wise.
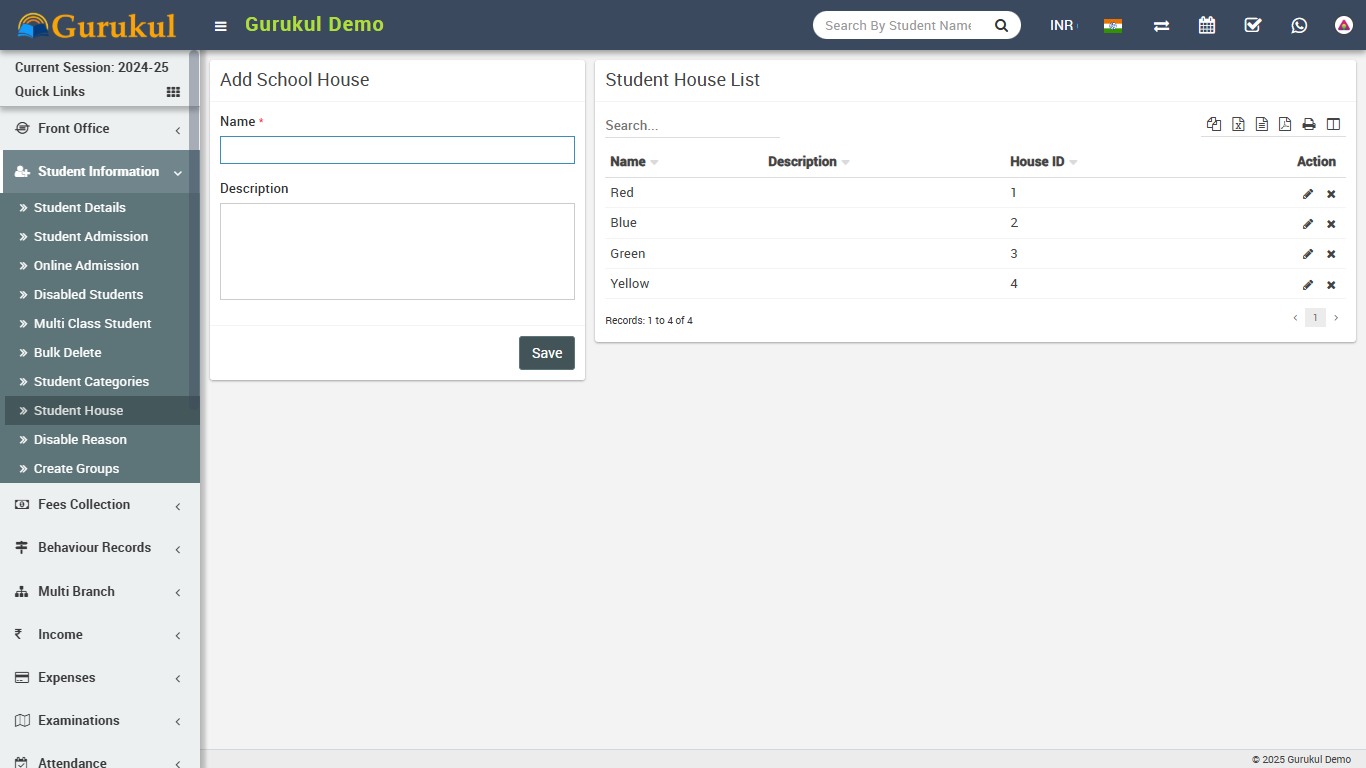
- Student House- Go to Student Information > Student House Add all student house
here. Student house is also another type of grouping of students.
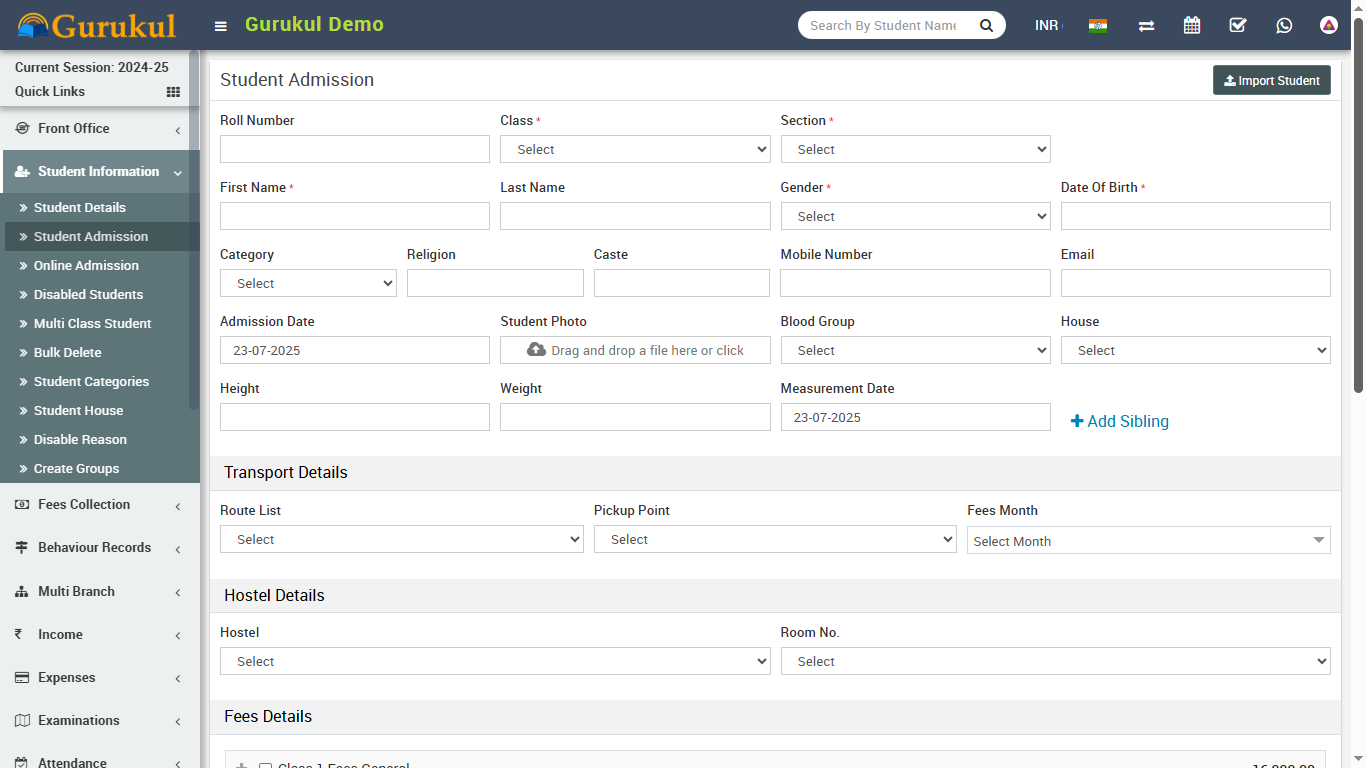
- Student Admission- Go to Student Information > Student Admission add student
basic details Admission No (if you want to use auto generation of student admission
number then enable it from System Setting > General Setting), Roll No (this roll
number is just for reference purpose, when you will generate student admit card from
examination module then a roll number will be auto generate for corresponding exam), select
Class and Section, First Name, Last Name, Gender, Date
Of Birth, Category, Religion, Caste, Student Mobile
Number, Email, Admission Date, Student Photo, Blood
Group, Student House, Height, Weight, As on Date, if
this student has sibling and already study in this school then click on Add Sibling
button and select sibling (note that if student has more than one sibling study in school
then you do not have to select all the siblings just select any one sibling and system
automatic detects other siblings), add student Father, Mother and
Guardian details. Now click on Save button to complete student admission, if
you want to add more details of student like Student Address Details, Transport
Route Details, Hostel Details, Miscellaneous Details, RTE
(Right To Education - in some countries there is a government funded scheme under which
student get free education and government pay fees for these students) and Upload
Documents then click on Add More Detail button. Student admission, admit
students in by default in current selected session.
To importing bulk students for admission click on upper right side Import Student button. Now select class and section and browse .csv and click on Import Students Data file to import student data. Using student import you should enter unique student admission number because even if you have enabled auto generation of student admission number. You can download sample .csv file by clicking upper right Download Sample Import File button. Note that by importing bulk student you have to update student record for proper admission record.
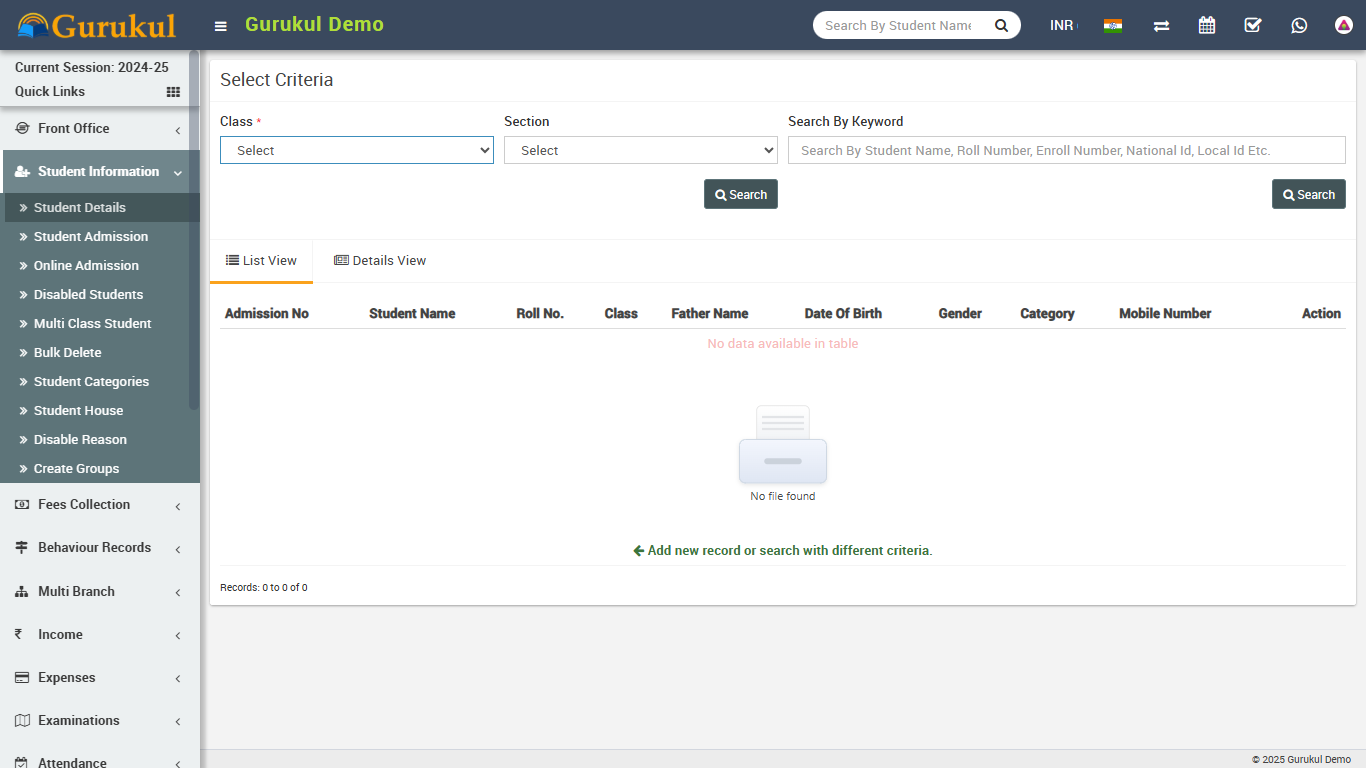
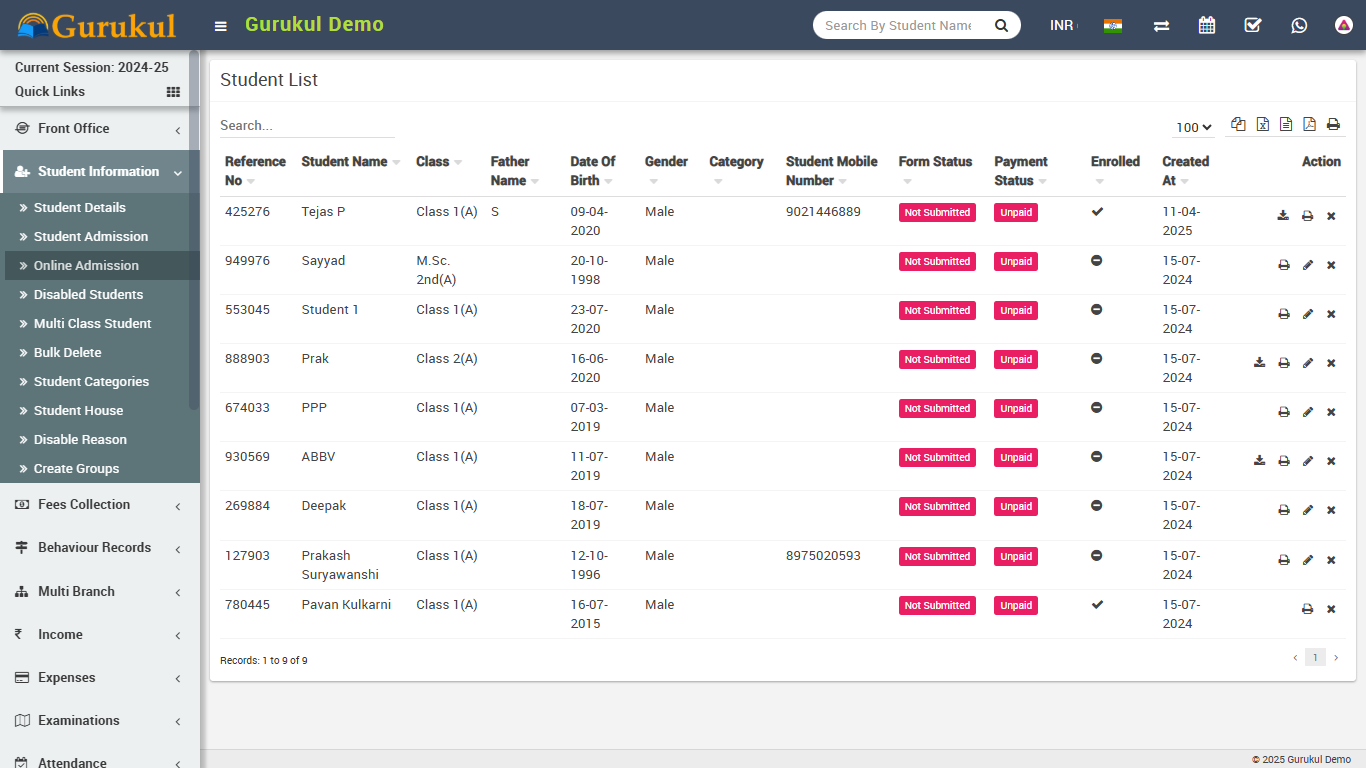
- Student Details- Go to Student Information > Student Details select
Class and Section and click on Search button to get student list under
this class-section. You can also search student by keyword in Search Input Box and
click on Search button. After search you will get student list below. There are two
views here one is List View and Details View. Every row has three buttons in
right side Show (to see student profile), Edit (to edit student profile) and
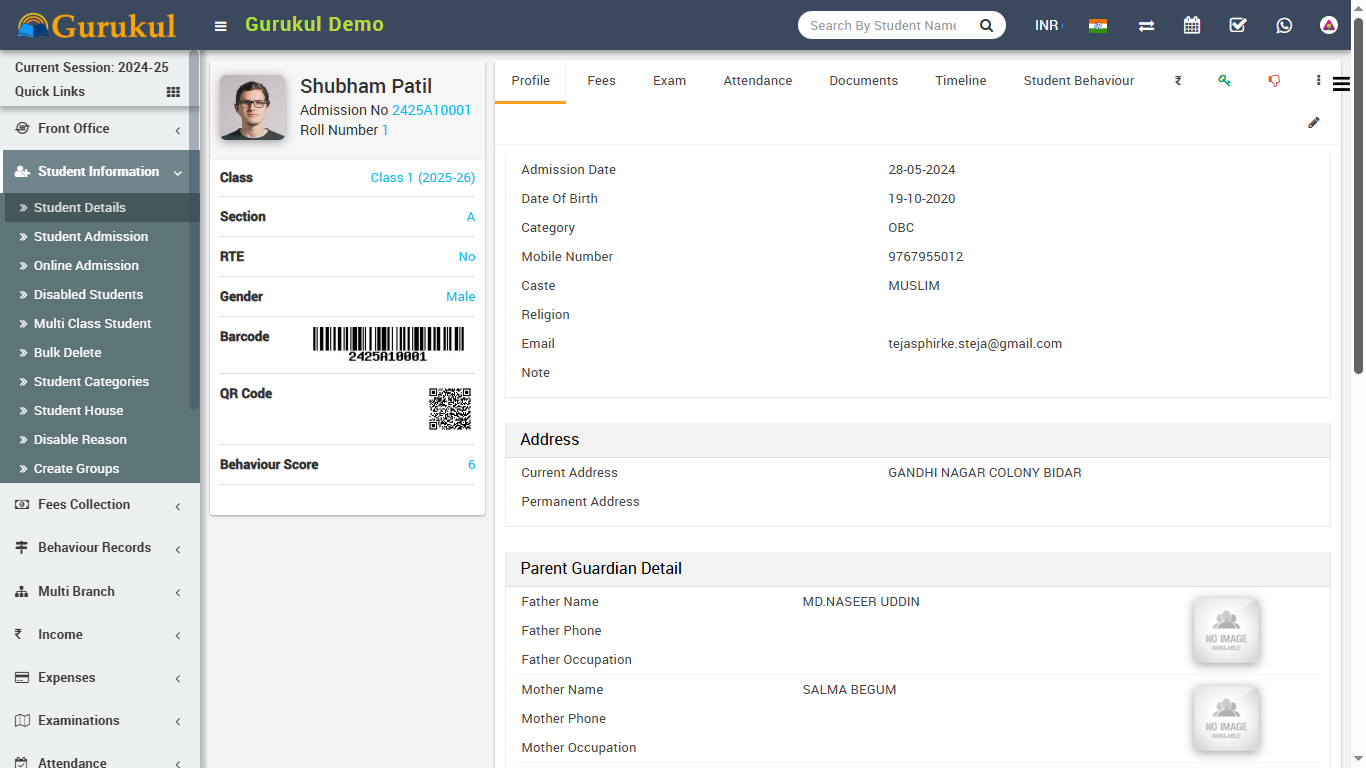
Add Fee (to add student fees). Click on Show button to open student profile.
Student profile page provides 360* View of student, consist student basic details,
address details, parent / guardian details, miscellaneous details, fees details, exam
details, documents and timeline related to student. You can check student and their guardian
login credentials by clicking on Login Details link. If any student get admitted by
mistake and we need to Disable student then you can click on red color hands down
icon button. After clicking it an window will appear and ask you to select for disable
reason for this student, just select disable reason. To send student/parent password click
on 3 dot icon button.
- Online Admission- Go to Student Information > Online
Admission Through online admission students can register themselves from front
site. To use online admission first it should be enabled from System Settings > General
Setting. Online admission form can be access directly from url
https://gurukul.qodeigence.com/online_admission . To use it in fronsite you must add this
url in any
menu from front cms.
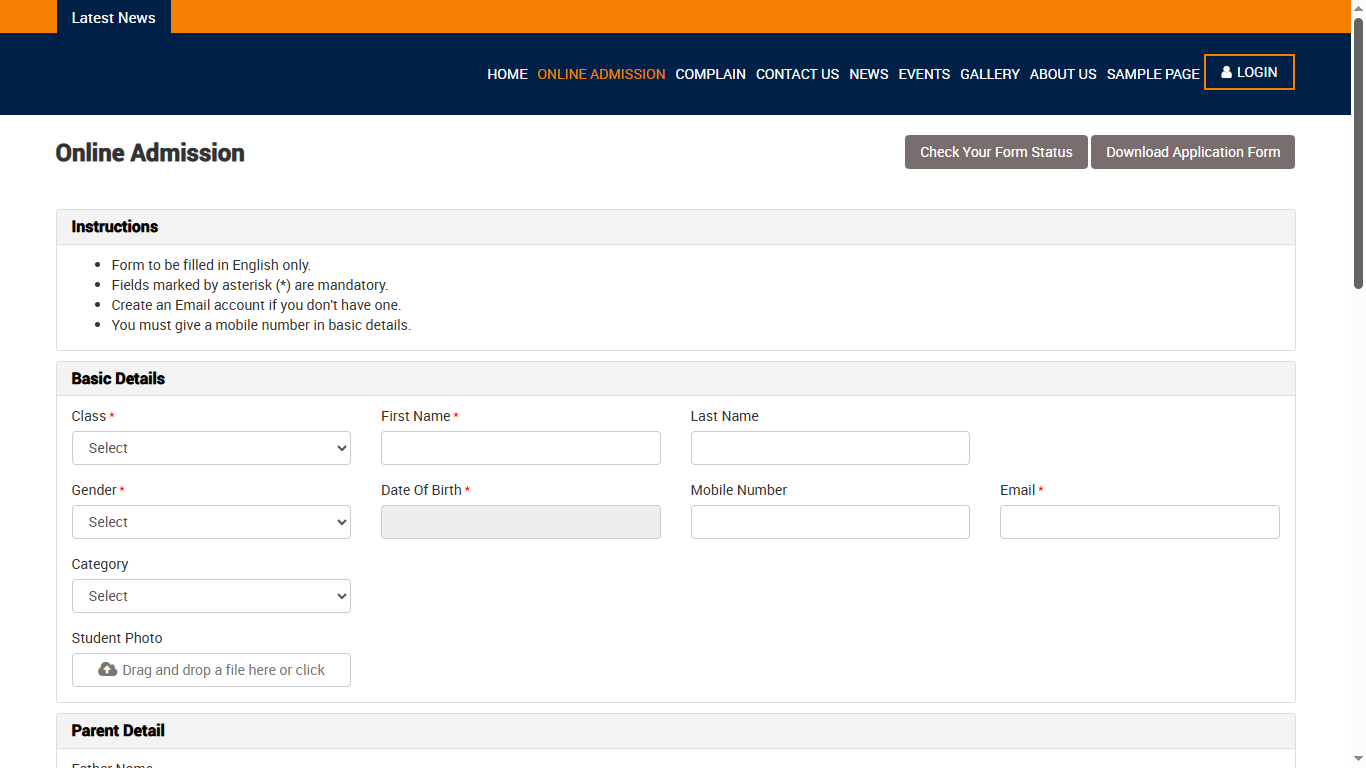
After student record submission from front site it will be display in Student Information > Online Admission page.
To admit / enrol this student just edit this student by clicking Edit button from Action column. At student edit page enter required details of student then click on Save if you just want to save student submitted record but to admit / enrol student you must click on Save And Enroll button. After this student will be admit and can be view in Student Admission > Student Details. If you want to delete online submitted details of student then just click on Delete button from Action column.
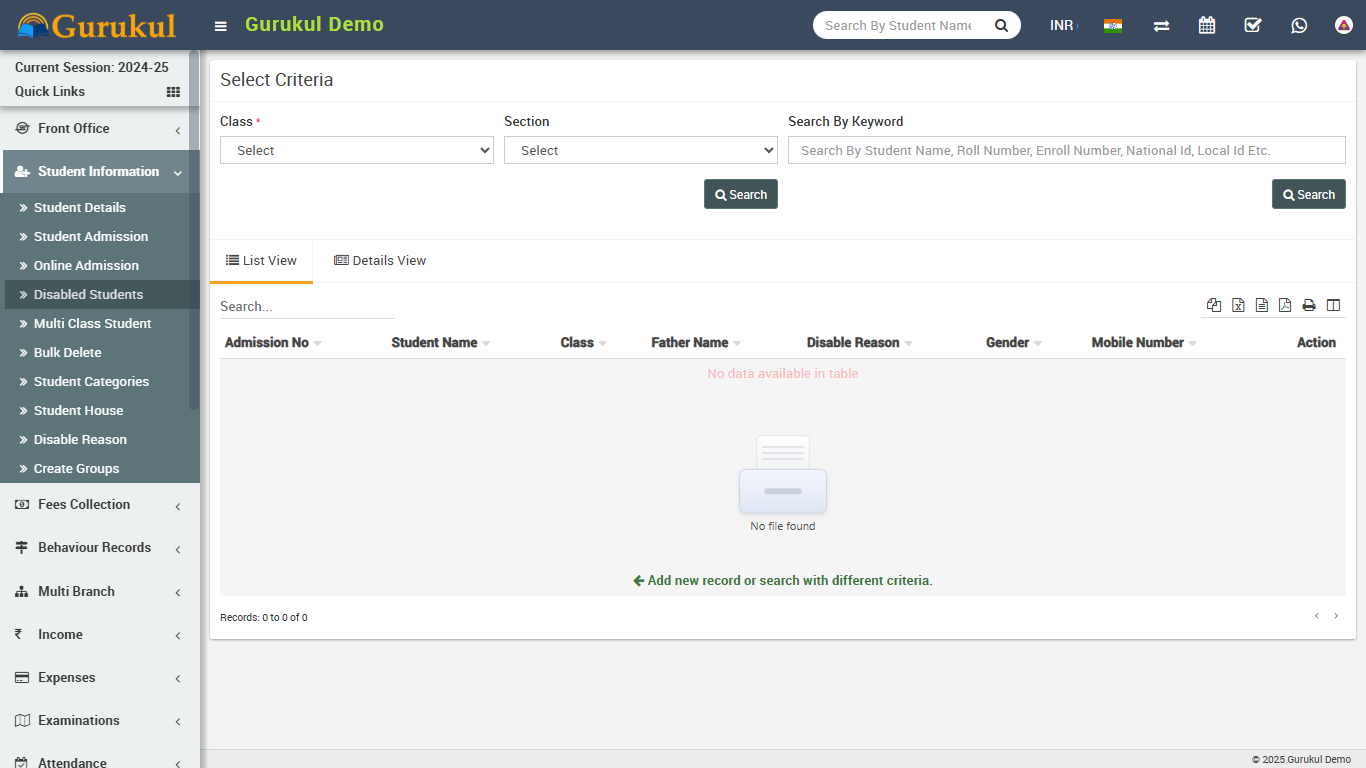
- Disabled Student- Go to Student Information > Disabled
Student here you can view all Disabled Students.
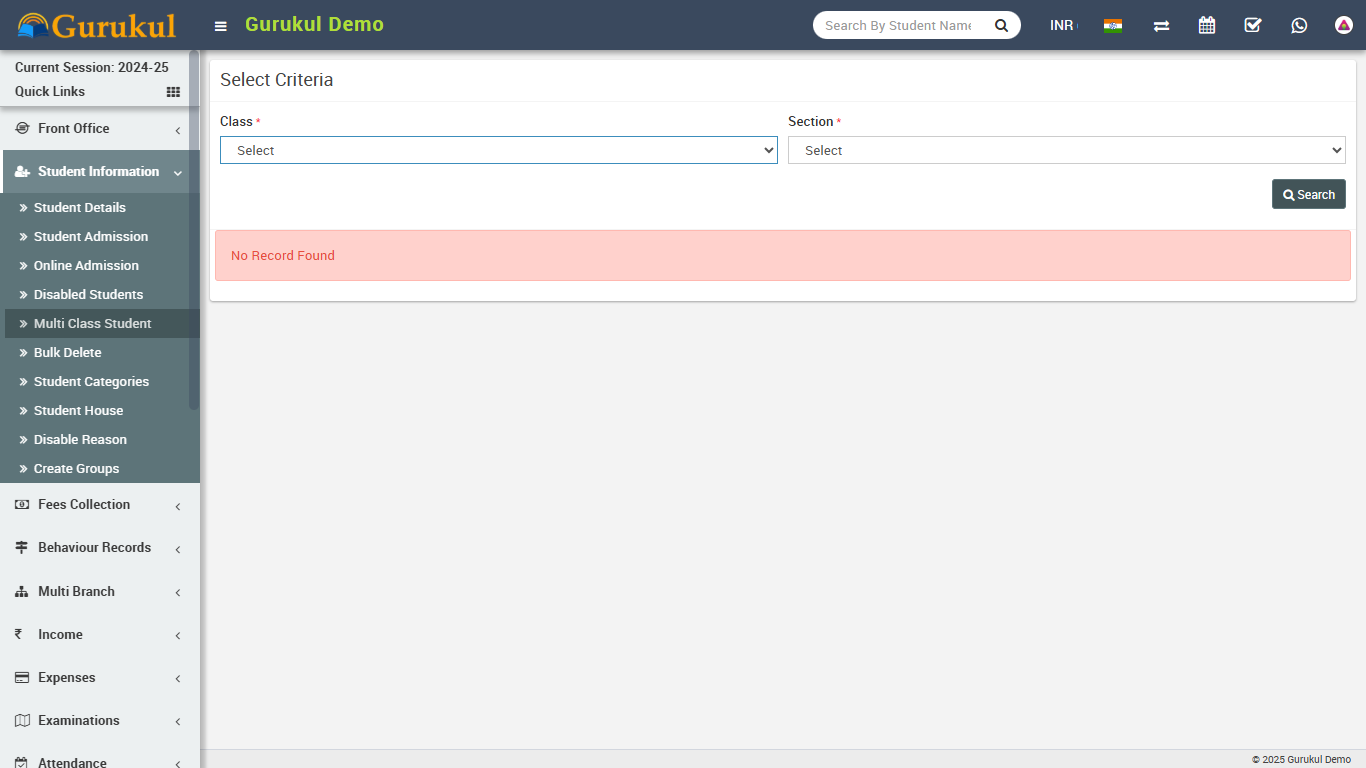
- Multi Class Student- Go to Student Information > Multi Class
Student here you can add a student in another class-section. Basically this
feature is for training or coaching centres where a student can be admit in singing class
and dancing class simultaneously. Multi class feature is not for schools or colleges. Multi
class feature is still in experimental stage and we recommend to not use multi class feature
with multi session. Multi class feature is online available for admin and student panel.
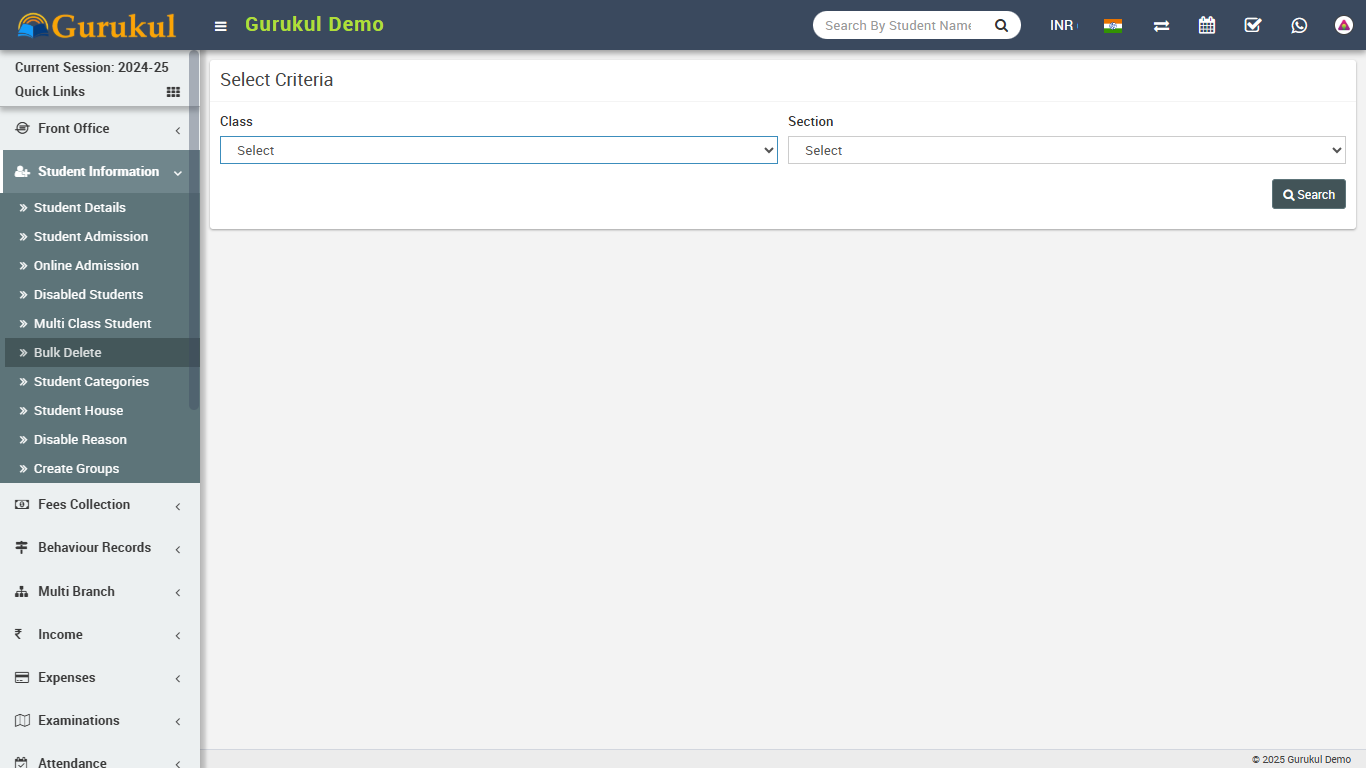
- Bulk Delete- Go to Student Information > Bulk Delete here
you can delete single or multiple students. Note that after deleting students from here will
delete from system and further student will not be rollback.
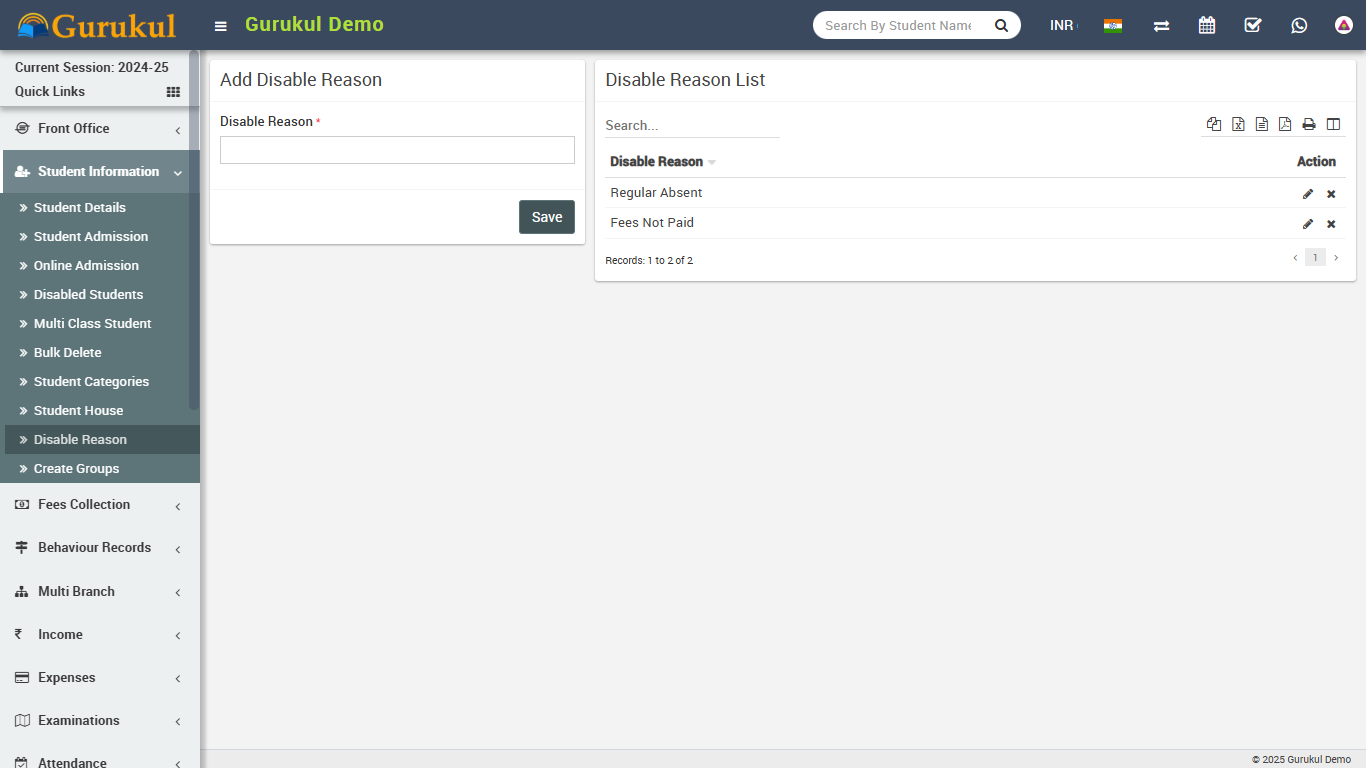
- Disable Reason- Go to Student Information > Disable Reason
here you can enter master entries for reasons for disabling students.
Fees Collection
This module has 9 sections -
- Collect Fees
- Search Fees Payment
- Search Due Fees
- Fees Master
- Fees Group
- Fees Type
- Fees Discount
- Fees Carry Forward
- Fees Reminder
First we will prepare our Fees Structure for Current Session by configuring Fees Type, Fees Group, Fees Master and Fees Reminder then we will Collect Fees of students then we will understand and review various fees reports by using Search Fees Payment, Search Due Fees.
Lets understand how we will create fees structure in Q Gurukul by using Fees Type, Fees Group & Fees Master. Fees Type means different types of fees can be collect by school e.g. Admission Fees, April Month Fees, May Month Fees, June Month Fees, Exam Fees, Dress/Uniform Fees, Library Fees, Sports Fees, Transportation Bus Fees, Picnic Fees etc. Fees Group Fees Group is use to make grouping of different Fees Type Then you can assign/allocate this Fees Group to whole class-section or a particular student. When you assign/allocate a Fees Group on a class-section or a particular student all Fees Type under this group with their Fees Master amount will be applied directly. You can assign/allocate multiple Fees Groups on a class-section or a particular student. Suppose we have created a Fees Group with the name Class 6 (2 Instalments) and added Fees Types Admission Fees ($1000), 1st Instalment ($5000), 2nd Instalment ($5000) then assign/allocate this Fees Group Class 6 (2 Instalments) on those students only who want to pay fees in 2 Instalments. You can create another Fees Group with the name Class 6 (1 Instalments) and add Fees Type Admission Fees ($1000), Full Instalment ($9500). You can also create another fees group with the name Class 6 Transport Fees and add Transport Fees as Fees Type and assign/allocate on those students who use transport facility. Note: Fees Type and Fees Group are not dependent on Academic Session but Fees Master is created session wise so you need to enter Fees Master data for every session.
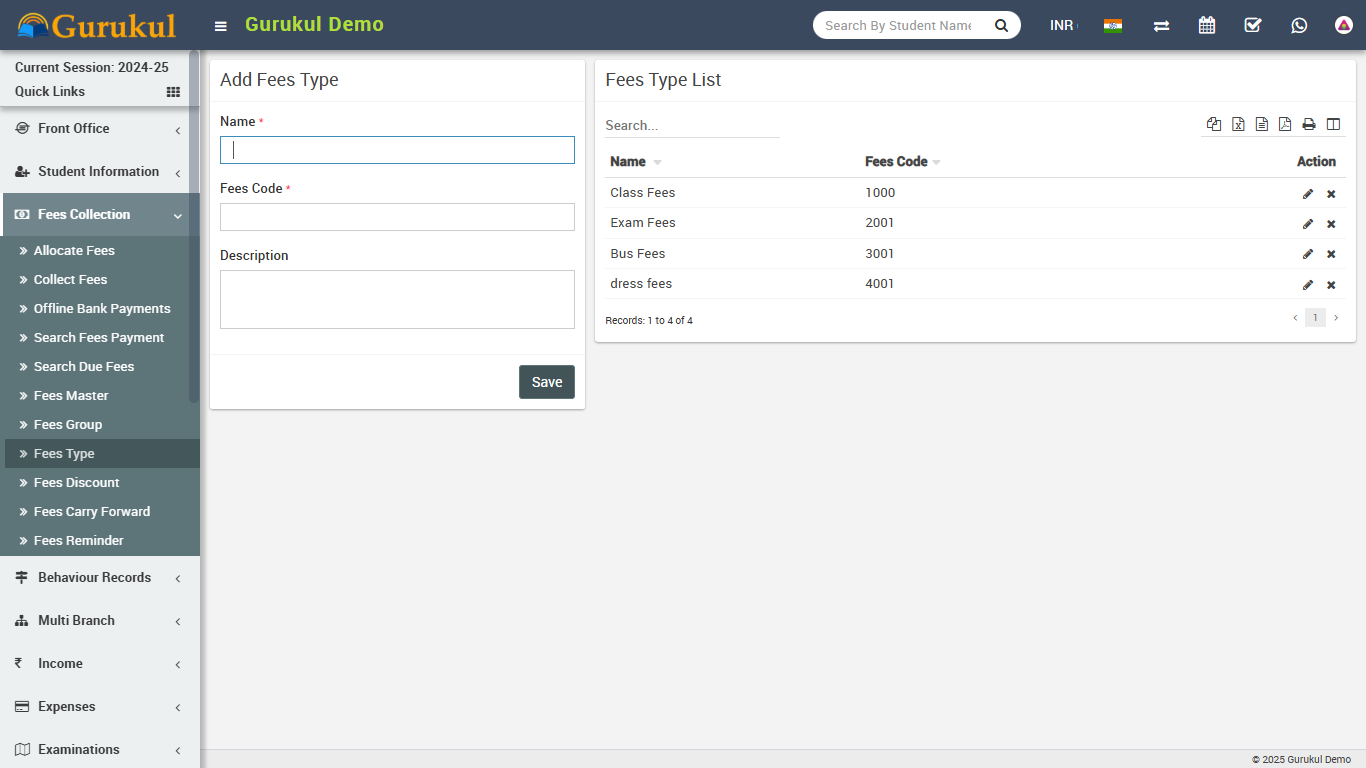
- Fees Type- Go to Fees Collection > Fees Type add all your
Fees Type here with Fees Code. All Fees Type can be see at right side of
this page.
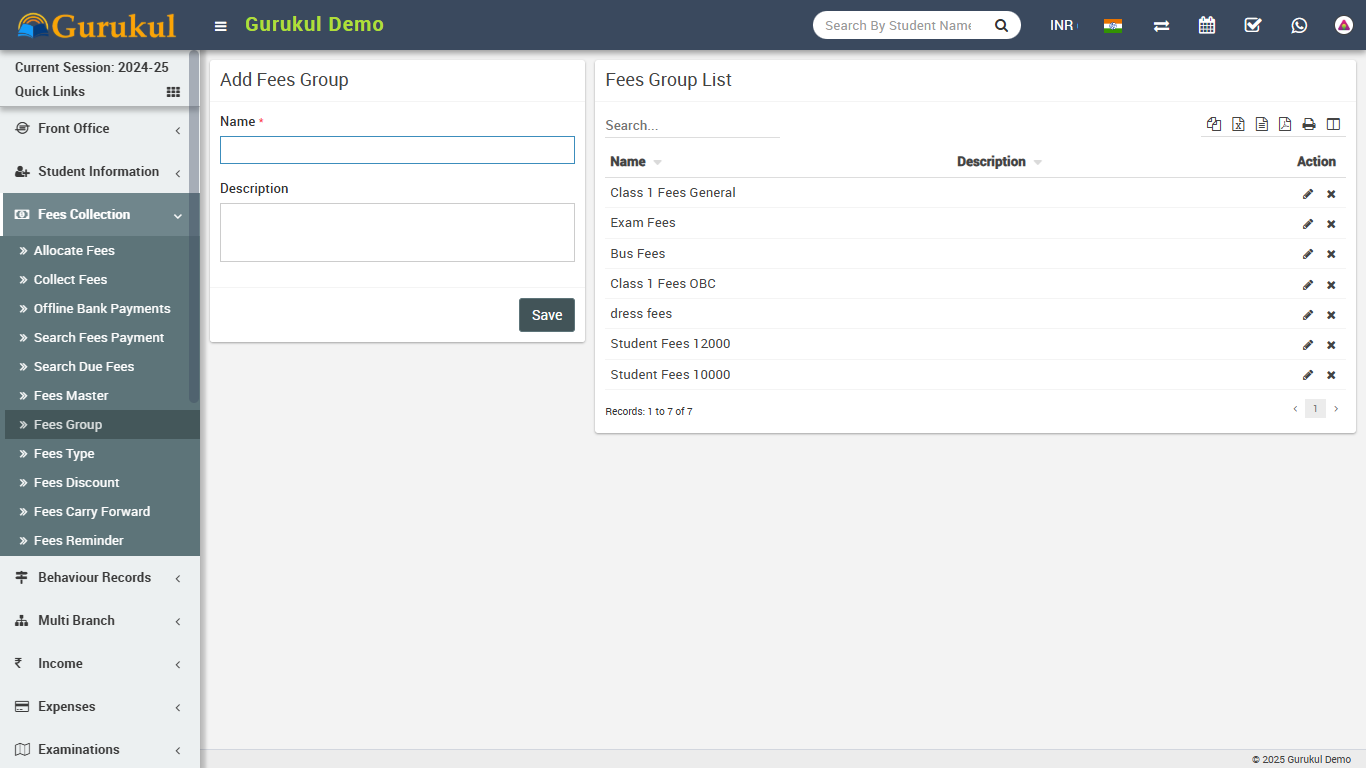
- Fees Group- Go to Fees Collection > Fees Group add all
your Fees Group here. All Fees Group can be see at right side of this page.
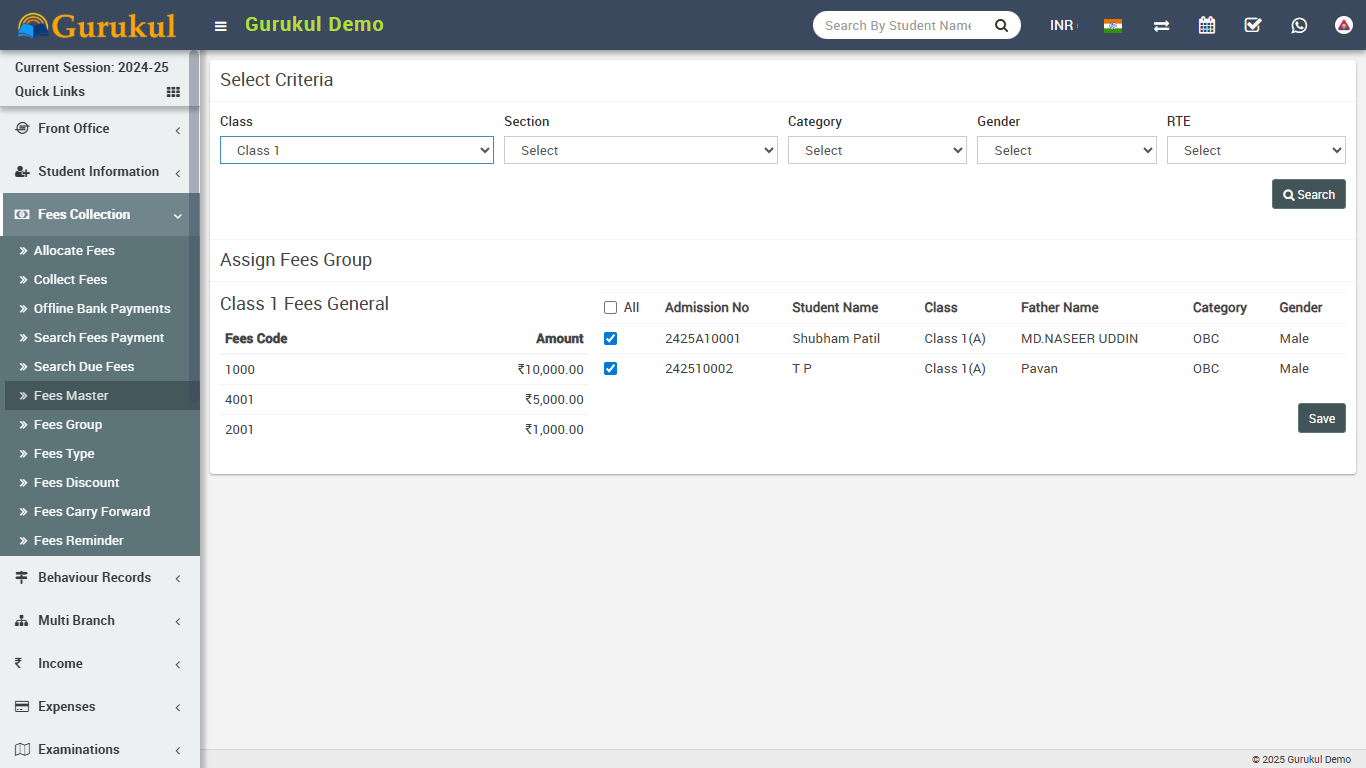
- Fees Master- Go to Fees Collection > Fees Master add all
your fees amount for current selected session here. Select
Fees Group then Fees Type then Due Date
then enter Amount means fees amount for selected session then select Fine
Type like percentage or fix amount now click Save button. All Fees Master
with Fees Group and Fees Code with amount can be see at right side of this page for current
selected session.
To assign/allocate Fees Group click on Assign/View button from Action column. Now at next page select Class then Section and click on Search button. Now select the students on which you want to assign/allocate this Fees Group then click on Save button.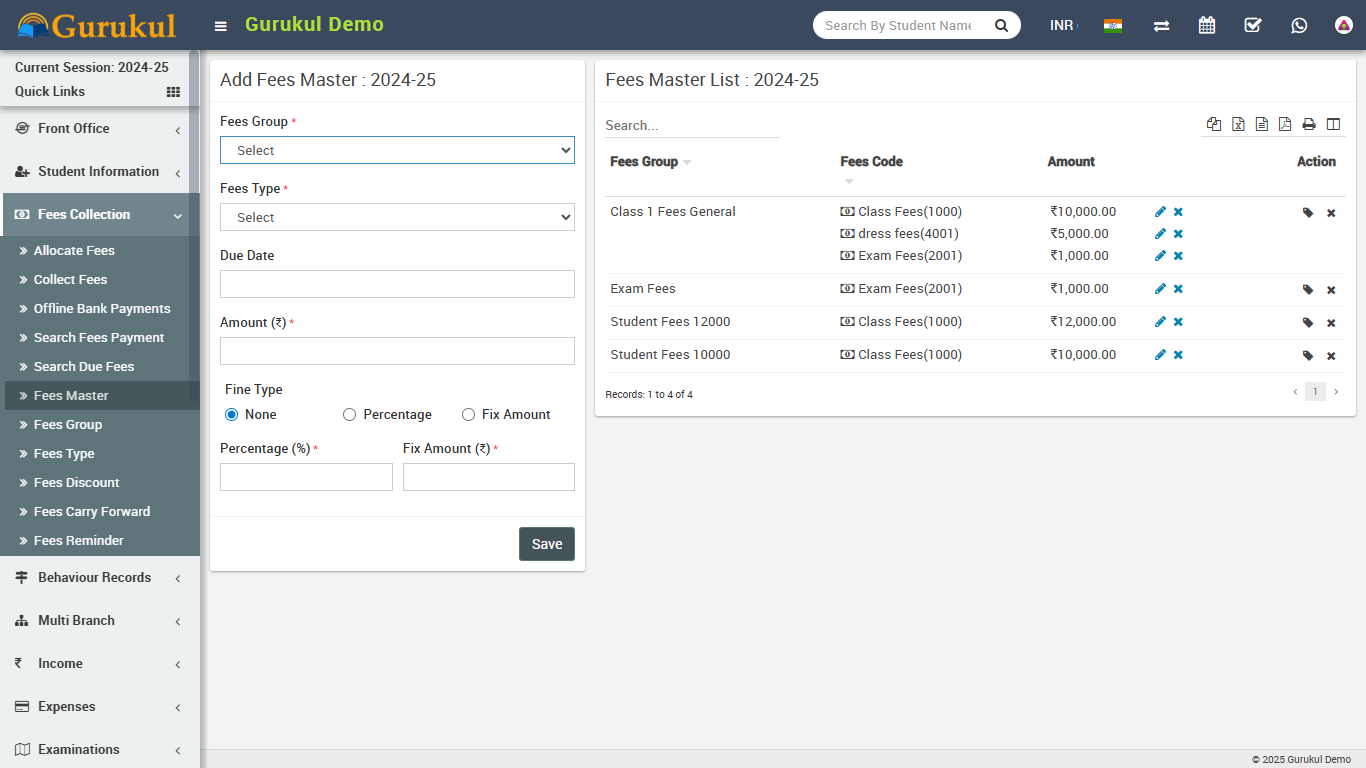
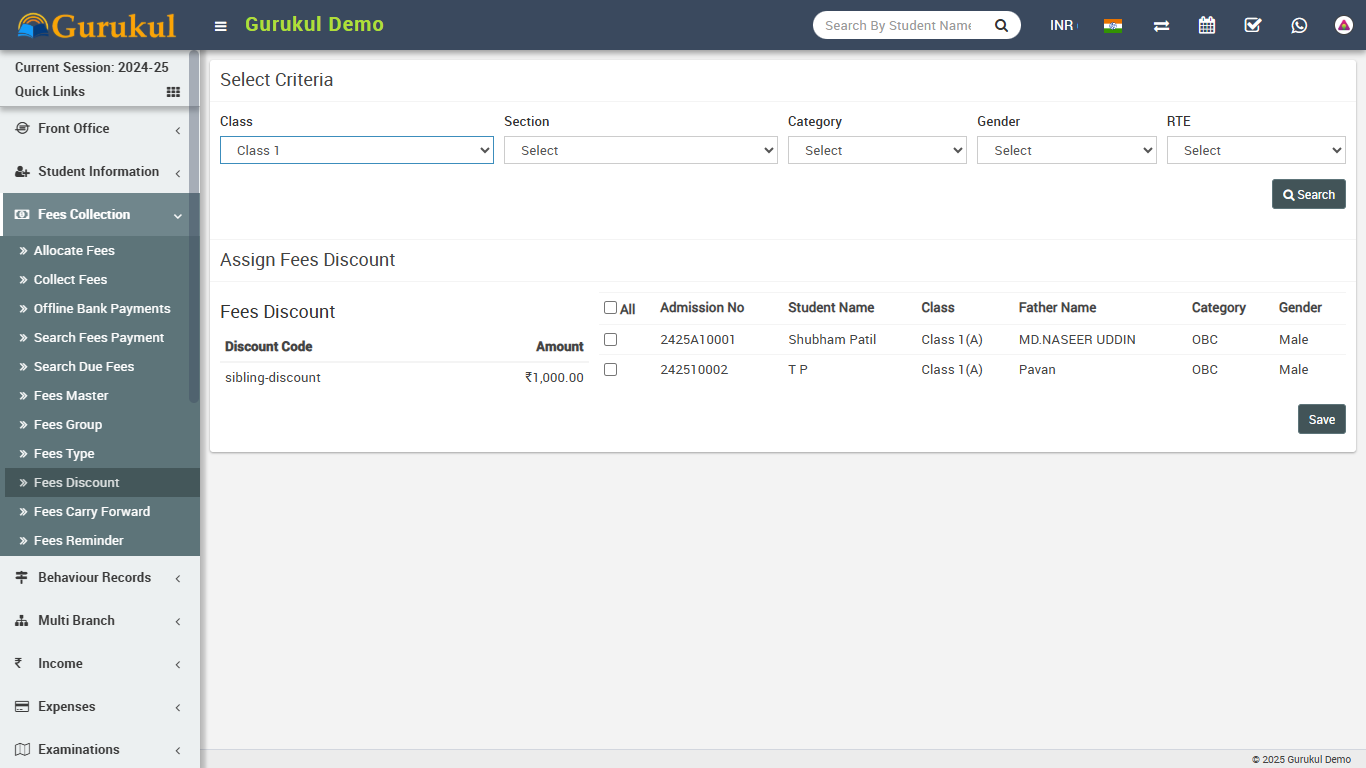
- Fees Discount- Go to Fees Collection > Fees Discount add
all your Fees Discount here with Discount Name, Discount Code, Amount and Description. All
Fees Discount can be see at right side of this page. To assign/allocate
discount click on Assign/View button from Action column.
On Next page select Class and Section then click on Search button. After Search select students on which this discount have to be applied then click on Save button.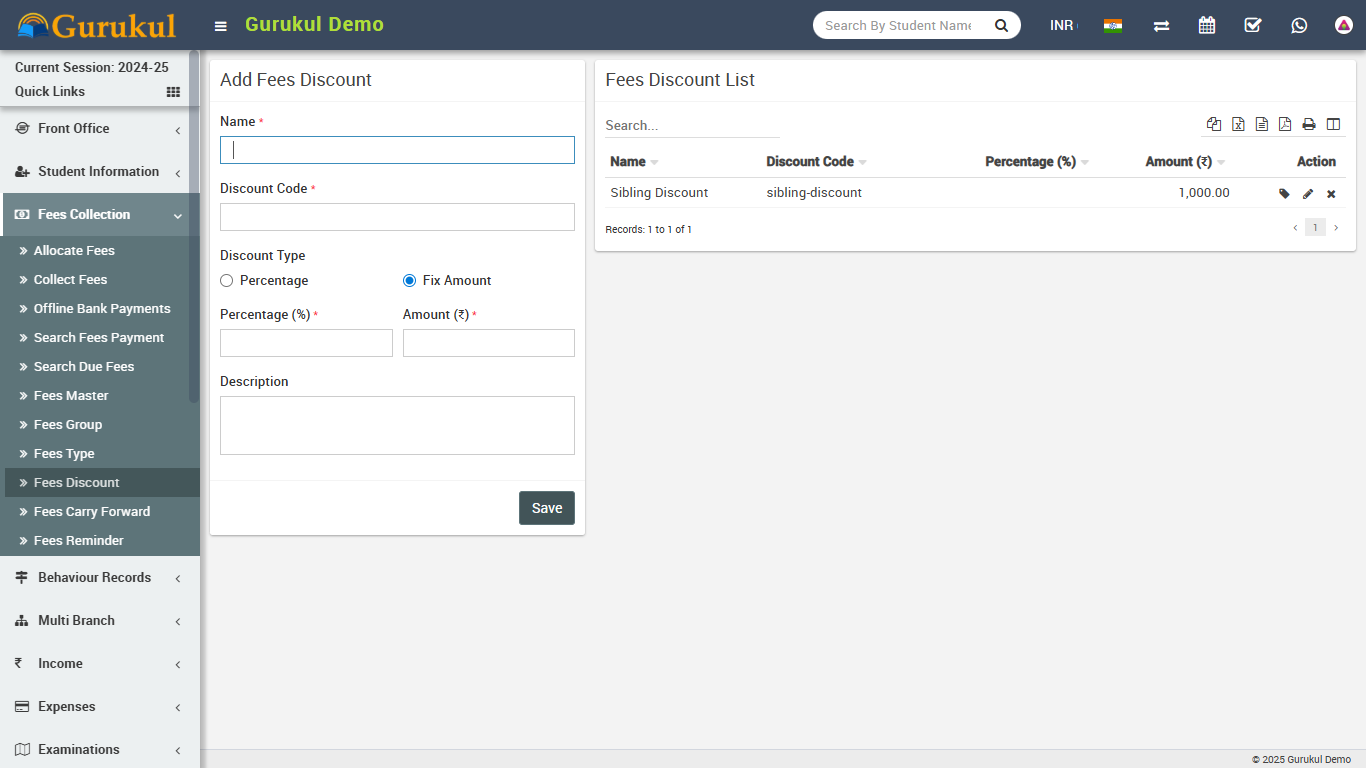
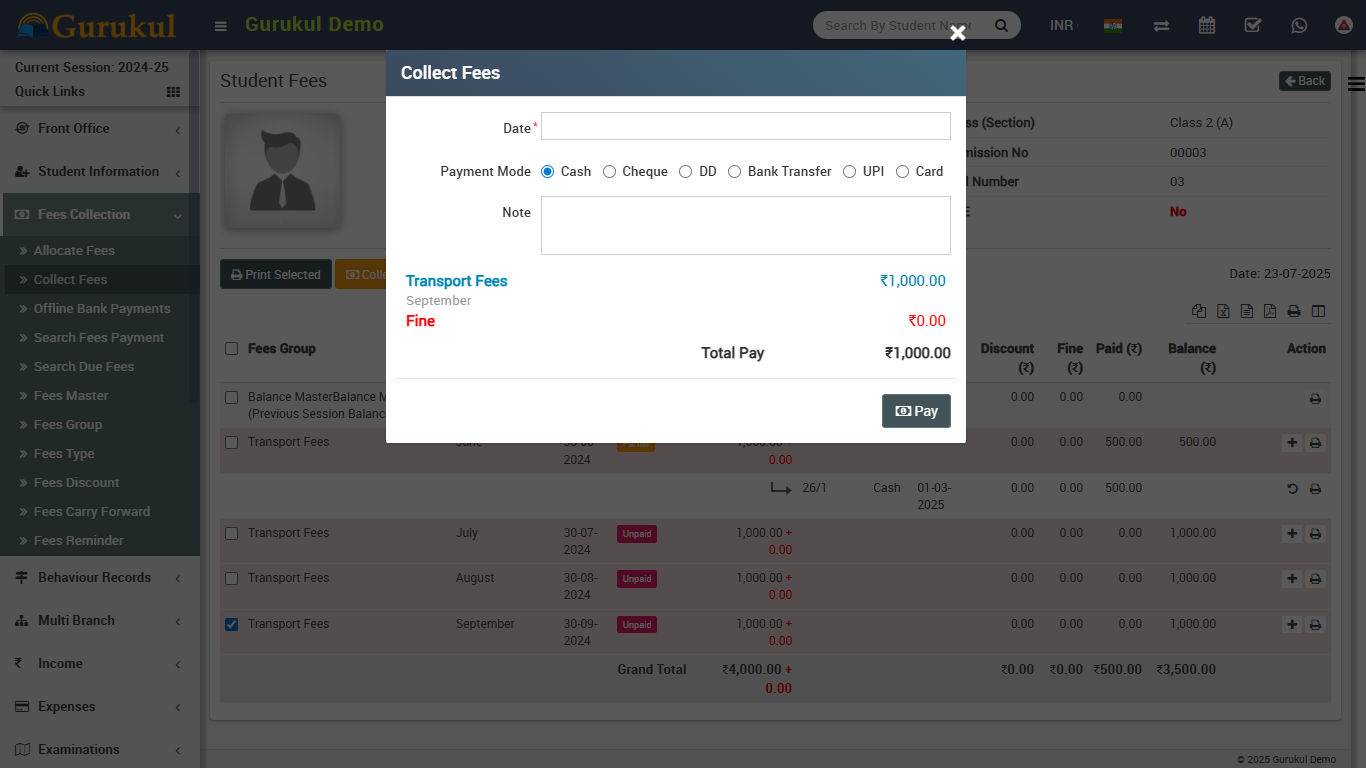
- Collect Fees- Go to Fees Collection > Collect Fees select
Class & Section & click in Search button
to get student list under this class-section. You can also search student by keyword in
Search Input Box and click on
Search button. After search you will get student list below. Click on
Collect Fees button to go to
collect fees page. Here you can see student details including student picture then next you
can see all assign/allocate fees details.
Collecting fees is very simple just click the
+ button from Action column a modal window will appear, here select
Date then Amount will be auto fetch by balance for this
Fees Invoice. You can enter any amount for Partial Fees payment, then
select Discount Group or enter
Discount (if any) then enter Fine (if any) then
Payment Mode then Note then click on Collect
Fees button. Now
fees has been collected & Revert button visible for reverting this fees.
For printing
Fees Receipt click on Print button from Action column.
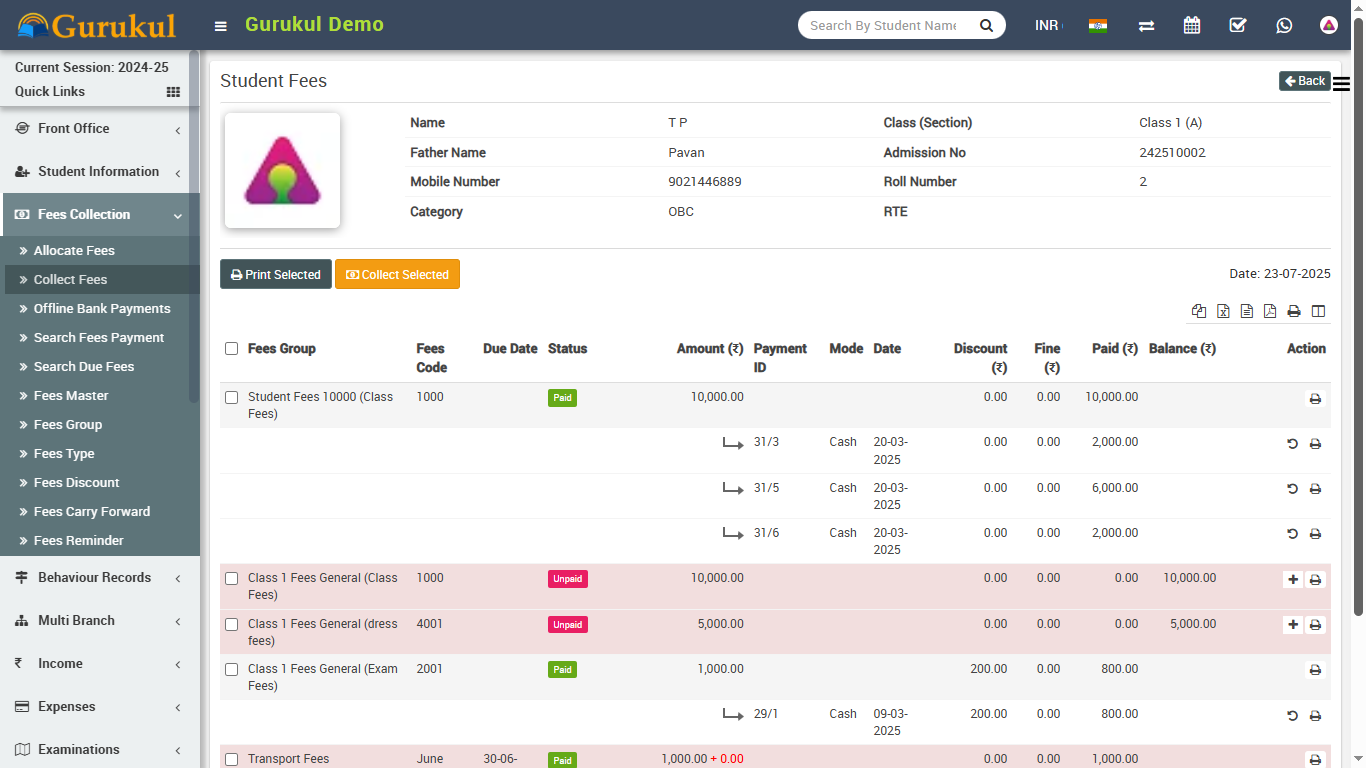
To collect multiple fees at once select multiple fees from left check boxes then click on Collect Selected button.
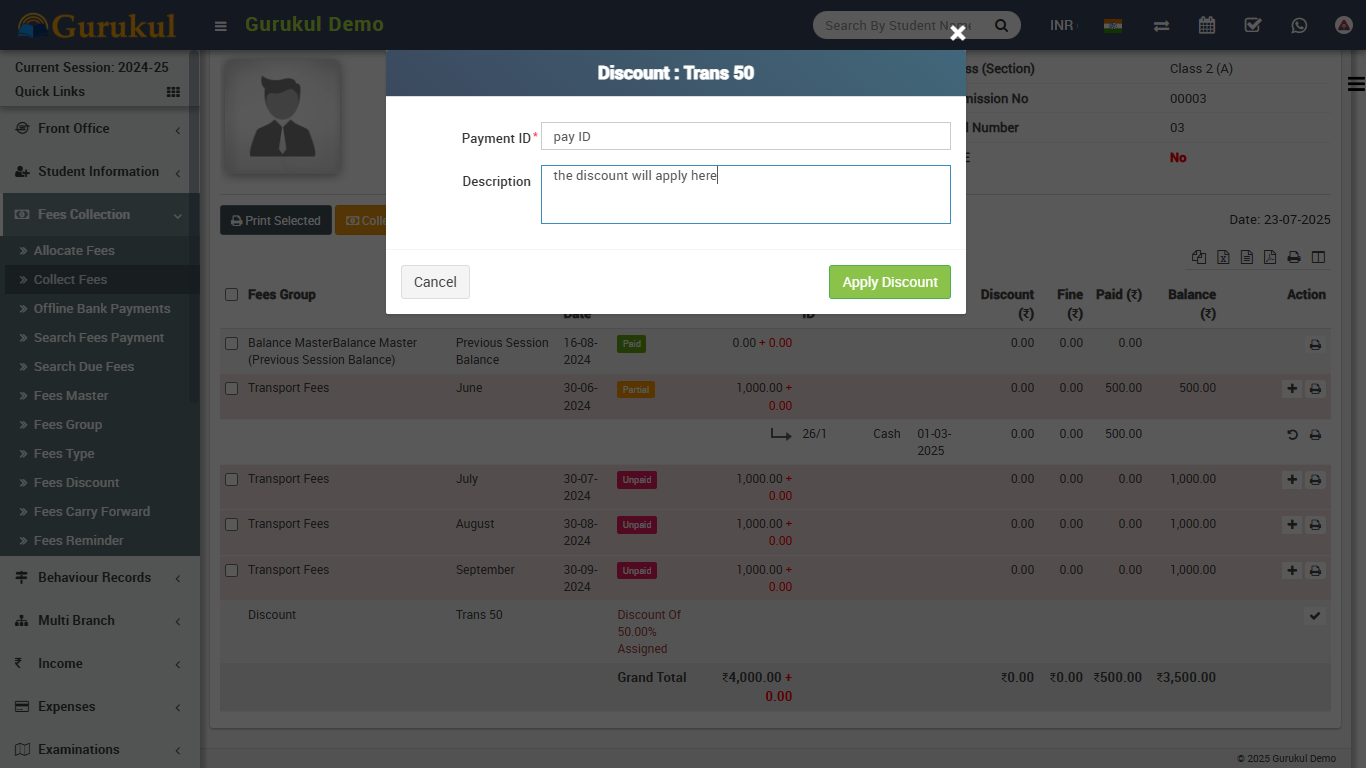
Fees Discount Adjustment: If you have applied discount by selection of Discount Group then there is no need for any adjustment. When you assign/allocate Fees Discount on any student then it will be only assigned. To make it apply you need to adjust this discount on any Fees Invoice payment by giving discount. To apply discount you need to first give discount on any fees invoice then click on Apply Discount button from Action column, a modal window will be open. Here enter Payment Id on which this discount has been given and enter description (if any). Now click on Apply Discount button to apply discount.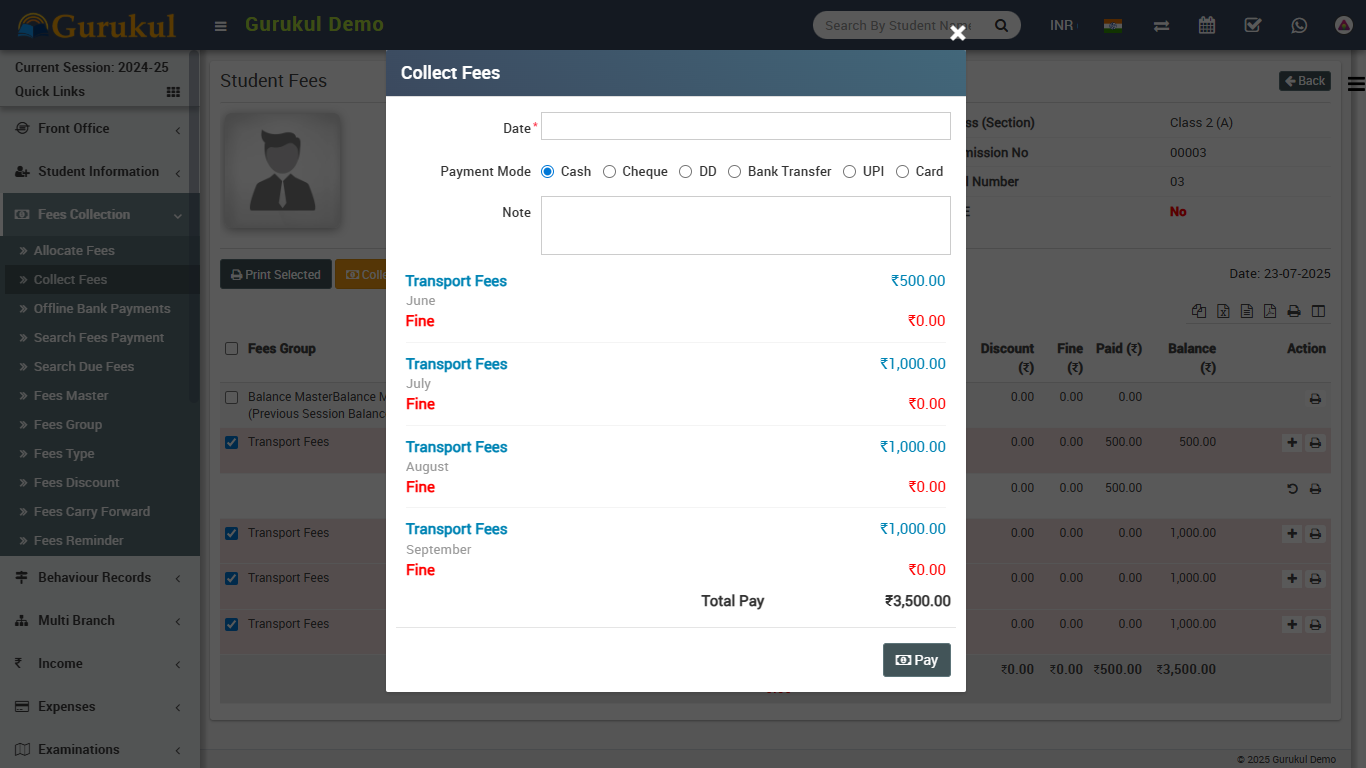
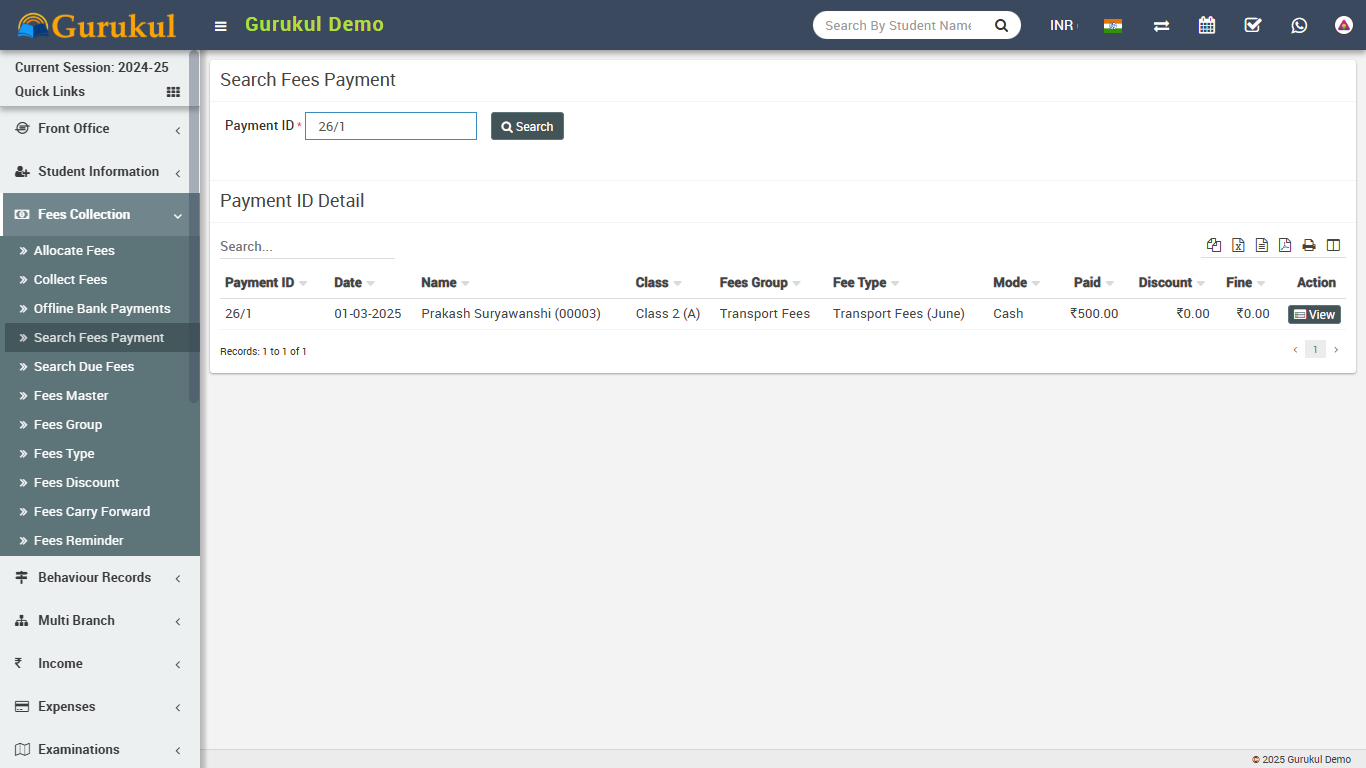
- Search Fees Payment- Go to Fees Collection > Search Fees
Payment for searching any fees payment details through
Payment ID enter Payment Id & click search button you will
get the details for this payment id.
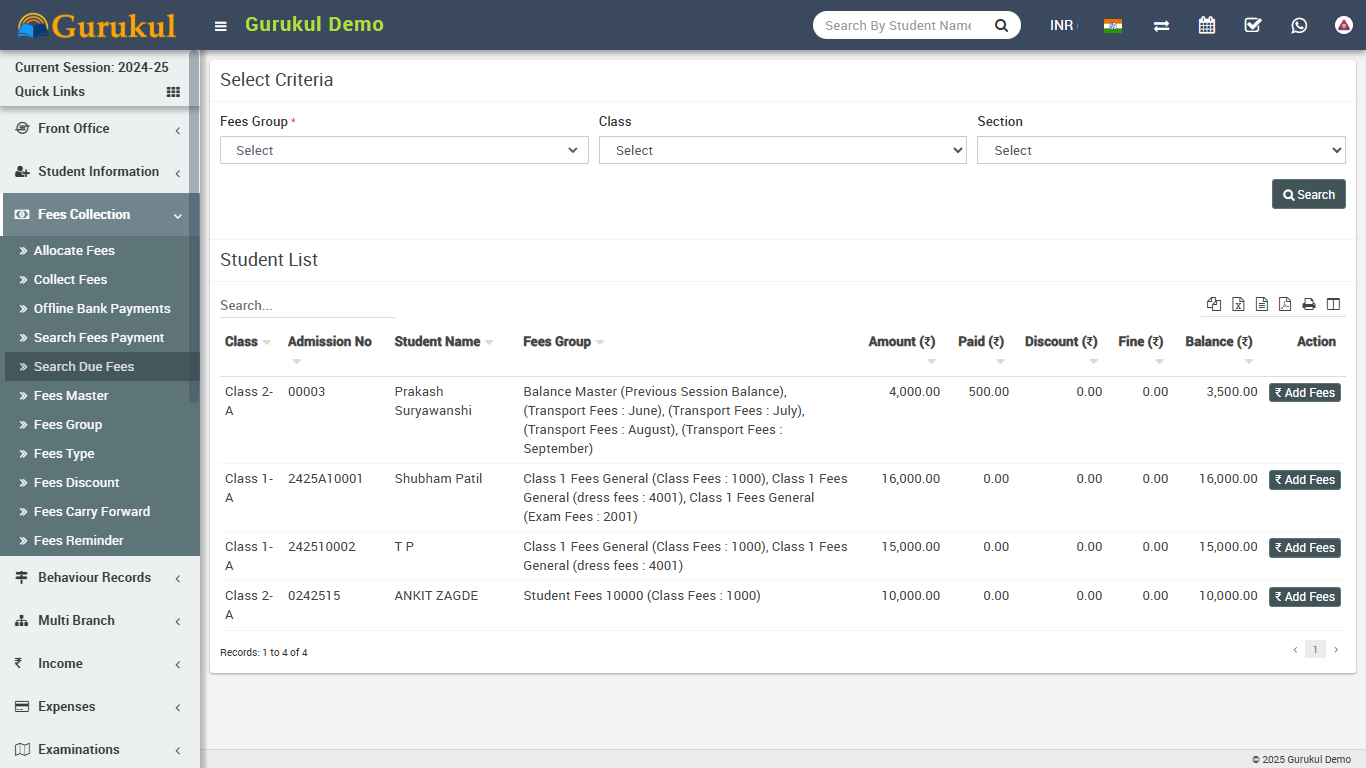
- Search Due Fees- Go to Fees Collection > Search Due Fees
for searching those students who have not done payment for a particular fees type then
select
Fees Category then Fees Type then Class
then
Section & click Search button, you will get all the
students list for due fees.
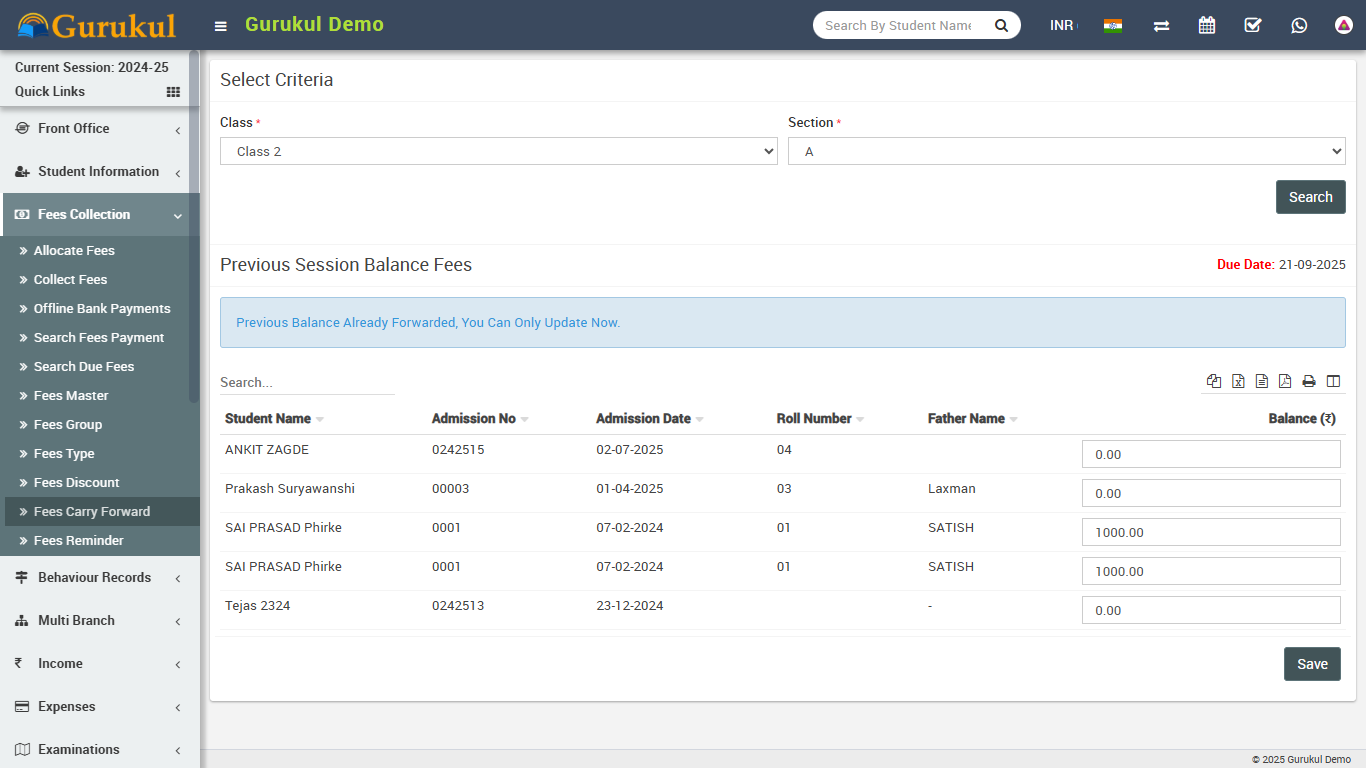
- Fees Carry Forward- Go to Fees Collection > Fees Carry
Forward if any student has balance fees in previous session then you can
forward this balance fees to current session. Select
Class, Section then click Search button.
Students with balance fees will be display below. If you want you can edit balance fees
amount to be forward. In Top right corner you can see Due Date for all
these fees forward. This Due Date will be number of days ahead which is set
in System Settings > General Setting > Fees Due Days. This balance fees
carry forward can be see in collect fees page as Balance Master (Fees Group) and Previous
Session Balance (Fees Code).
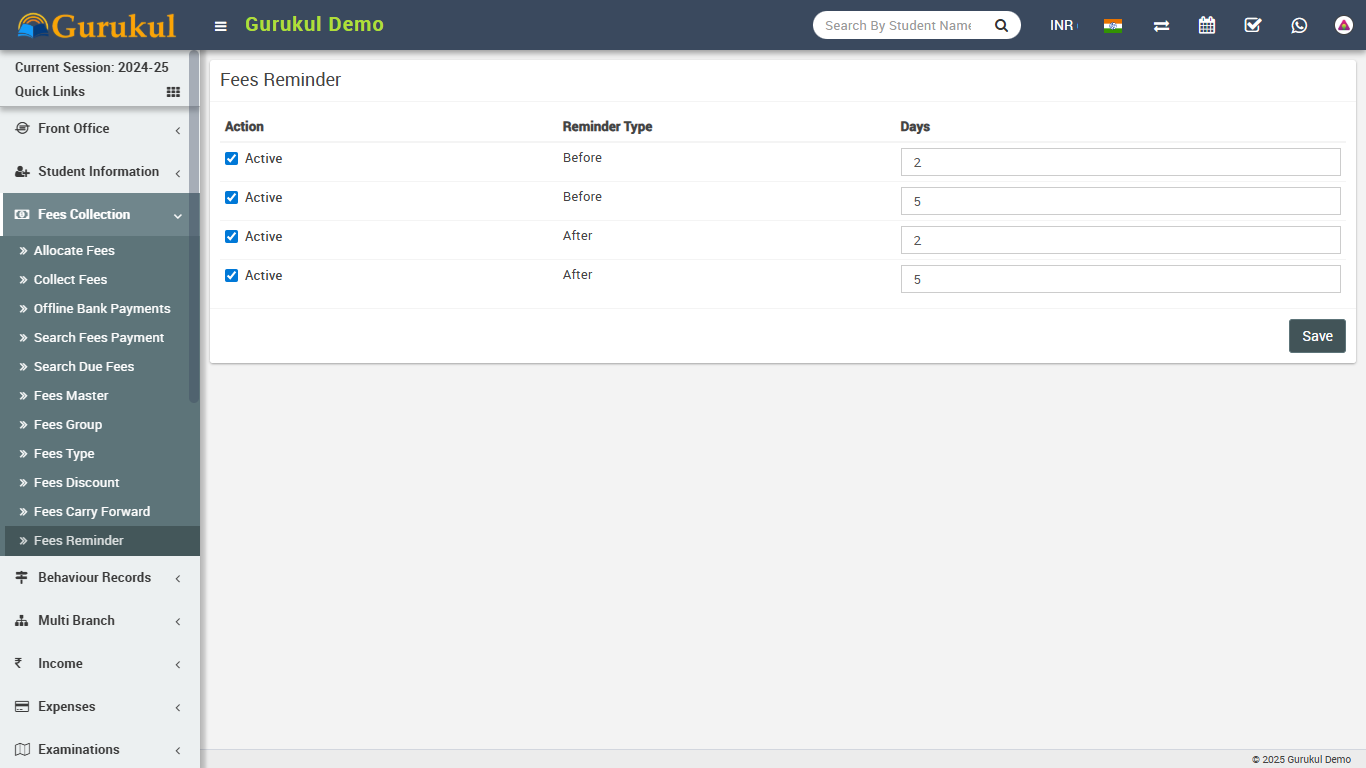
- Fees Reminder- Go to Fees Collection > Fees Reminder Fees
reminder is for sending fees reminder notifications to guardians. Here two before and two
after reminder has been given, reminder acts respect to your fees due days. To use use it
just active reminder and set your days. Suppose a before reminder is set for 5 days then a
fees reminder notification will be send 5 days before fees due date. To use this feature you
should add http://yoursite.com/cron url in your hosting cron job.
Income
This module has 3 sections -
- Add Income
- Search Income
- Income Head
First we will create our Income Head then we will Add our daily/monthly Incomes then we will Search our Income.
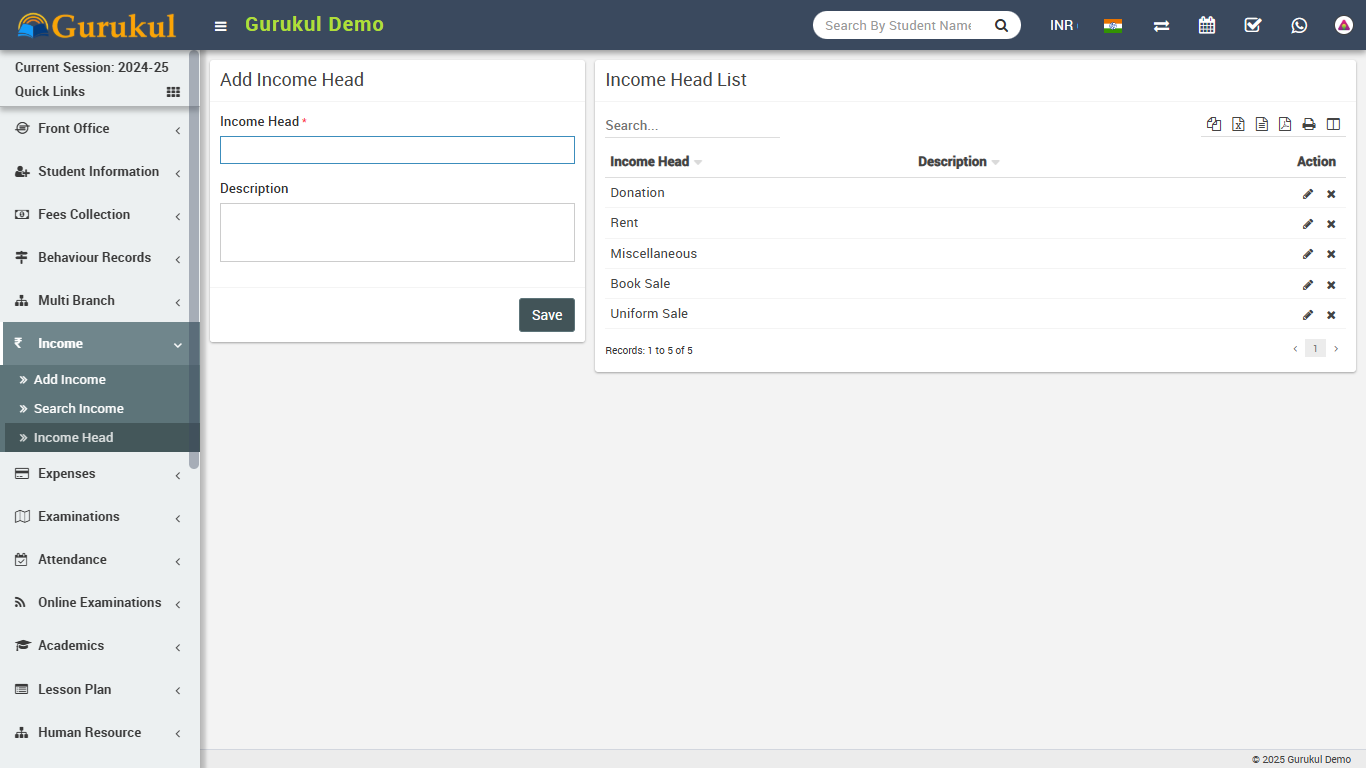
- Income Head- Go to Income > Income Head enter
Income Head and its Description then click on
Save button. All Income head can be see right side of this page.
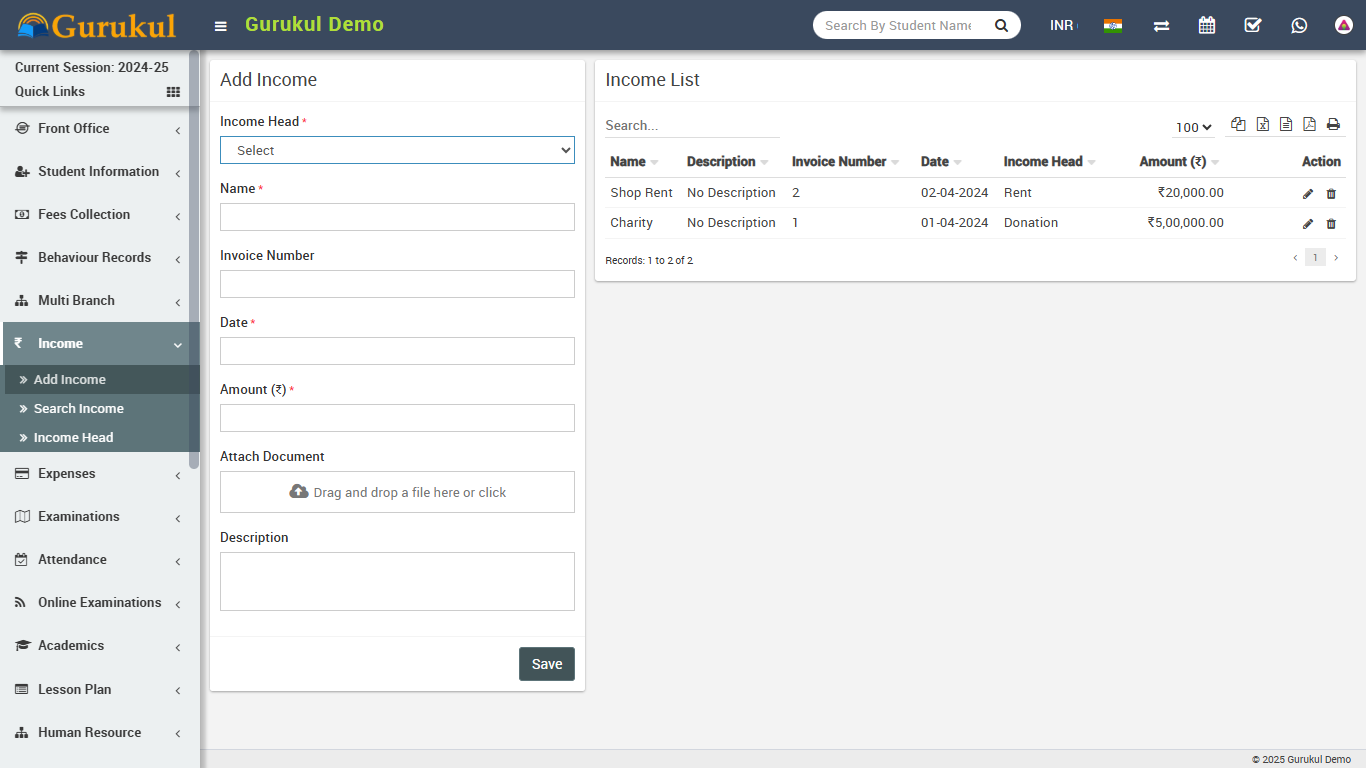
- Add Income- Go to Income > Add Income select
Income Head then enter Income Name then
Invoice Number, Date of Income then Amount then
Attach Document then Description & click on
Save button. Recently added 10 Incomes can be see right side of this page.
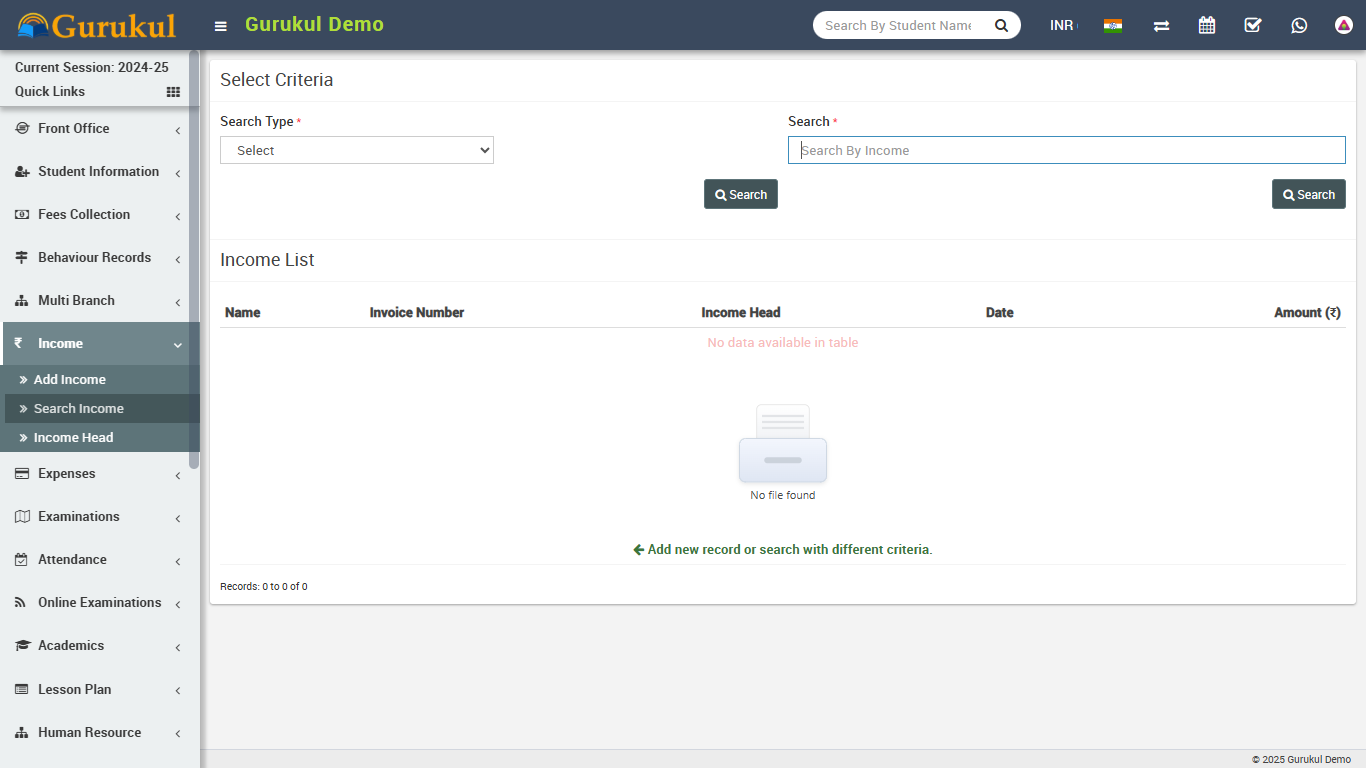
- Search Income- Go to Income > Search Income to search
Incomes between two dates or by a keyword select
Date From & Date To or enter keyword then click on
Search button, you will get the list of all Incomes related to your search
criteria.
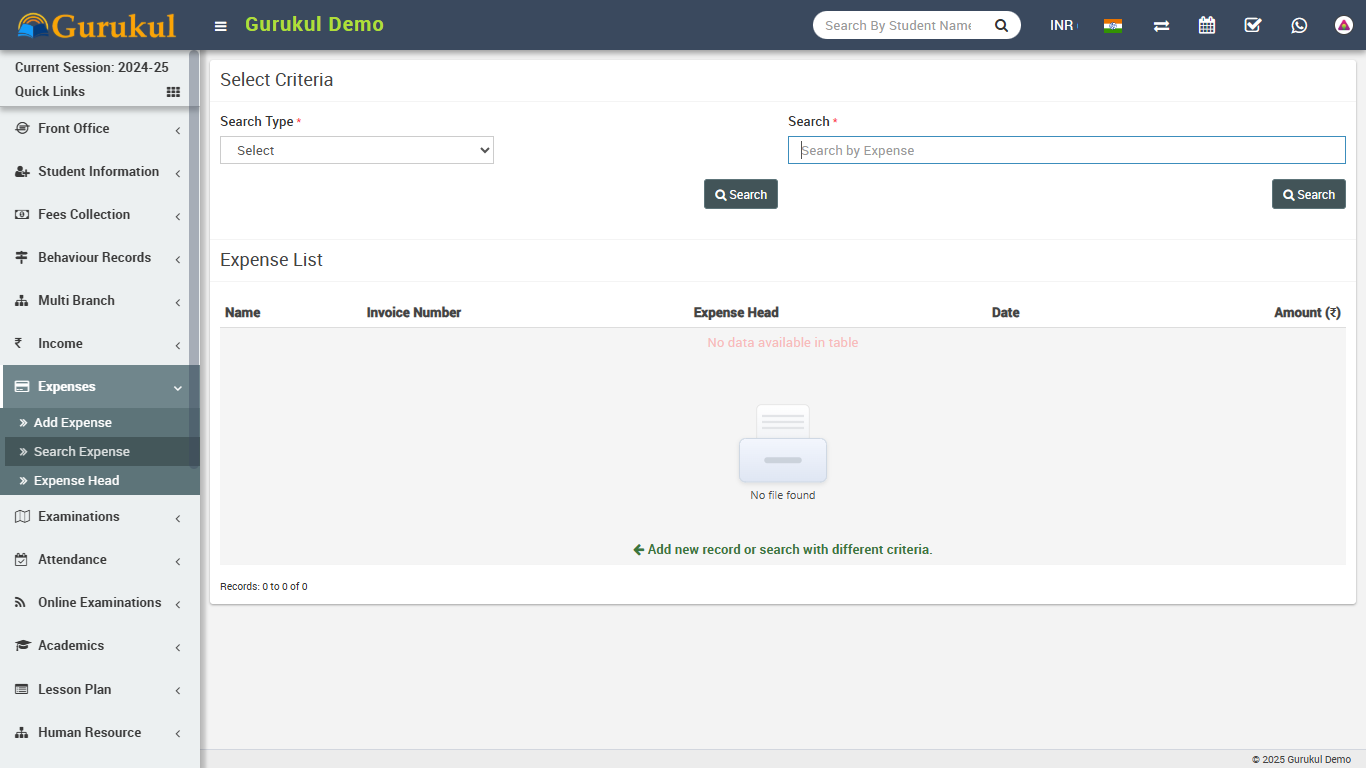
Expenses
This module has 3 sections -
- Add Expense
- Search Expense
- Expense Head
First we will create our Expense Head then we will Add our daily/monthly Expenses then we will Search our Expense.
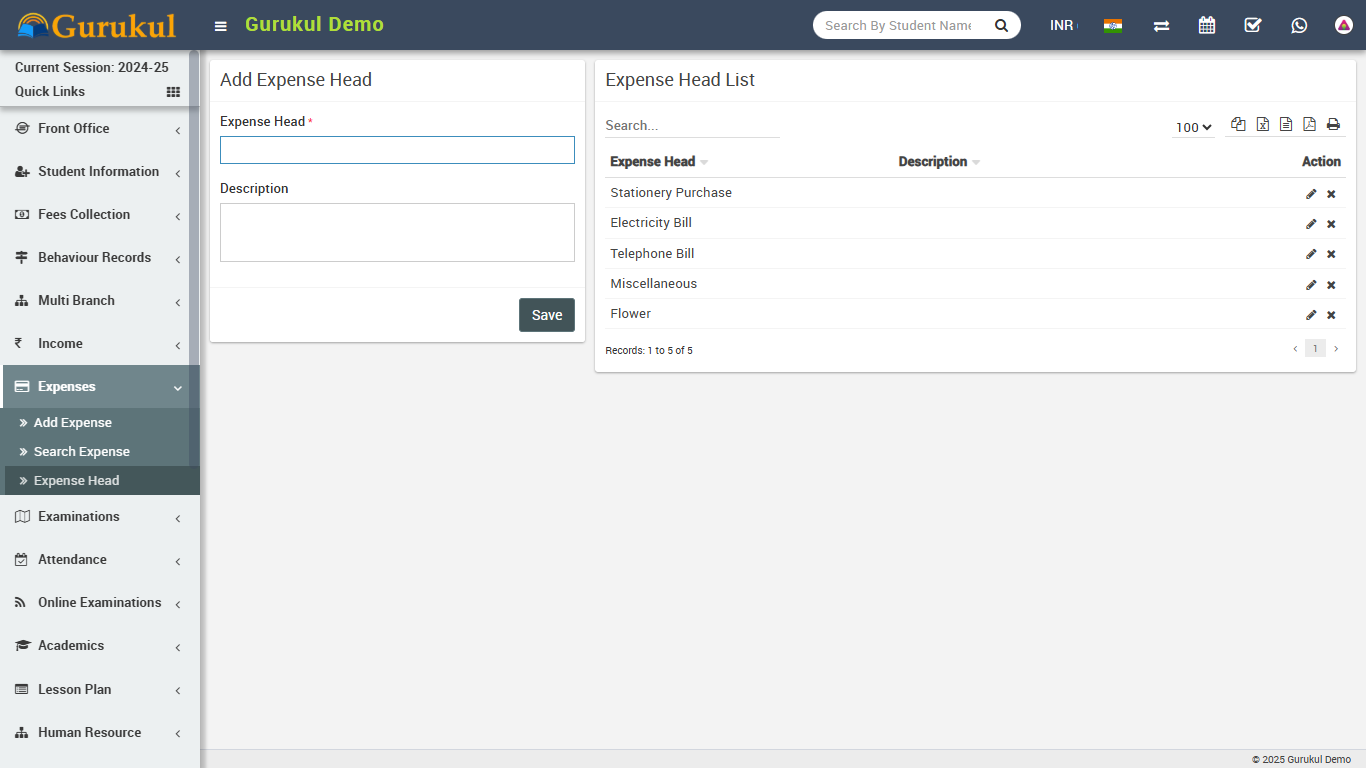
- Expense Head- Go to Expenses > Expense Head enter
Expense Head and its Description then click on
Save button. All expense head can be see right side of this page.
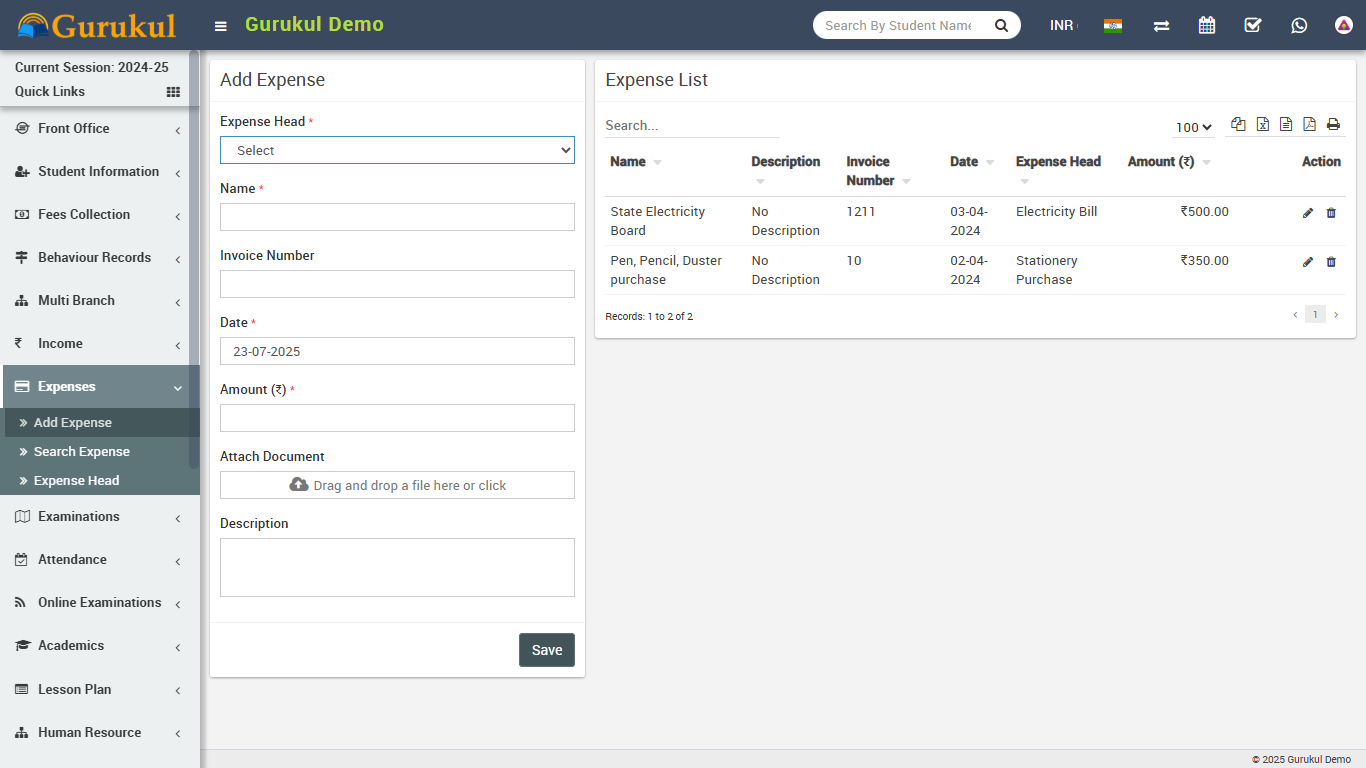
- Add Expense- Go to Expenses > Add Expense select
Expense Head then enter expense Name then
Invoice Number, Date of expense then Amount then
Attach Document then Description & click on
Save button. Recently added 10 expenses can be see right side of this page.
- Search Expense- Go to Expenses > Search Expense to search
expenses between two dates or by a keyword select
Date From & Date To or enter keyword then click on
Search button, you will get the list of all expenses related to your search
criteria.
Attendance
This module has 3 sections -
- Student Attendance
- Attendance By Date
- Approve Leave
Q Gurukul supports two types of attendance Day Wise and Period Wise. You can run any type at once at a time and attendance type can be select from System Settings > General Settings. Now Q Gurukul also supports biometric attendance devices (currently only for day wise attendance) for automated attendance submission. You can enable biometric device feature from System Settings > General Settings. To utilise biometric device feature you should have Q Gurukul Biometric Desktop Plugin Software. Its desktop based application which fetch attendance data from biometric device and sends to Q Gurukul web application.
First we will enter Student Attendance then we will search student attendance for a particular date.
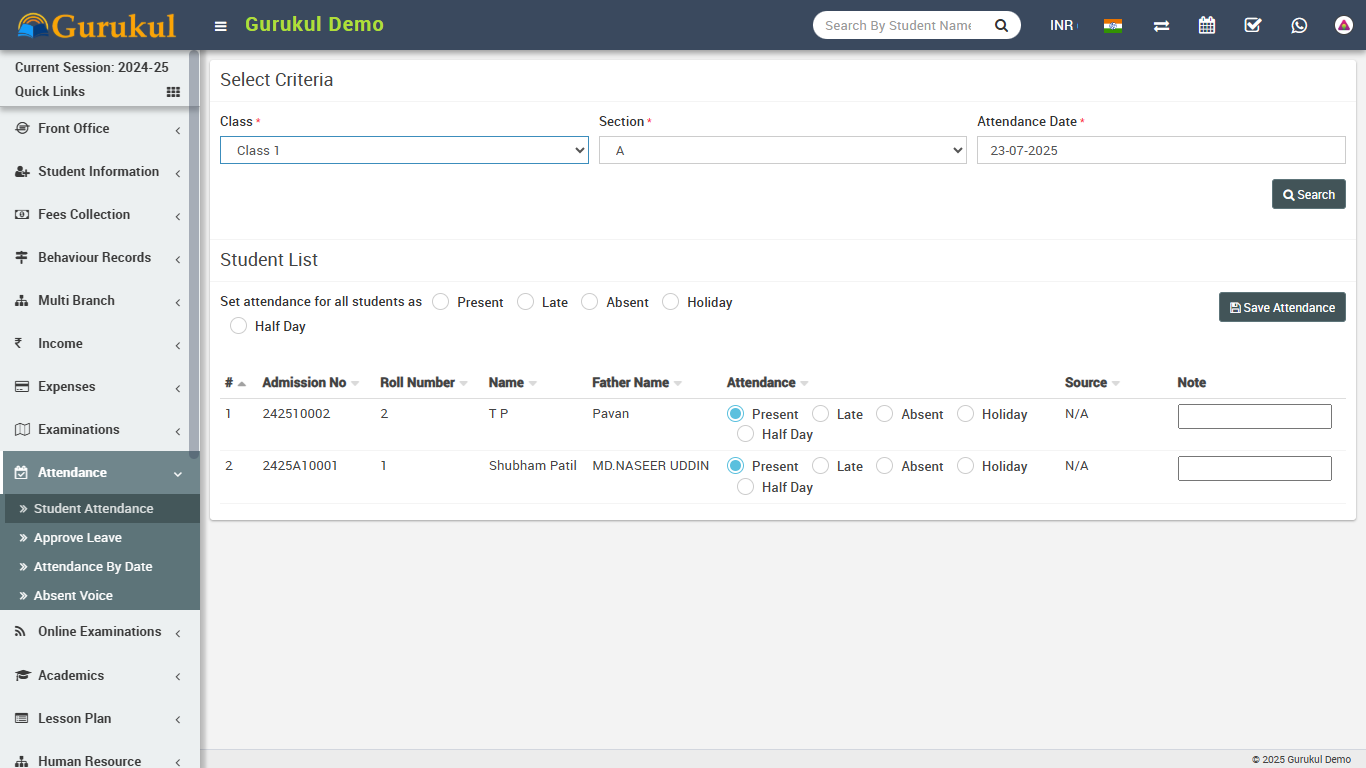
- Student Attendance- Go to Attendance > Student Attendance
select
Class then Section then Attendance Date
then click
Search button. Now below you can see list of students & attendance options
like
Present, Late, Absent etc. Select the
attendance for students then click on
Submit Attendance button. To enter National Holiday or Sunday select
Mark as holiday button then Submit Attendance button. Note
that is attendance is already submitted for a date then you can only edit attendance.
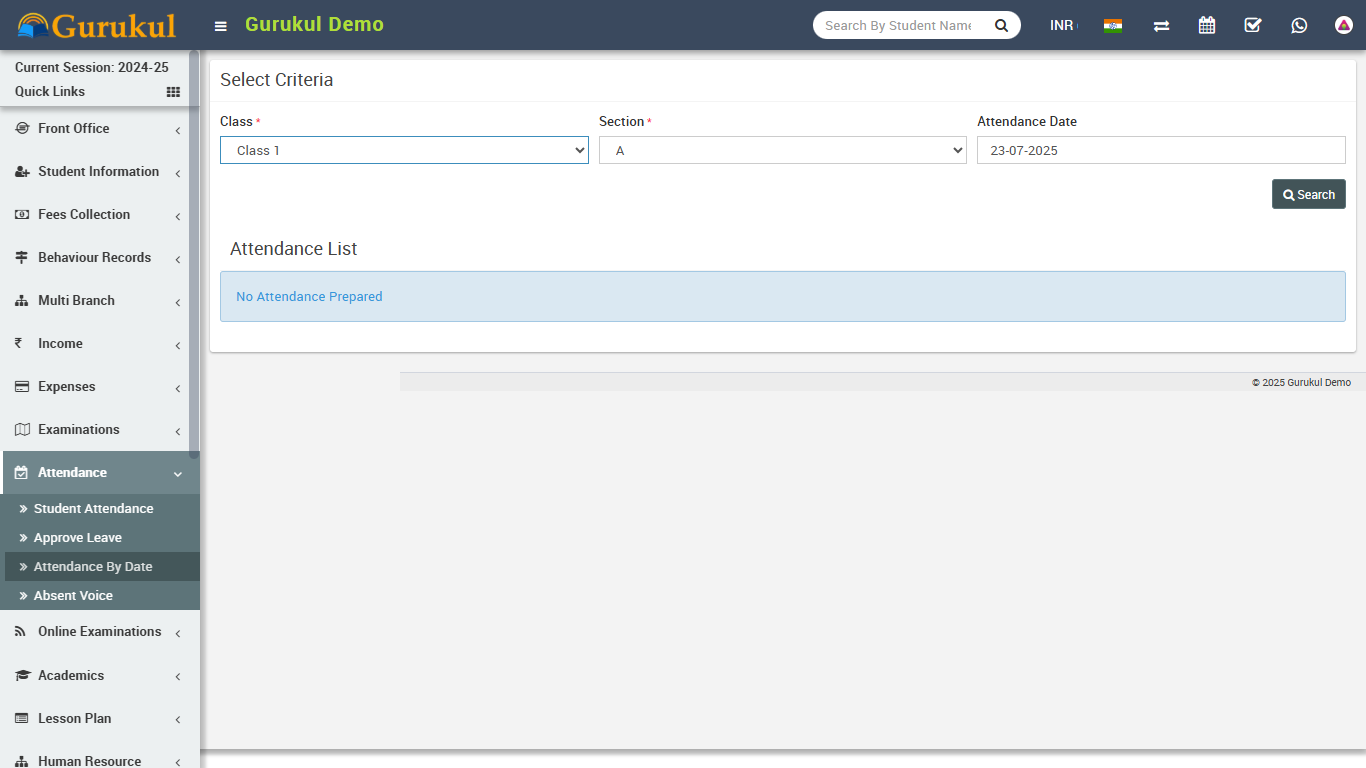
- Attendance By Date- Go to Attendance > Attendance By Date
to check attendance for a particular date select
Class then Section then Date then click
on
Search button.
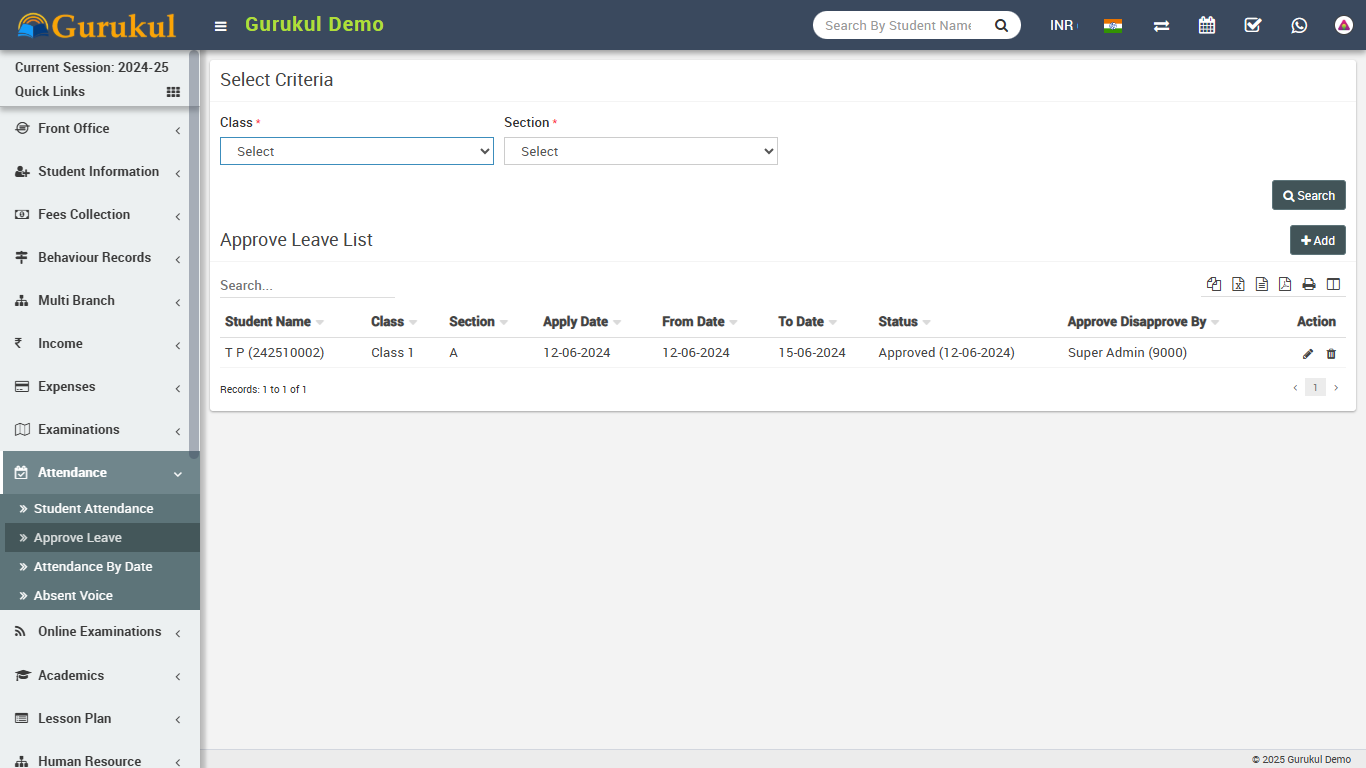
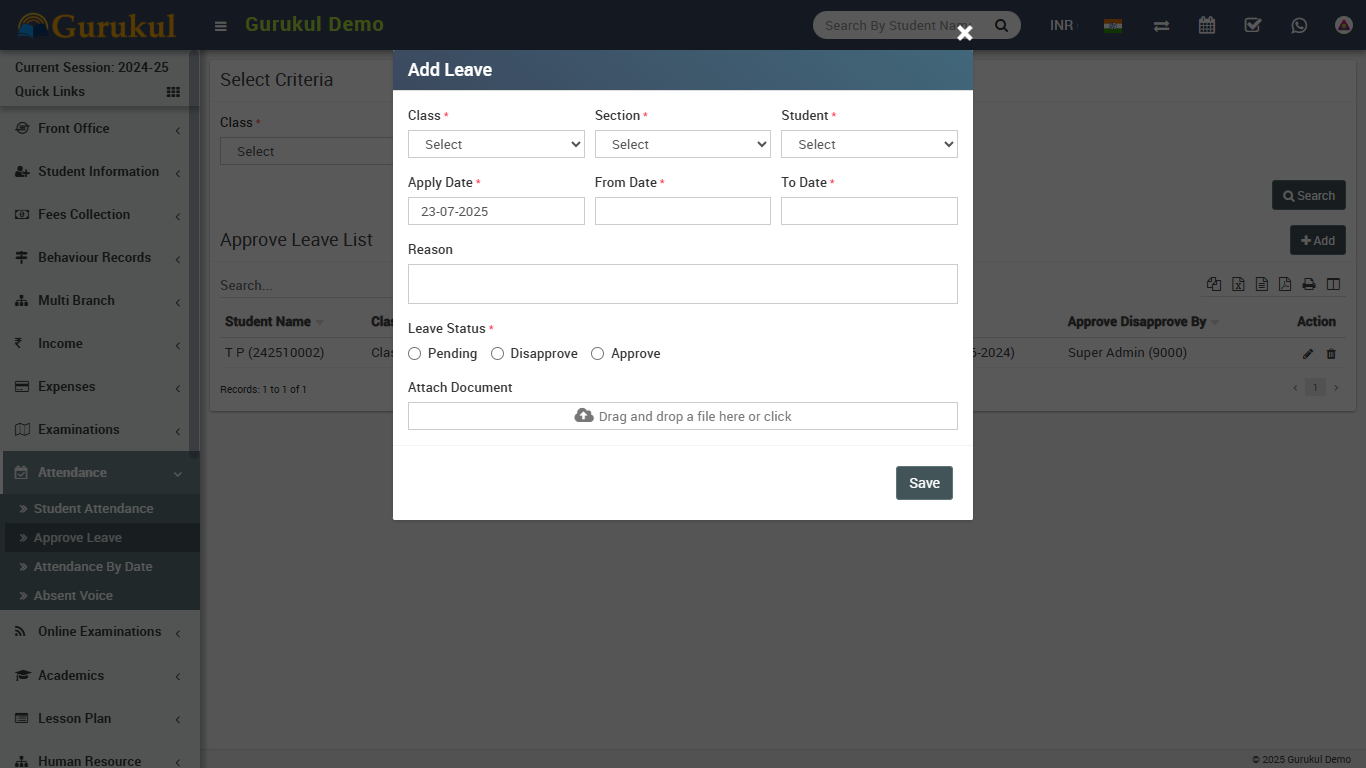
- Approve Leave- Go to Attendance > Approve Leave here you
can see leave request submitted by student to approve or add leaves for students.
Examinations
This module has 7 sections -
- Exam Group
- Exam Exam Result
- Design Admit Card
- Print Admit Card
- Design Marksheet Card
- Print Marksheet Card
- Marks Grade
Q Gurukul supports 4 types of exam types General Purpose (Pass/Fail), School Based Grading System, College Based Grading System and GPA Grading System.
General Purpose (Pass/Fail) - is general purpose non grading exam type used in majority of schools/institutions.
School Based Grading System - is grading exam type, in this you can merge two or more exams of same session to get consolidated result with final exam. For merging exams subjects should be same for all exams.
College Based Grading System - is grading exam type, in this you can merge two or more exams of different session to get consolidated result with final exam.
GPA Grading System - is GPA grading exam type based on credit hours and grade points.
First we will prepare Marks Grade then create exam in Exam Group then enter Exam Schedule then enter marks in Marks Register. Note that there is no need to prepare Marks Grade if your institution is not following Grading System in exams. Just leave Marks Grade & don't make any entry in it.
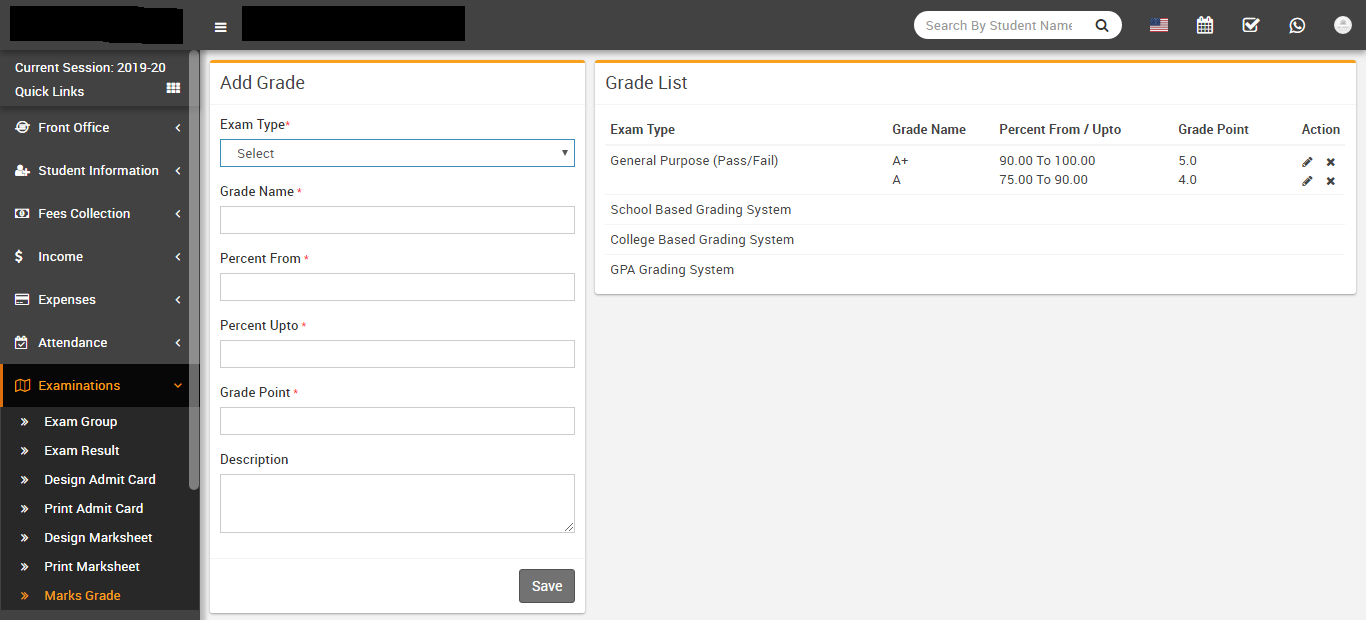
- Marks Grade- Go to Examination > Marks Grade select
Exam Type, enter
Grade Name, Percent From, Percent
Upto,Grade Point,
Description & click on Save button. All the
grades can be see at right side of this page.
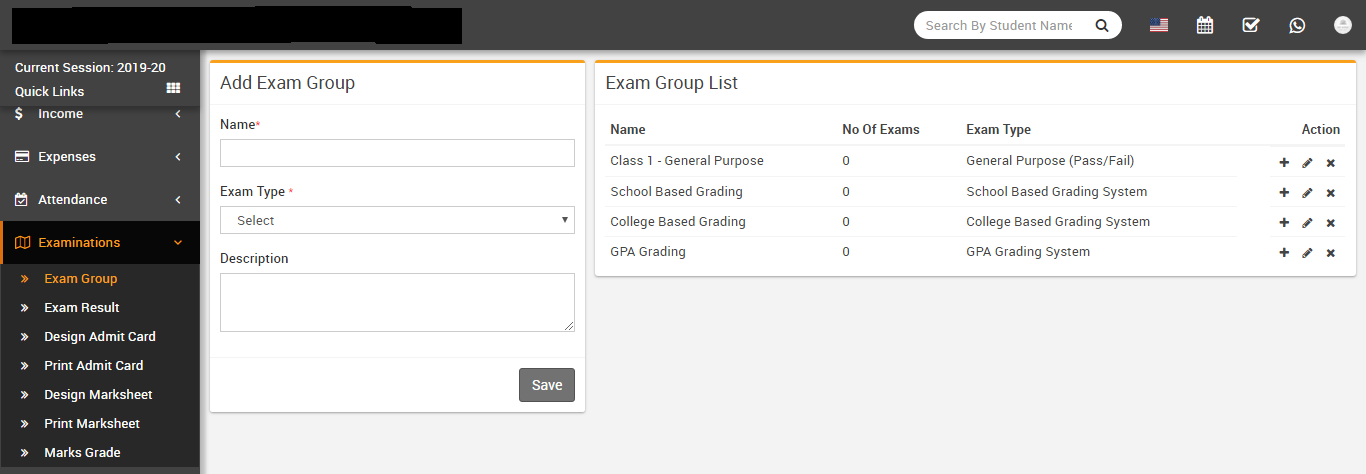
- Exam Group- Go to Examination > Exam Group enter
Exam Name, selectExam Type, Description
and click Save button. Exam Group is basically grouping of exams.
-
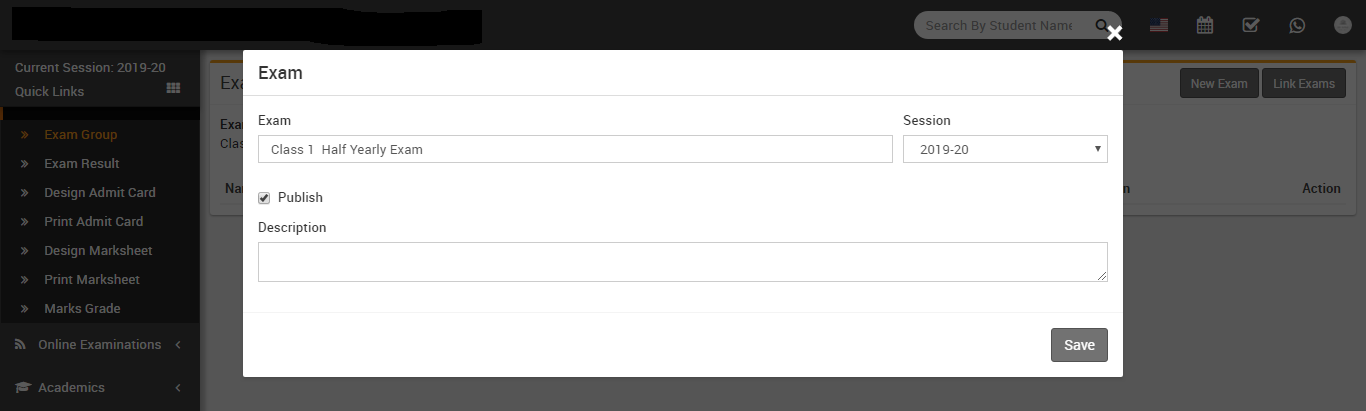
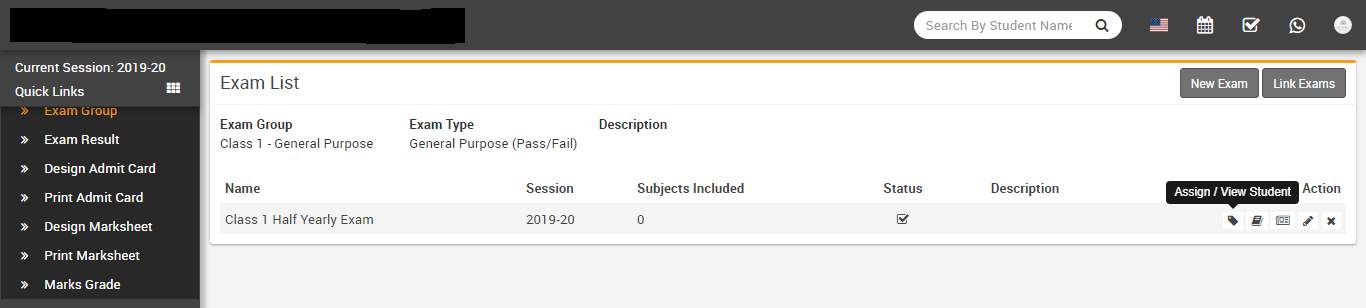
Adding New Exam- Go to Examination > Exam Group here at
exam group list action column click on + icon button to reach Exam List page. Here click on
New Exam button then enter Exam name, select Session, select Publish (to publish exam) and
Description then click Save button.

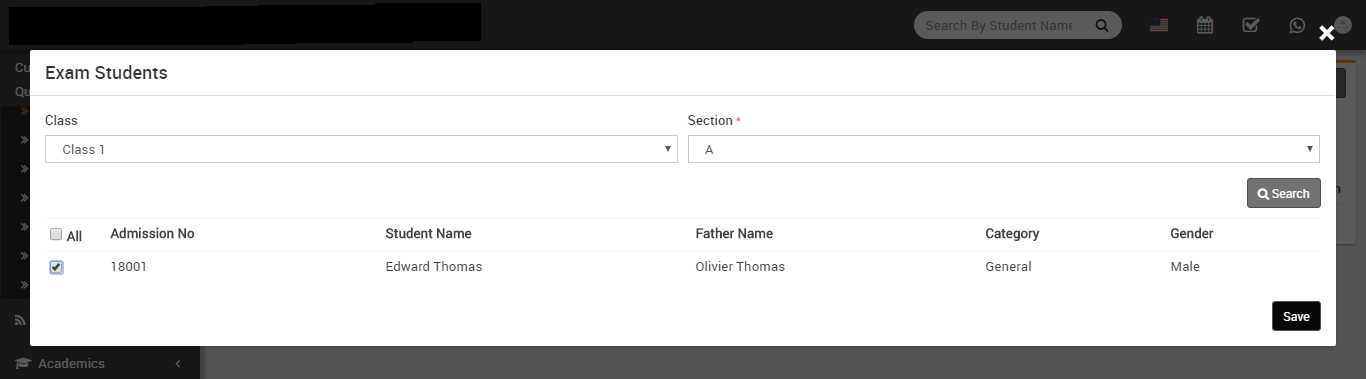
Now at Exam List page click on Assign / View Student button to assign students on exam.
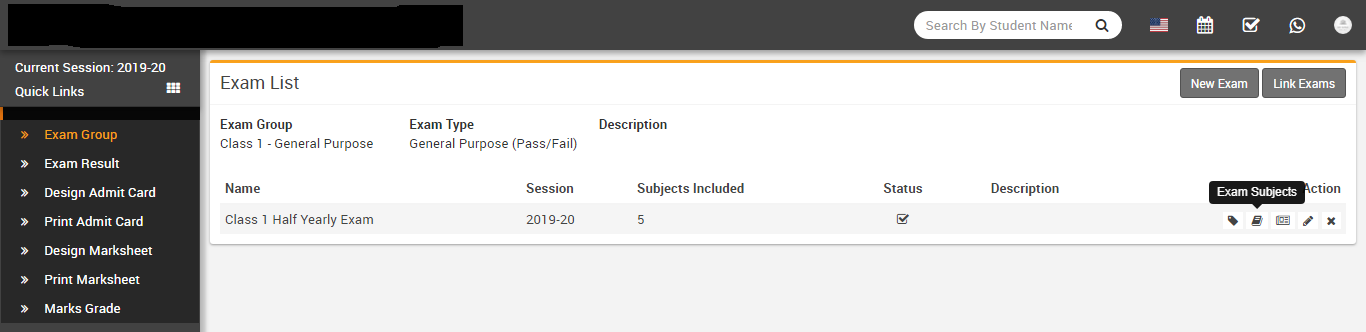
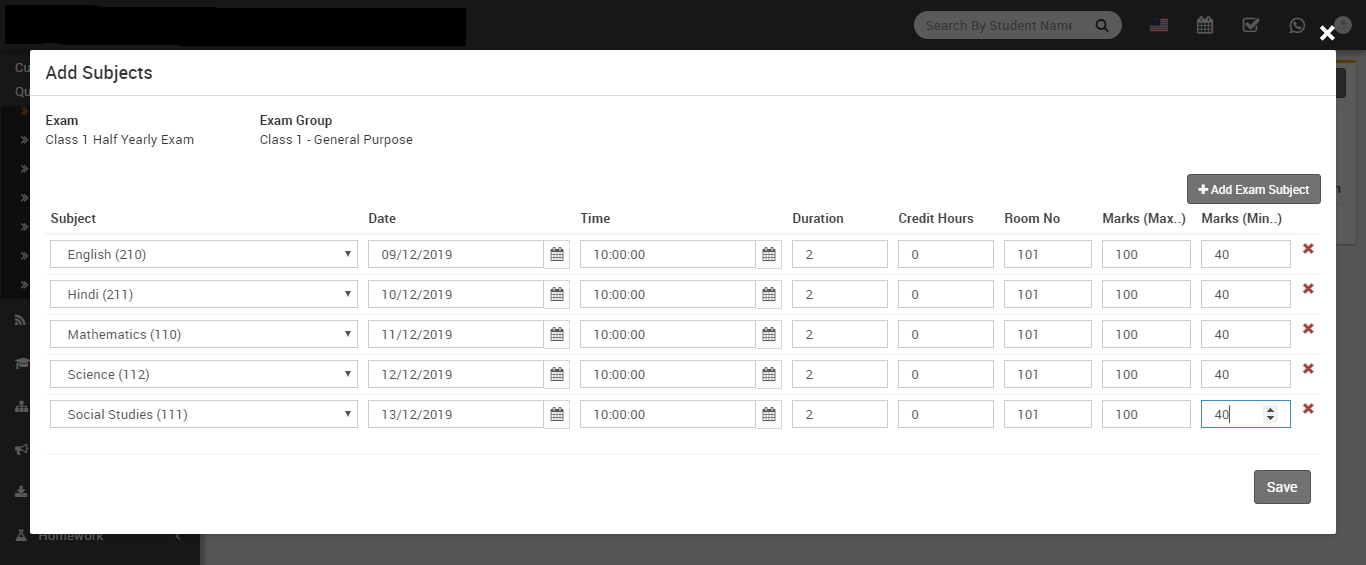
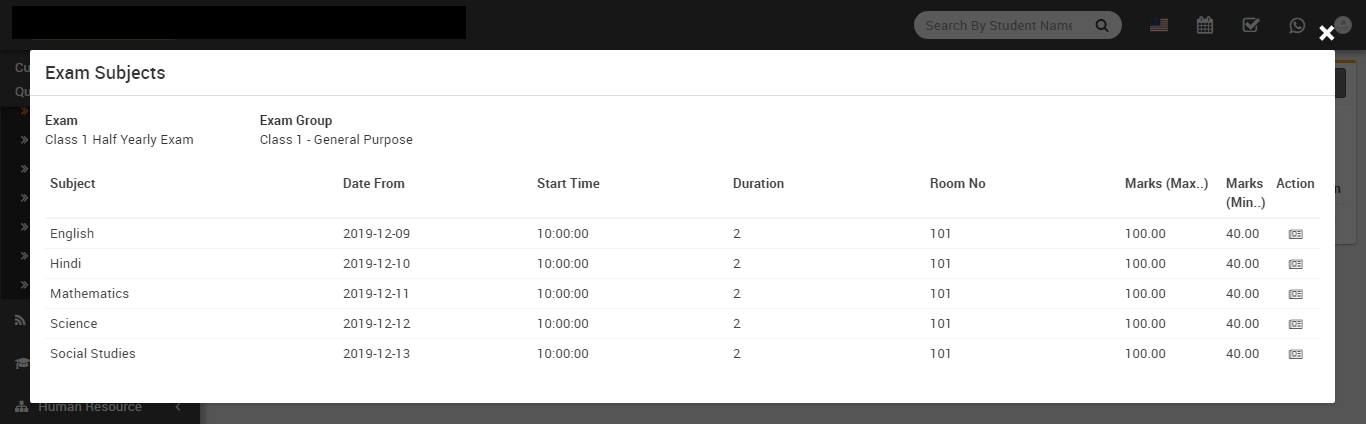
Now at Exam List page click on Exam Subject button to add subjects and exam schedule. Here enter Credit Hours if you are using GPA Grading System exam type otherwise ignore it.
Now at Exam List page click on Exam Marks button to add subject marks.
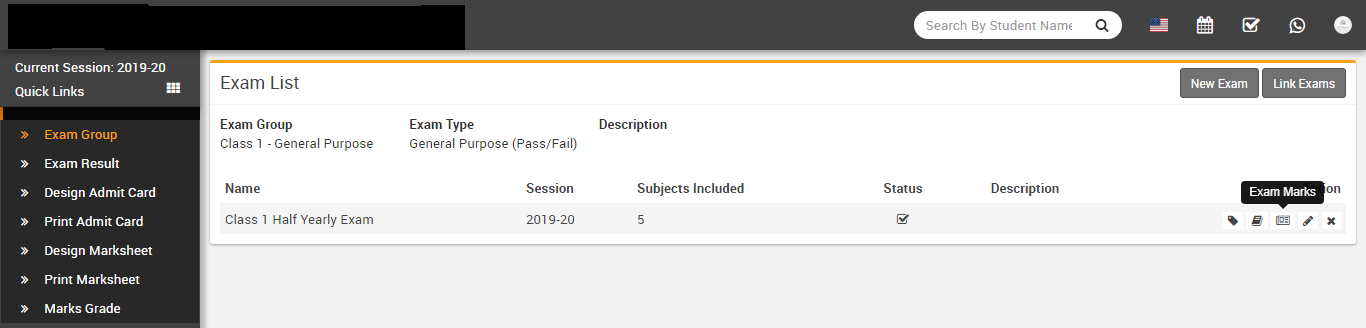
At Exam Subject page click on Enter Marks button from Action column to add subject marks.
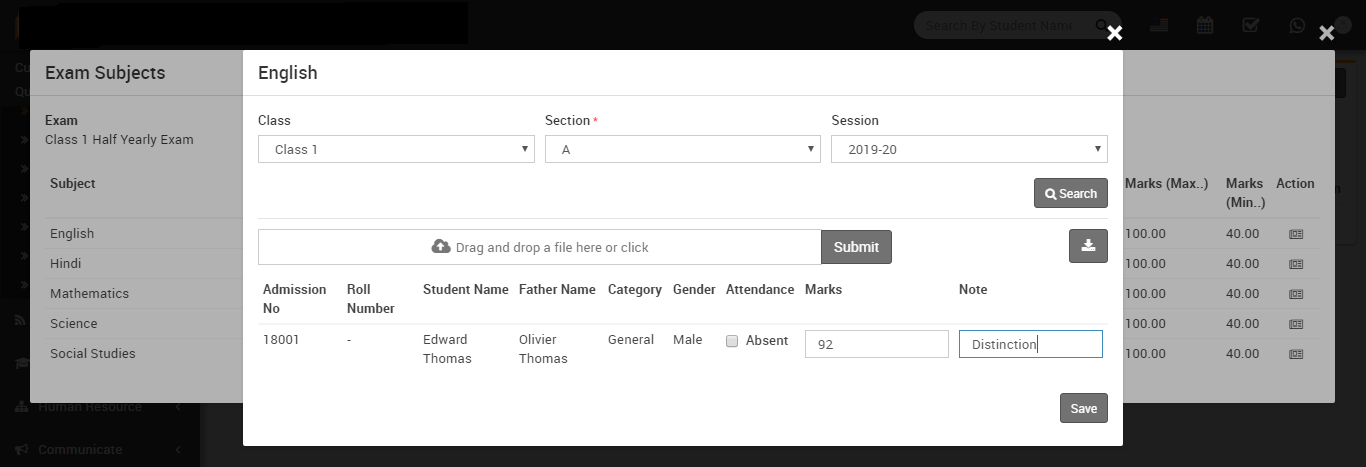
You can also import marks here using csv file. After importing csv file marks will be fill in marks input box so if you want you edit and check marks then you can submit marks.
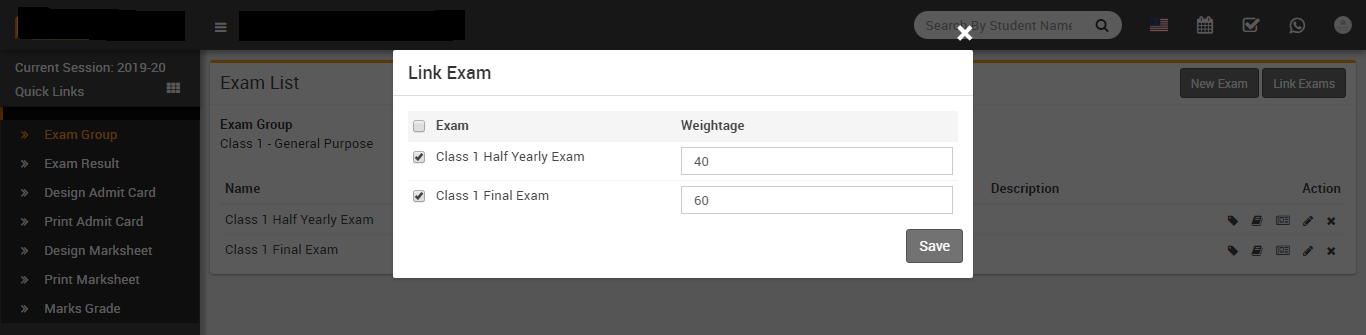
- Link Exams- at Exam List page click on Link Exam button to link/merge two
exams to get consolidated result with final exam. Using Link Exam feature all data for exams
should be entered carefully otherwise you will not get consolidated result.
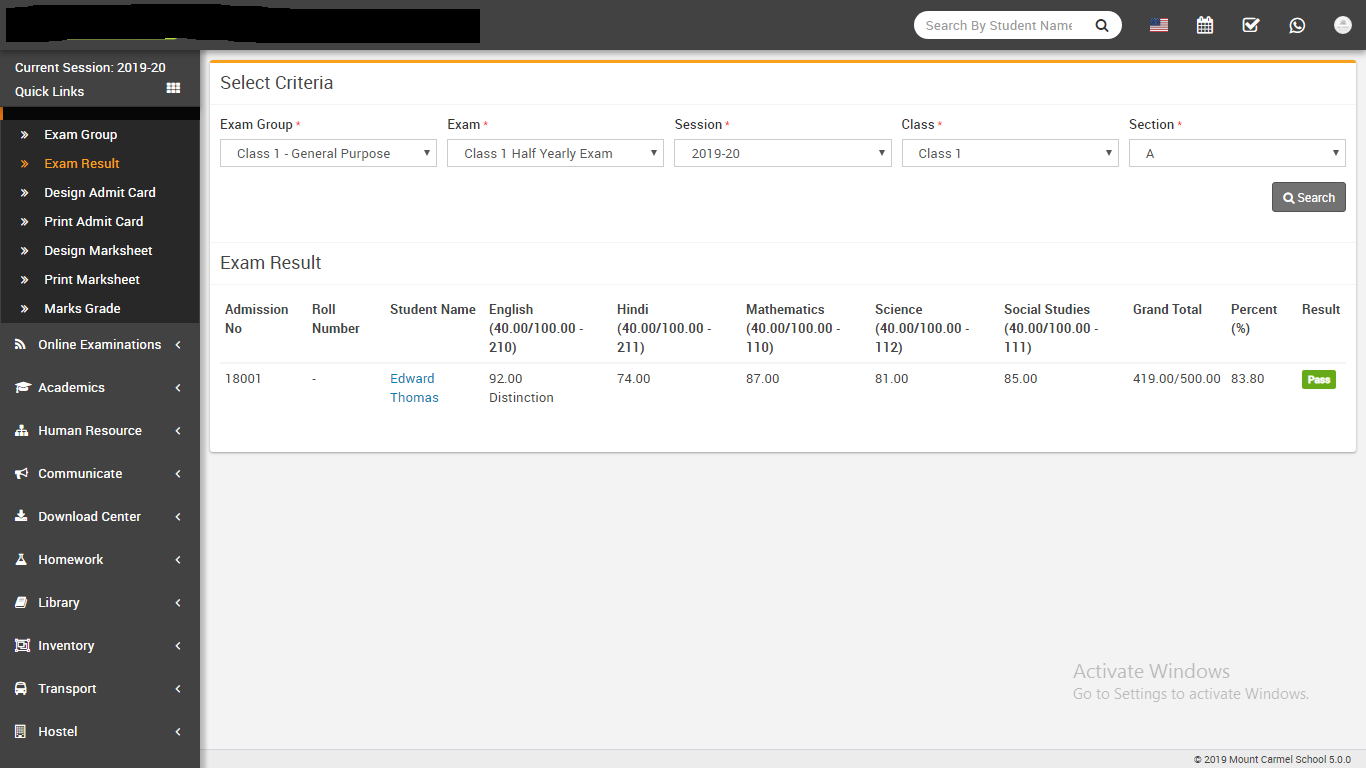
- Exam Result- Go to Examination > Exam Result here select
all criteria to get exam result of that Class-Section.
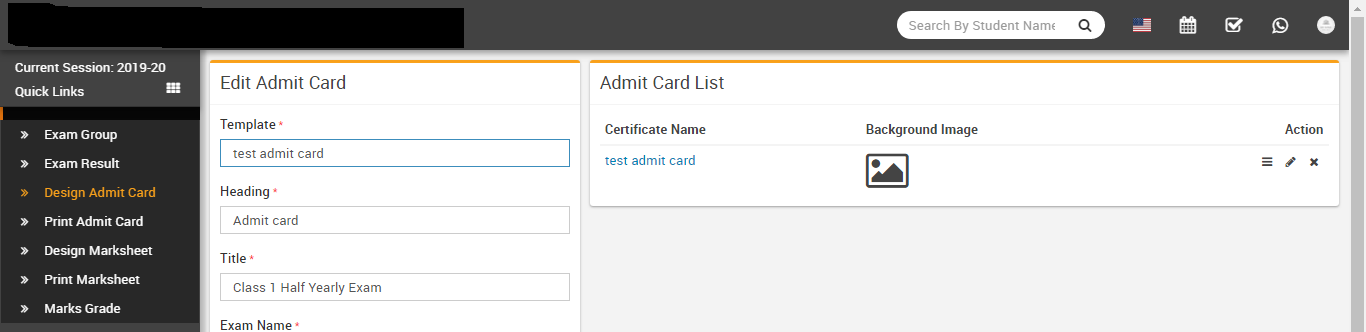
- Design Admit Card- Go to Examination > Design Admit Card
here enter details for admit card template design and enable/disable variables on admit
card.
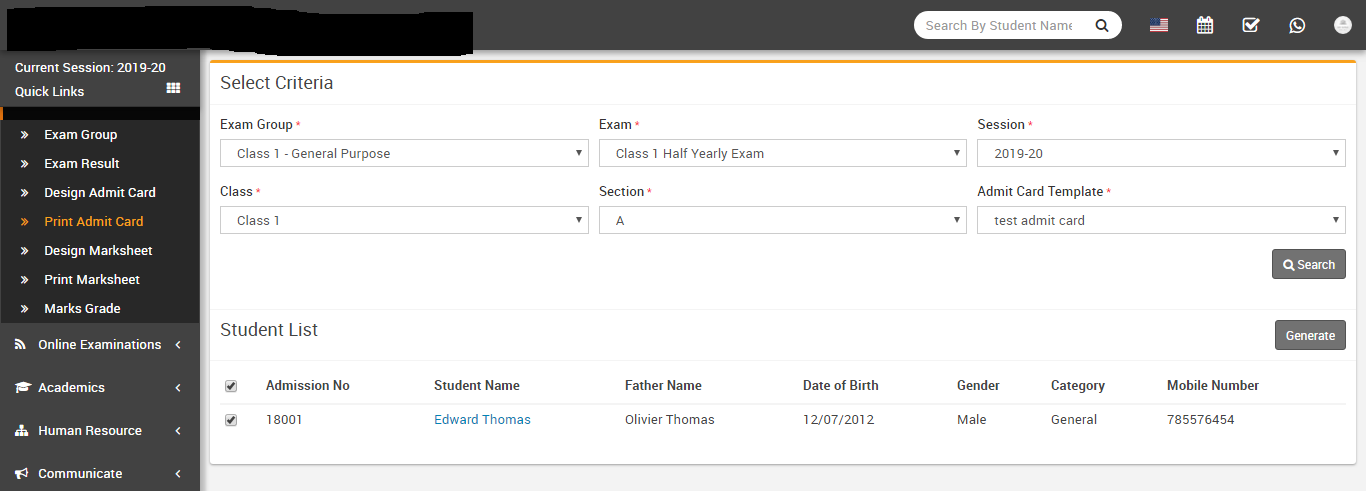
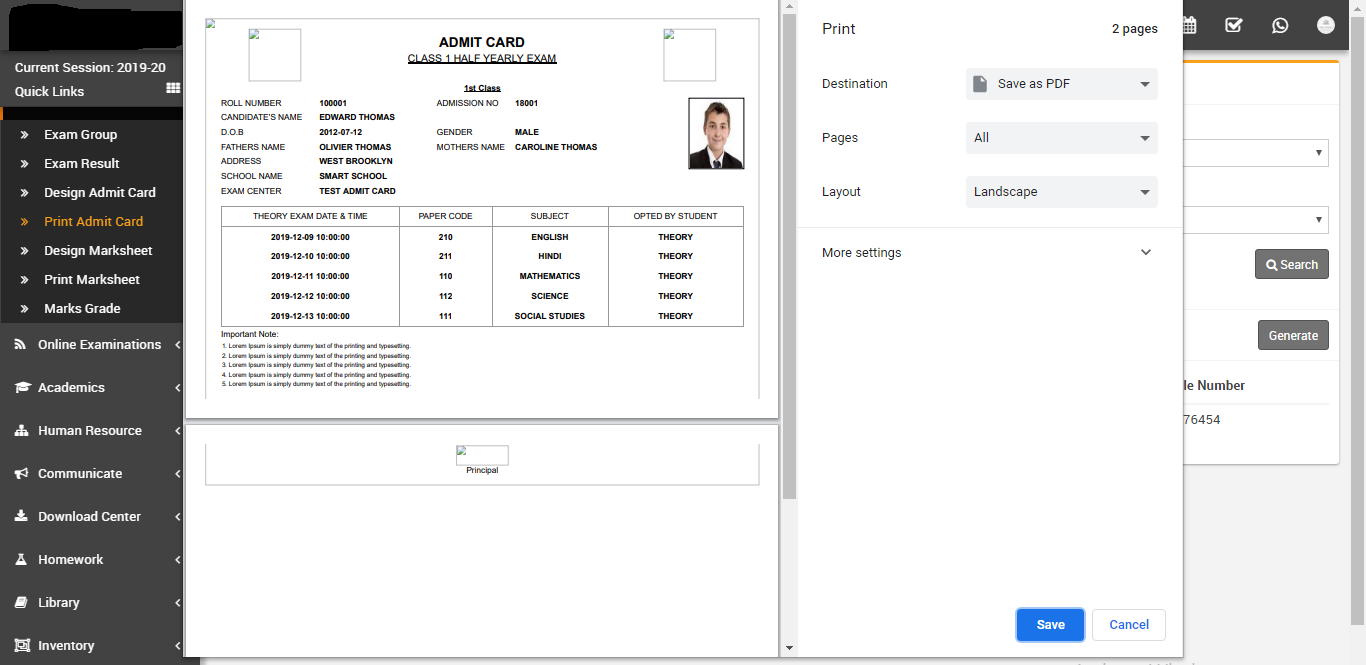
- Print Admit Card- Go to Examination > Print Admit Card
here select all criteria to get student list for printing admit card. Now select all student
for which you want to generate admit card then click on Generate button. It is highly
recommended to don't print admit card directly here instead of it use Save As PDF feature of
Chrome browser and save PDF file then print admit cards using this PDF file.
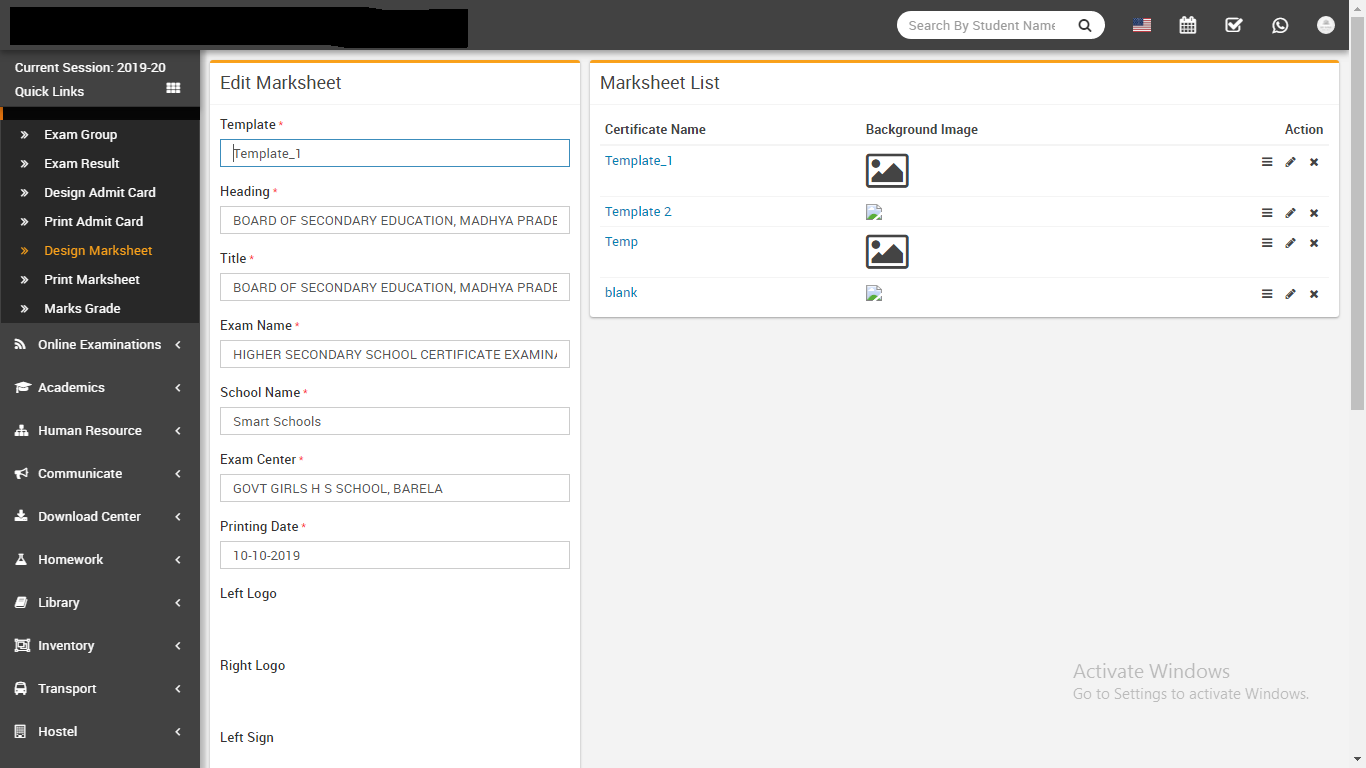
- Design Marksheet- Go to Examination > Design Marksheet
here enter details for Marksheet template design and enable/disable variables on Marksheet .
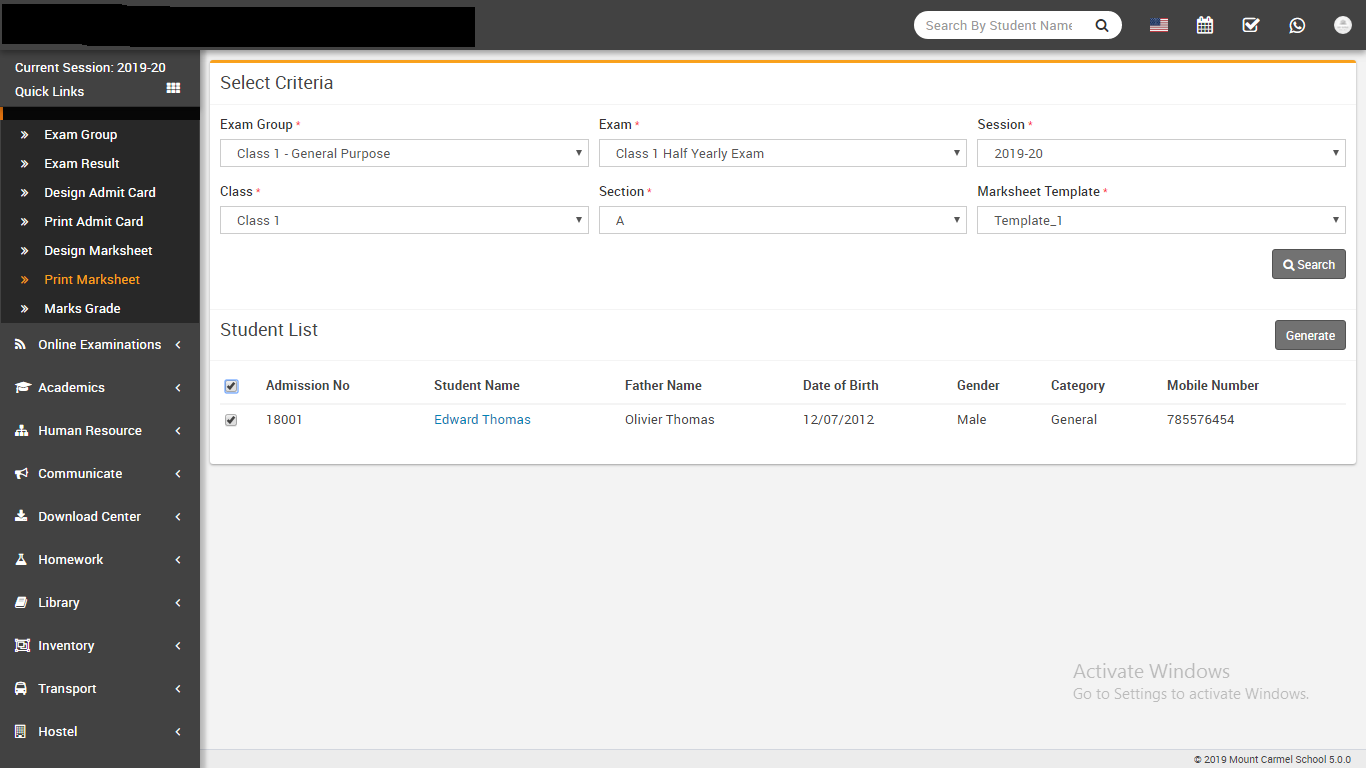
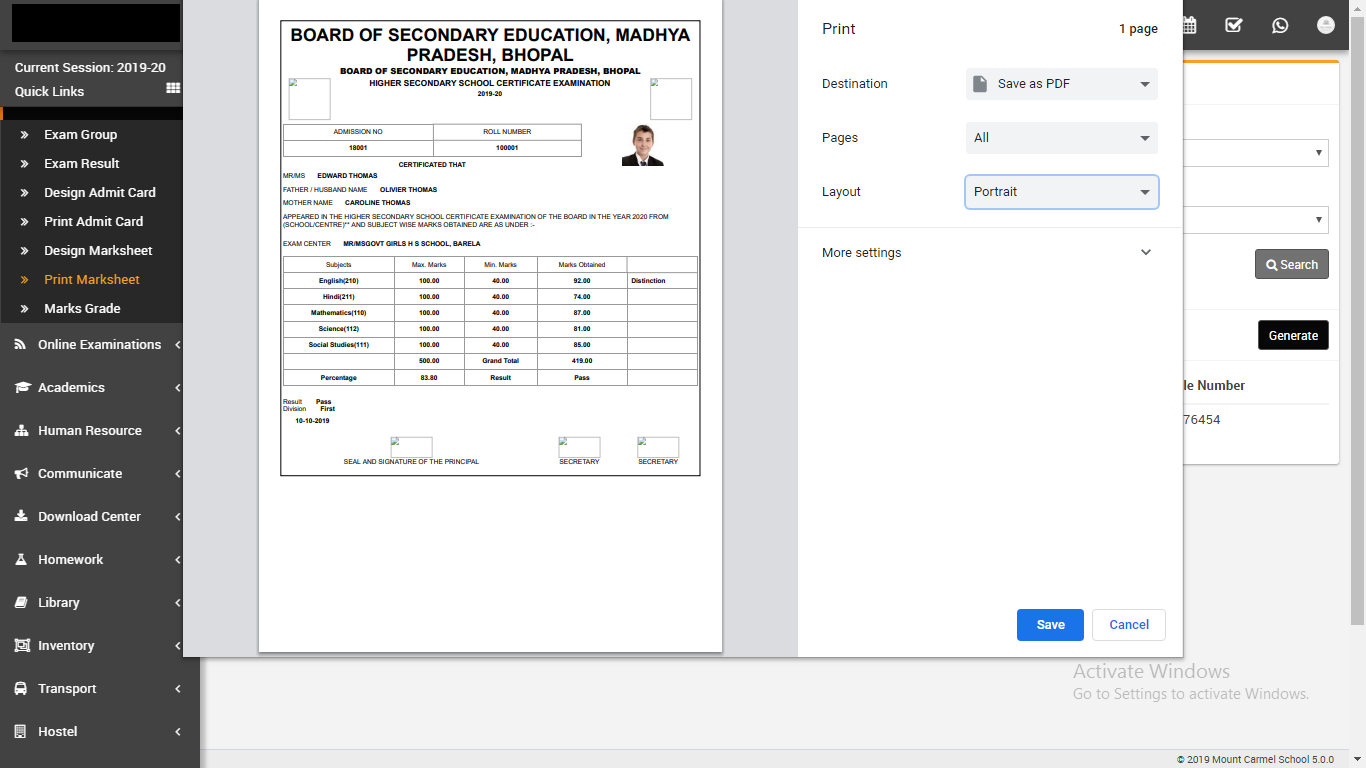
- Print Marksheet- Go to Examination > Print Marksheet here
select all criteria to get student list for printing Marksheet. Now select all student for
which you want to generate Marksheet then click on Generate button. It is highly recommended
to don't print Marksheet directly here instead of it use Save As PDF feature of Chrome
browser and save PDF file then print Marksheet using this PDF file.
Online Examinations
This module has 2 sections -
- Online Exam
- Question Bank
First we will enter questions in Question Bank then create exam in Online Exam Further students can take online exams from their student panel and see exam result when result will be publish.
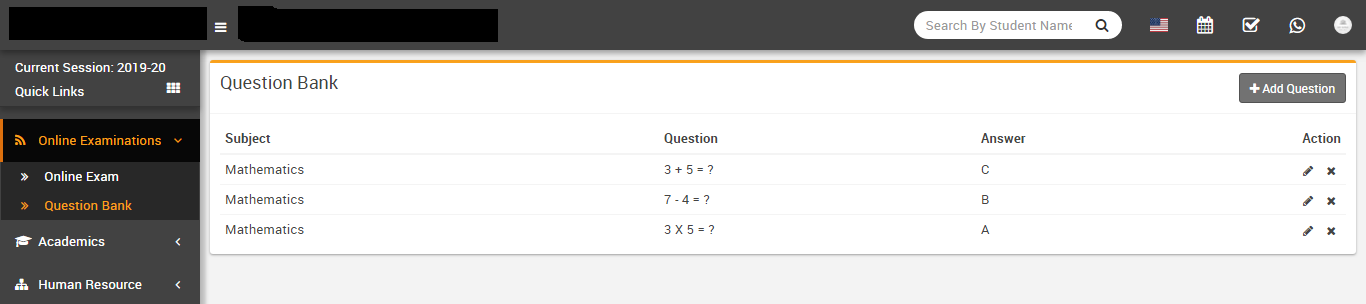
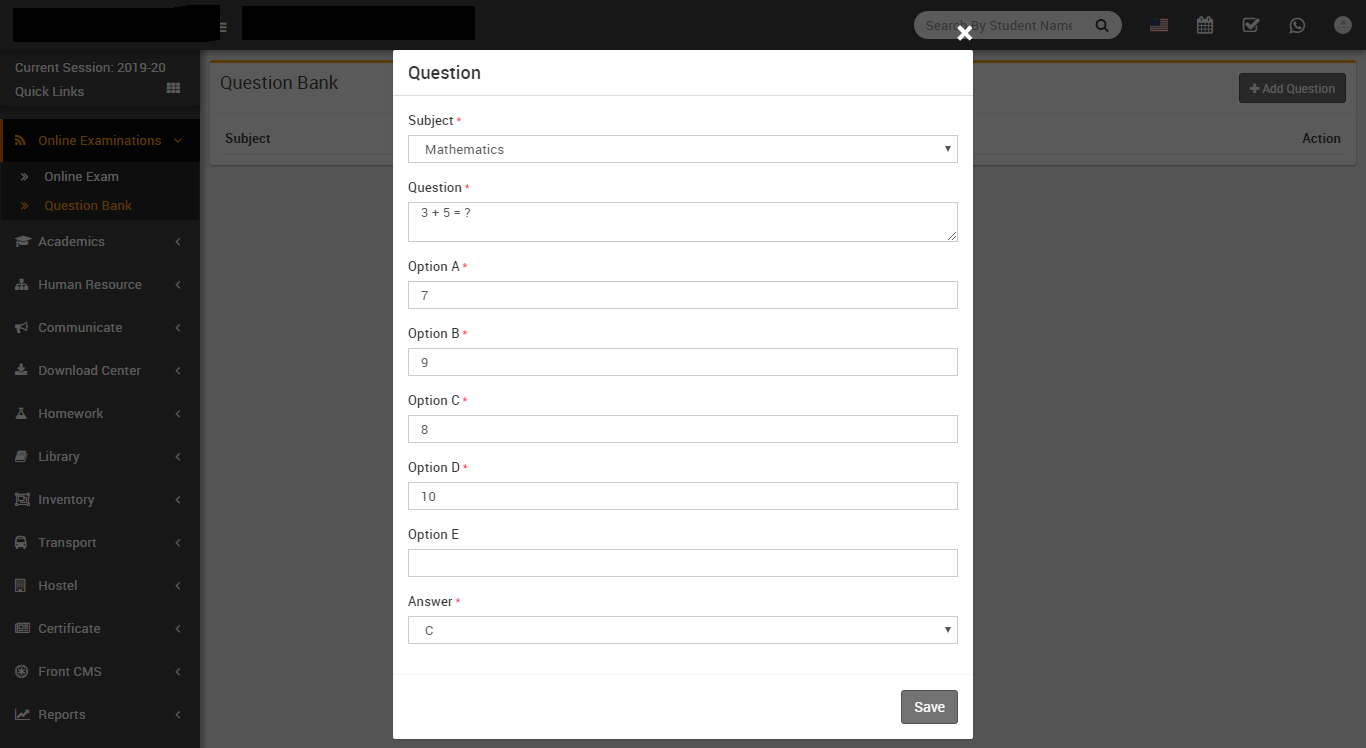
- Question Bank- Go to Online Examination > Question Bank
Here you can see list of all questions. To add new question click on Add Question button.
Now select Subject, enter Question, then Option A, Option B, Option C, Option D and Option E
(if available) then select correct answer of qeustion then click on Save button.
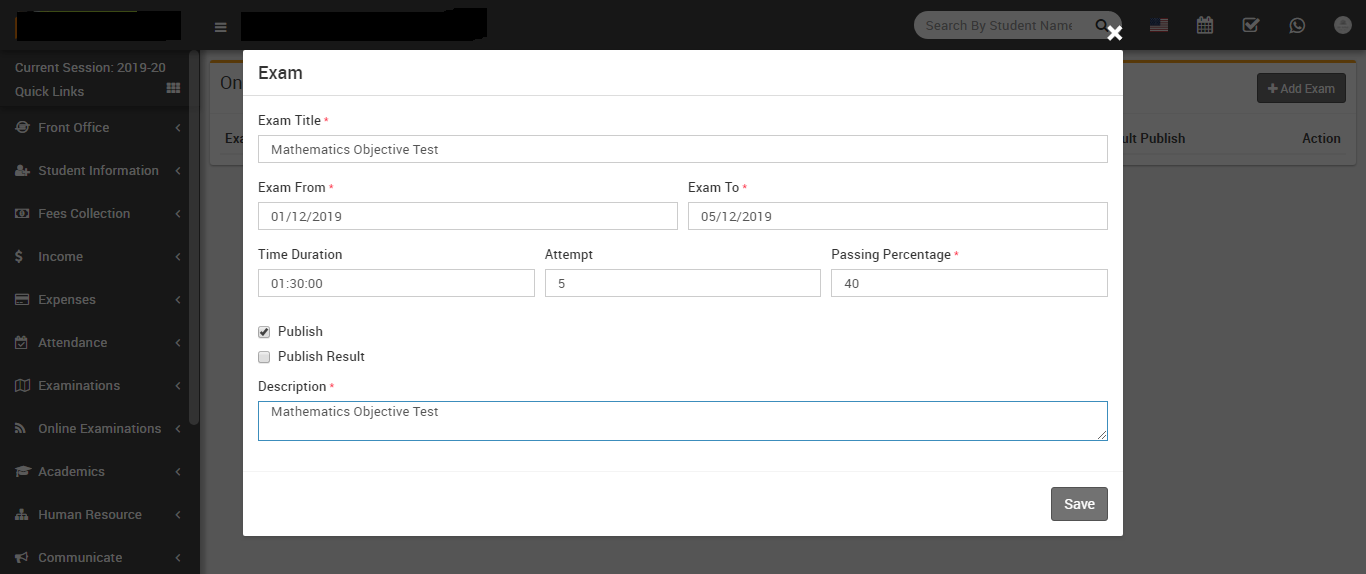
- Online Exam- Go to Online Examination > Online Exam here
we will see list of available online exams. To add new exam click on Add Exam button

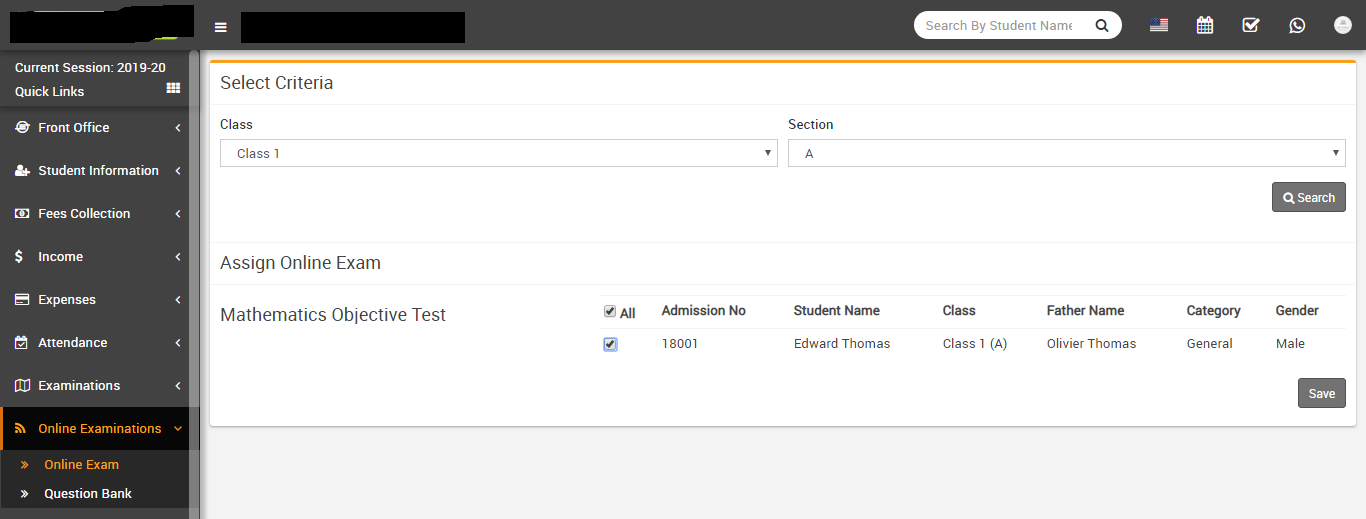
At Online Exam List page click on Assign / View Student button to add student in this exam.

Now at Online Exam List page click on Add Question button to add questions in this exam.

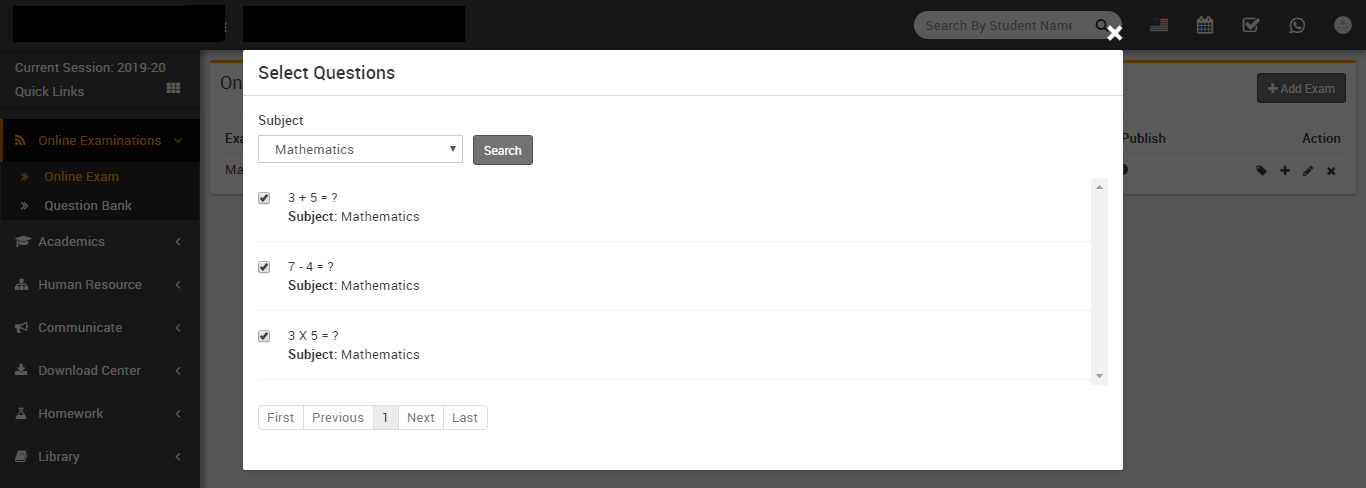
Now Online Exam has been created and students now can attempt this exam from their student panel
Lesson Plan
Academics
This module has 8 sections -
- Class Timetable
- Teachers Timetable
- Assign Class Teacher
- Promote Students
- Subject Group
- Subjects
- Class
- Sections
We have already described few section of Academics Module during Steps to Setup your school, but now we will understand completely Academics module sections. First we will create Sections then Classes then Subject Group then Assign Class Teacher on class-sections then create Class Timetable.
- Sections- Go to Academics > Sections enter
Section Name & click Save button. All the
sections can be see right side on this page.
-
Class- Go to
Academics > Class enter Class Name then select
Sections under this Class then click
Save button. All the Classes and their Sections can
be see at right side of this page.
-
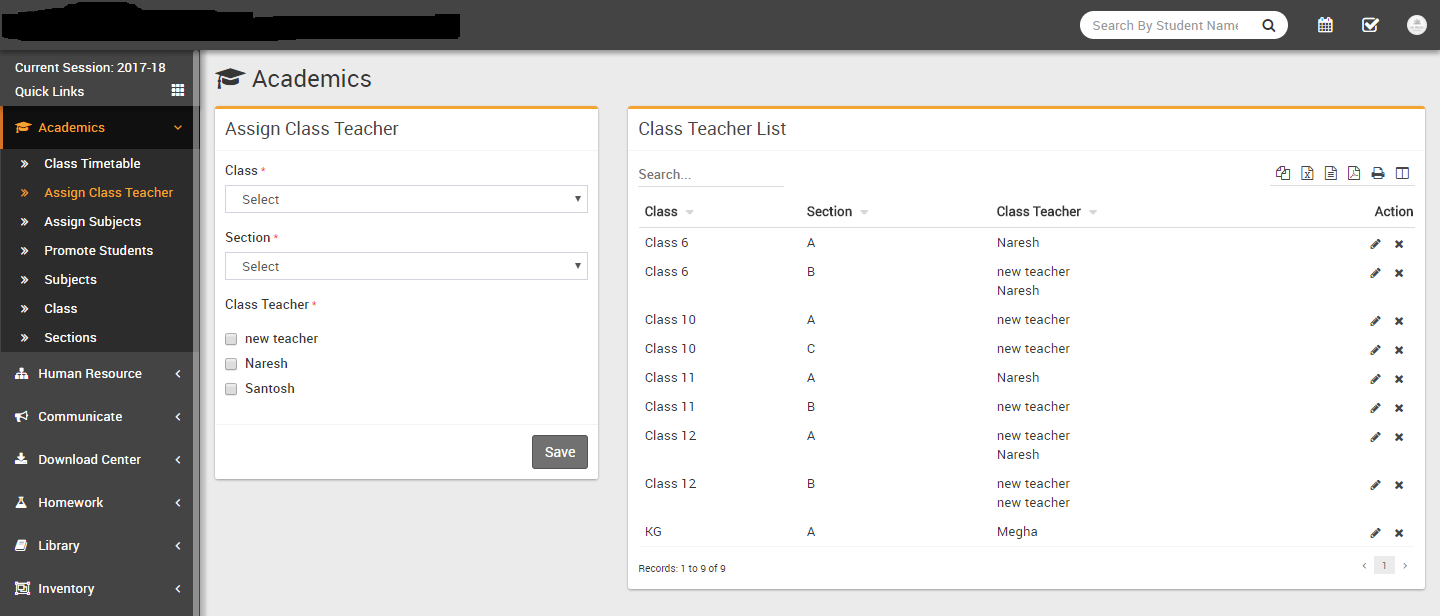
Assign Class Teacher- Go to
Academics > Assign class Teacher select Class then select
Section then select Class Teachers for this Class Section then click
Save button. All the Class-Section and their Class
Teachers can be see at right side of this page.
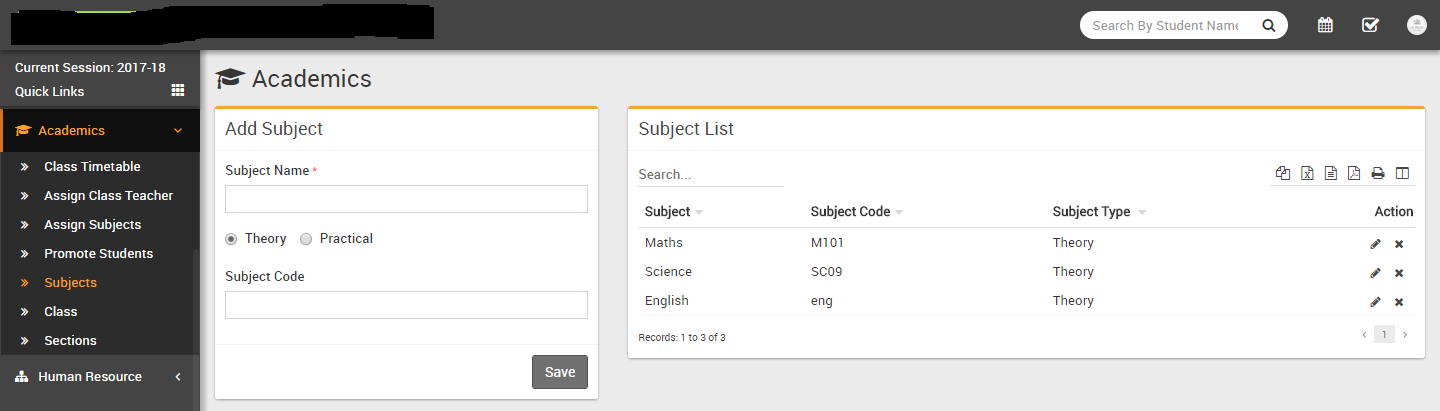
- Subjects- Go to Academics > Subjects enter
Subject Name, Subject Type (Theory/Practical),
Subject Code then click Save button. All the subjects can
be see at the right side of this page.
- Subject Group- Go to Academics > Subject Group enter
Subject Group then select Class and Section then select all subjects you want to include in
this class and section as group now click on Save.
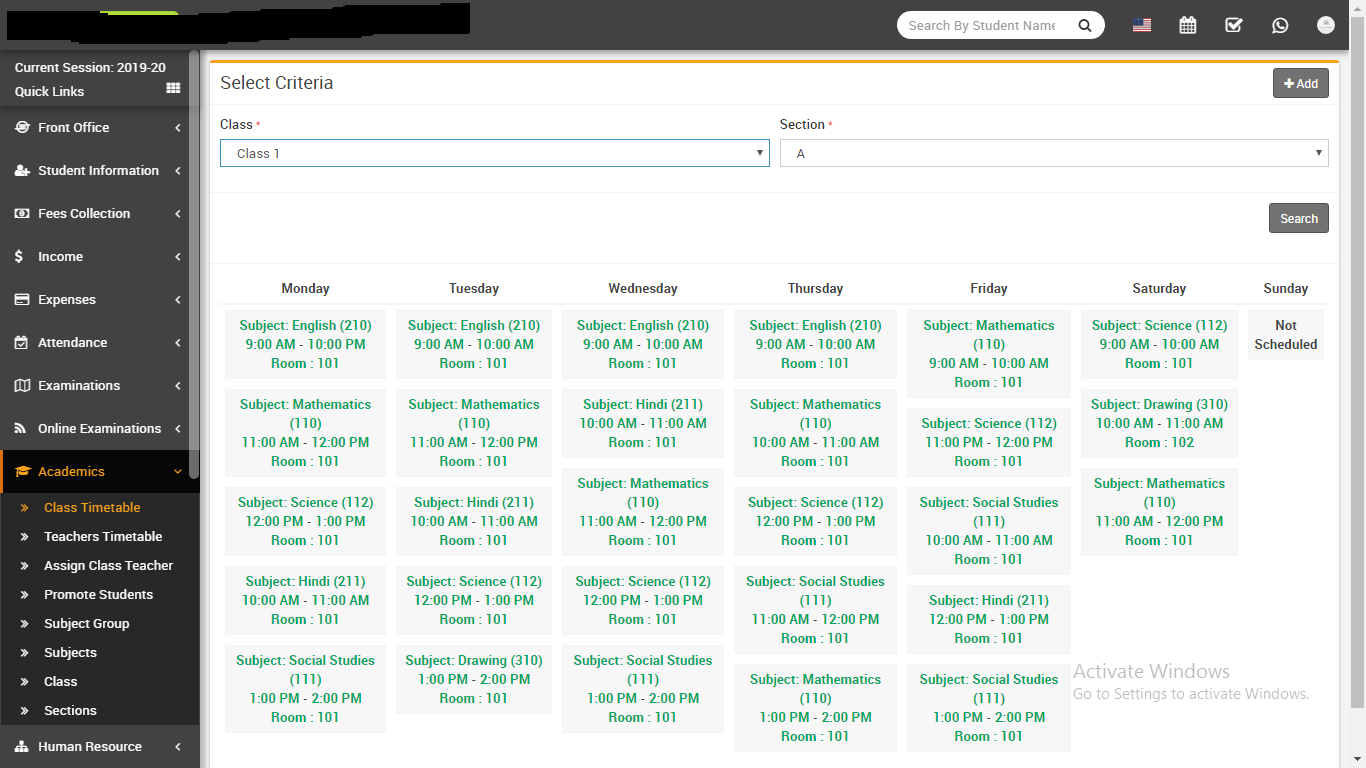
- Class Timetable- Go to Academics > Class Timetable Class
Timetable has two parts 1)
Adding/Editing class timetable 2) Viewing class
timetable.
For Adding/Editing Class Timetable click on Add button then on next page select Class, Section, Subject Group & click Search button then you will get 7 days tab, now enter Subject,Teacher,Time From,Time To, Room No for each days & click on Save button to save timetable.
For viewing Class Timetable (go to Academics > Class Timetable) select Class, Section and click Save button to see class timetable.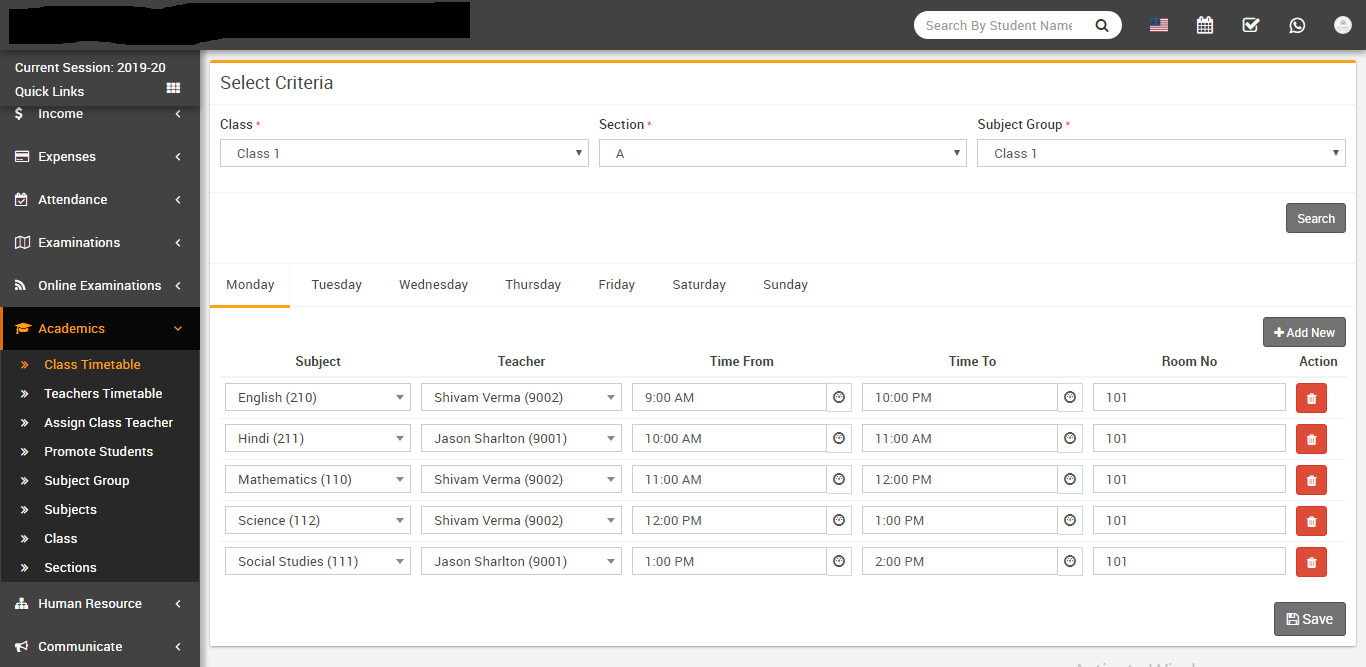
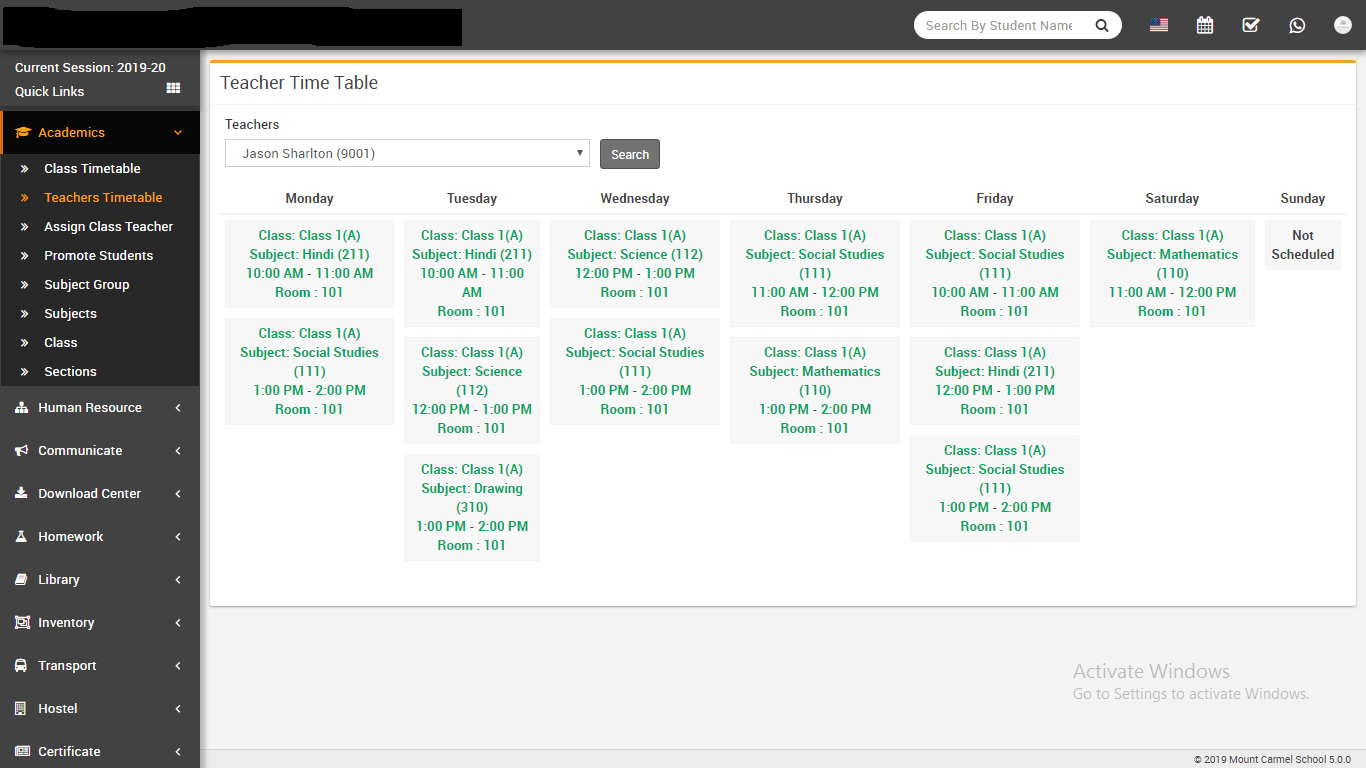
- Teachers Timetable- Go to Academics > Teachers Timetable
Here teachers or other admin staff can see selected teacher timetable.
- Promote Students- Go to Student Information > Promote Students select
Class and Section and click on Search button to get student list under
this class-section. Here you can see every student has Current Result column with Pass /
Fail and Next Session Status column with Continue / Leave options and three drop down to
select Promote In Session, Class, Section just above the student list.
Now let's understand how Promote Student works. Promoting students to next session and class-section depends on two things, 1). Student is pass or fail in main examination and 2). Student will be continue in school or leaving from school. If student is pass and will continue to school, only then student will be promoted to next session and class-section. If student is fail and continue to school then students will be promoted to next session but class-section will be remain as it is. If student is pass but leaving to student then student will not be promoted to next session nor promoted to next class-section. This is the whole mechanism of Promote Student. Q Gurukul automatically manage promotion of session and class-section. To promote students first select Promote In Session, Class, Section and for every student select Current Result pass or fail and Next Session Status continue or leave and click on Promote button from bottom right.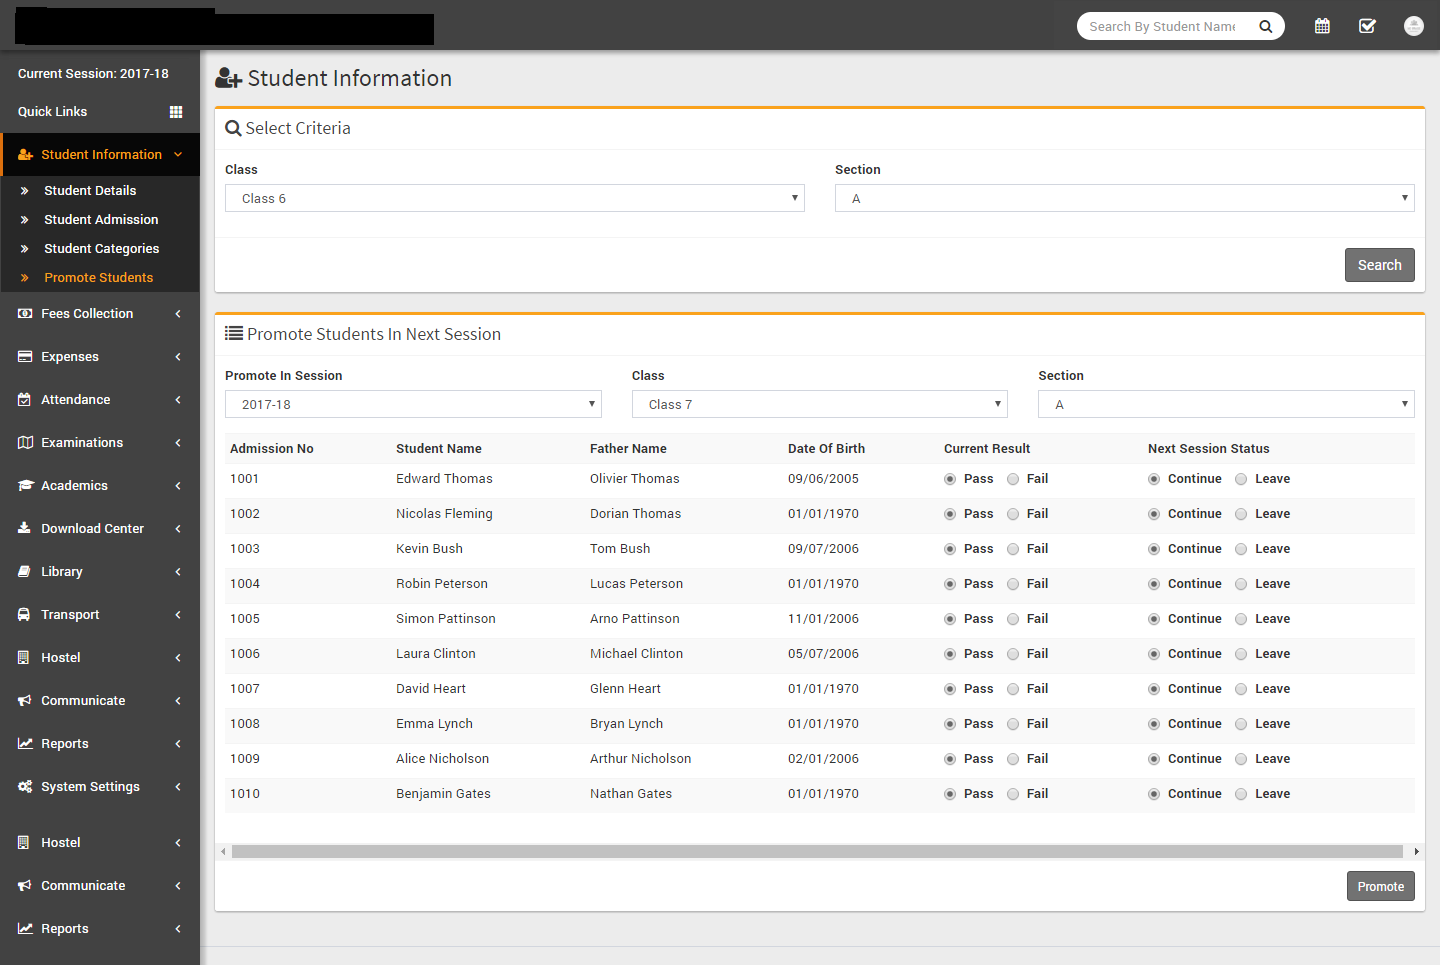
Human Resource
This module has 11 sections -
- Staff Directory
- Staff Attendance
- Staff Attendance Report
- Payroll
- Approve Leave Request
- Apply Leave
- Leave Type
- Teachers Rating
- Department
- Designation
- Disabled Staff
In Human Resource we will manage all activities of school staff (not student or parent or guardian) from Principal to Owner to Peon or any School member even he/she using or not using Q Gurukul application. First we will add Department, Designation, Leave Types then we will add Staff Member from Staff Directory then we will manage day by day Staff Attendance then manage Payroll/Salary of staff then Apply or Approve Leave Request. If you want to add additional fields in staff form then you can use Custom Fields feature for this go to System Settings > Custom Fields and add your desired fields in Staff. If you also don't want any default fields in staff then you can disable it from System Settings > System Fields and disable staff system fields.
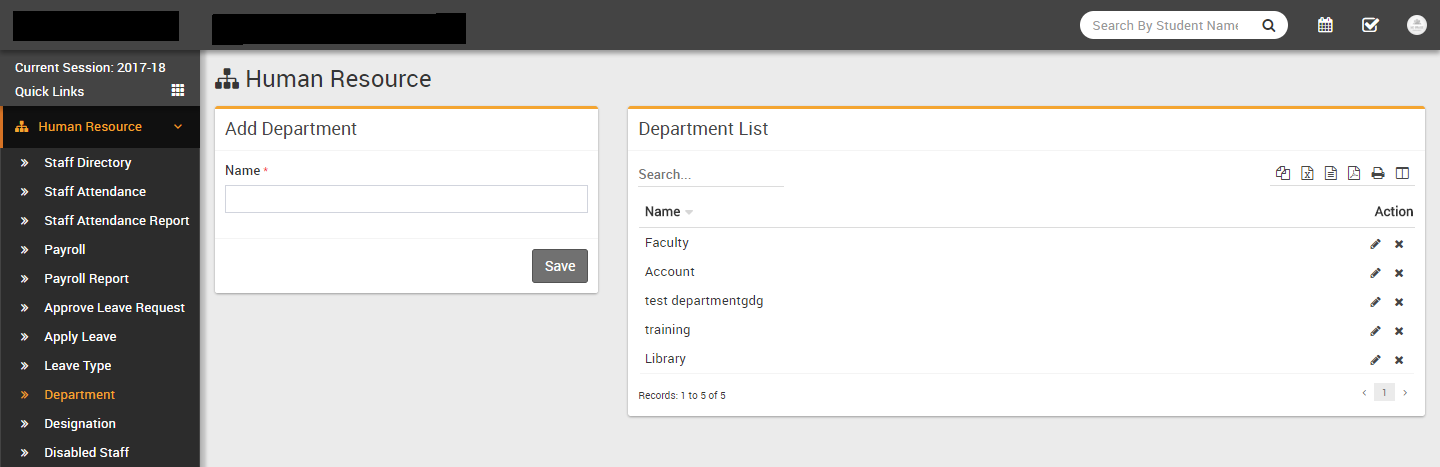
- Department- Go to Human Resource > Department enter
Department Name then click Save button. All existing
Departments can be see right side of this page.
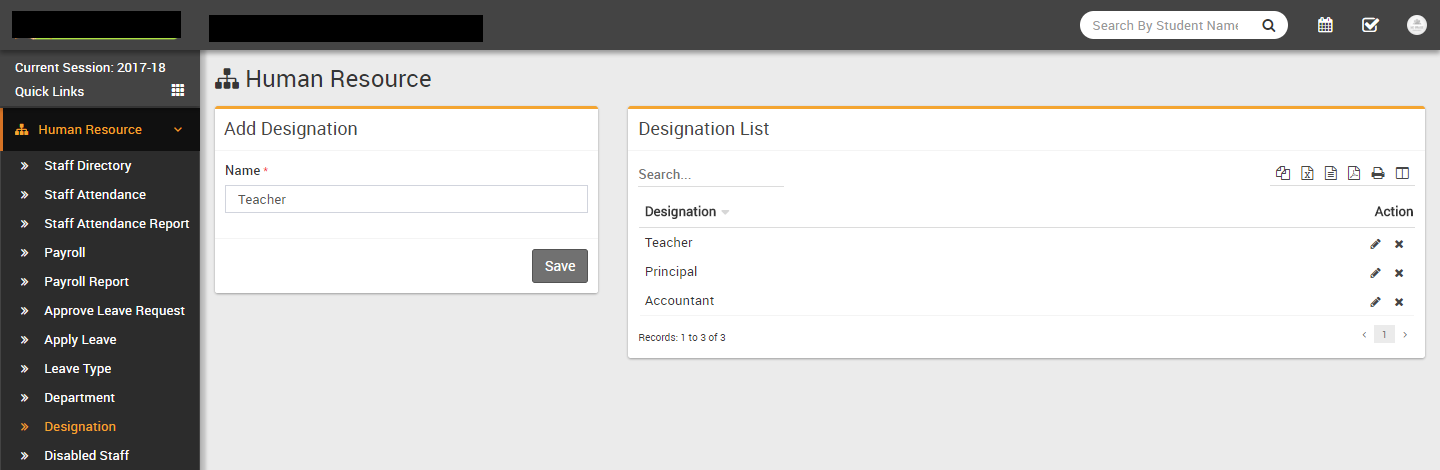
- Designation- Go to Human Resource > Designation enter
Designation Name then click Save button. All existing
Designation can be see right side of this page.
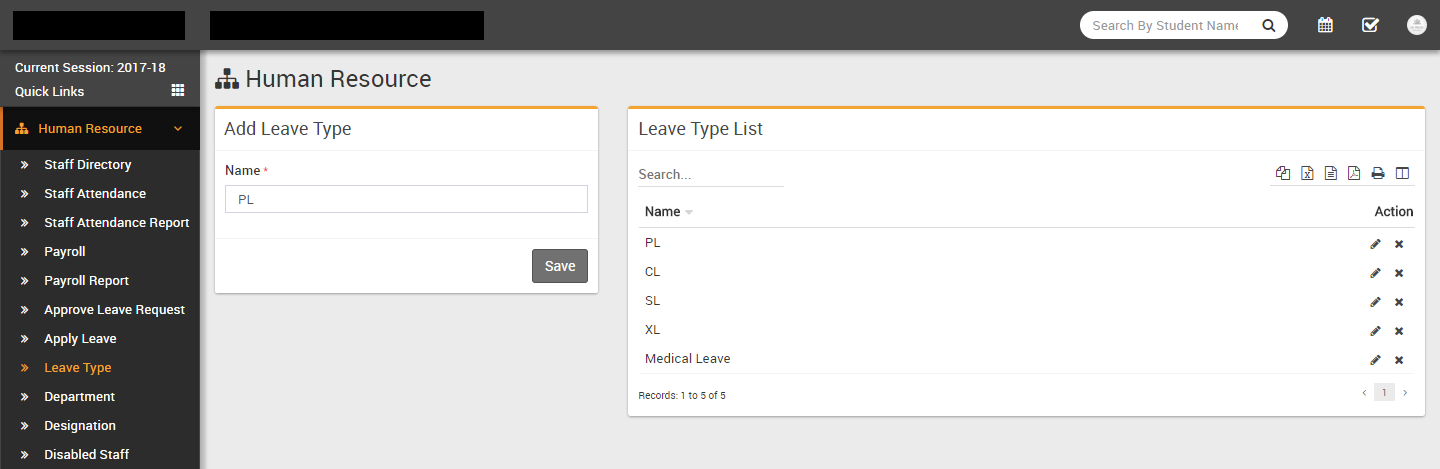
- Leave Type- Go to Human Resource > Leave Type enter
Leave Type Name then click Save button. All existing
Leave Type can be see right side of this page.
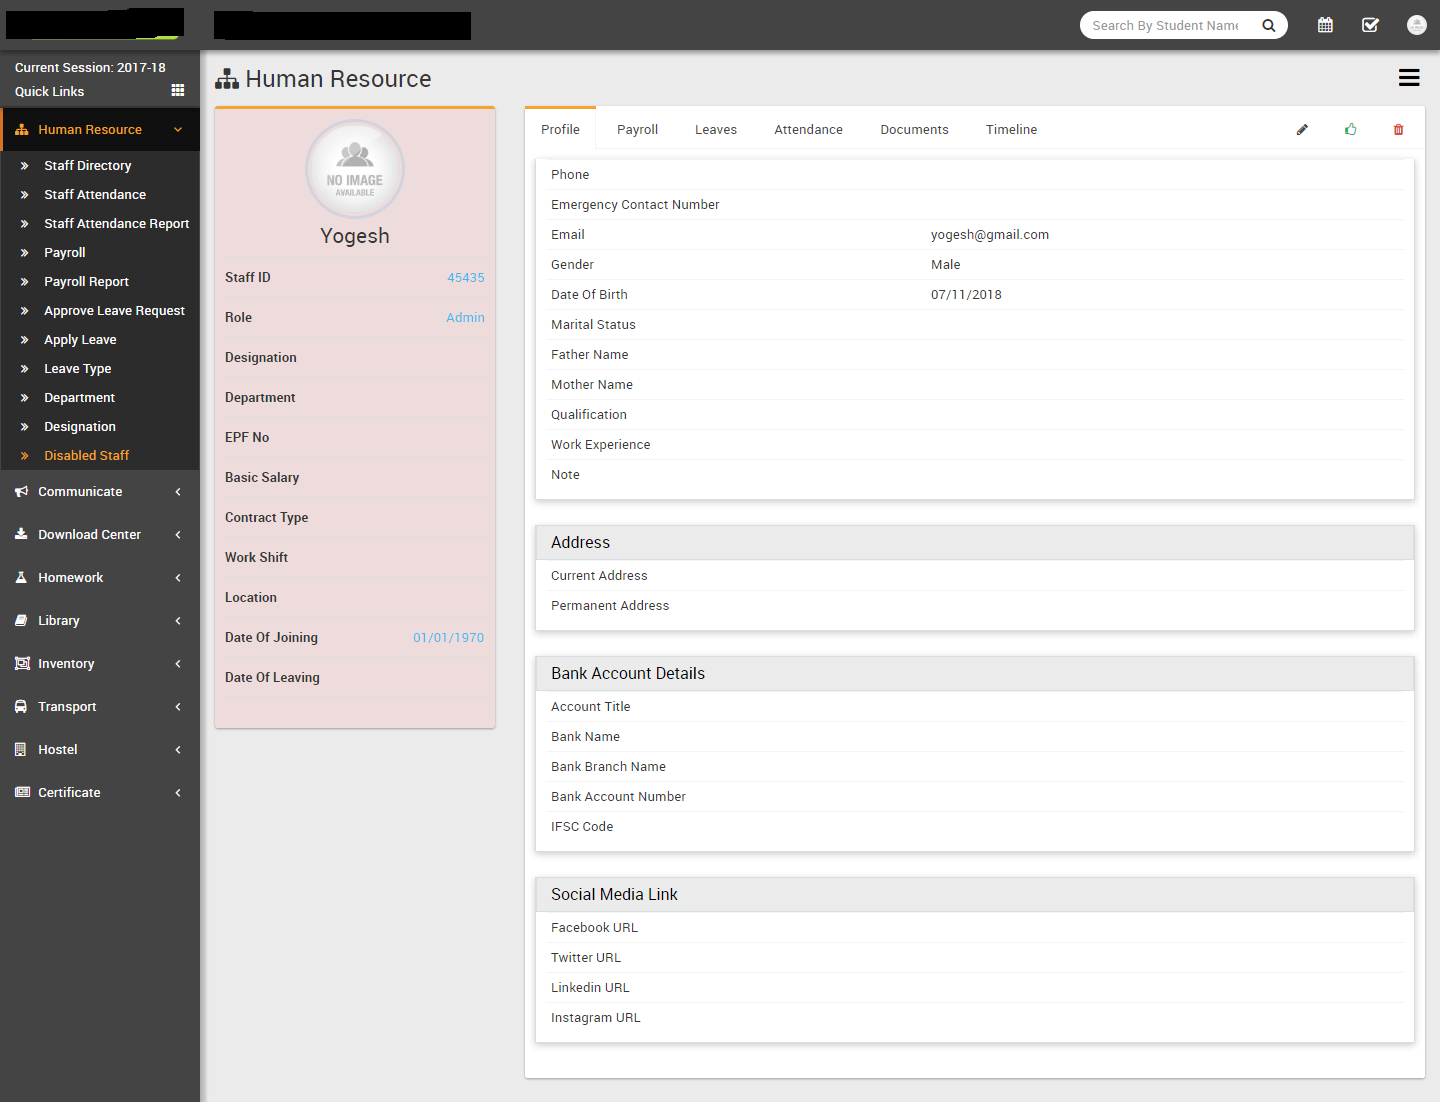
- Staff Directory- Go to Human Resource > Staff Directory
here you can search all active staff members. You can filter staff members by Role or search
by any keyword. You can also see staff directory in two views Card View or List View.

You can edit any staff by clicking on Edit button on Staff Card. To view staff details/profile click on View button present on staff card. Staff profile provides 360* view of staff including complete profile, payroll, payslip, allotted/apply/approved leaves, monthly/yearly attendance, uploaded documents and timeline. After staff retirement or reliving you can Disable staff from top right down hand red icon button. After disabling staff, staff profile is marked as red color in background and its login to Q Gurukul also being disabled. Disabled staff can be seen in Human Resource > Disabled Staff. You can also add staff leaving date and resignation letter from staff Edit. Staff can be deleted after disabling staff.
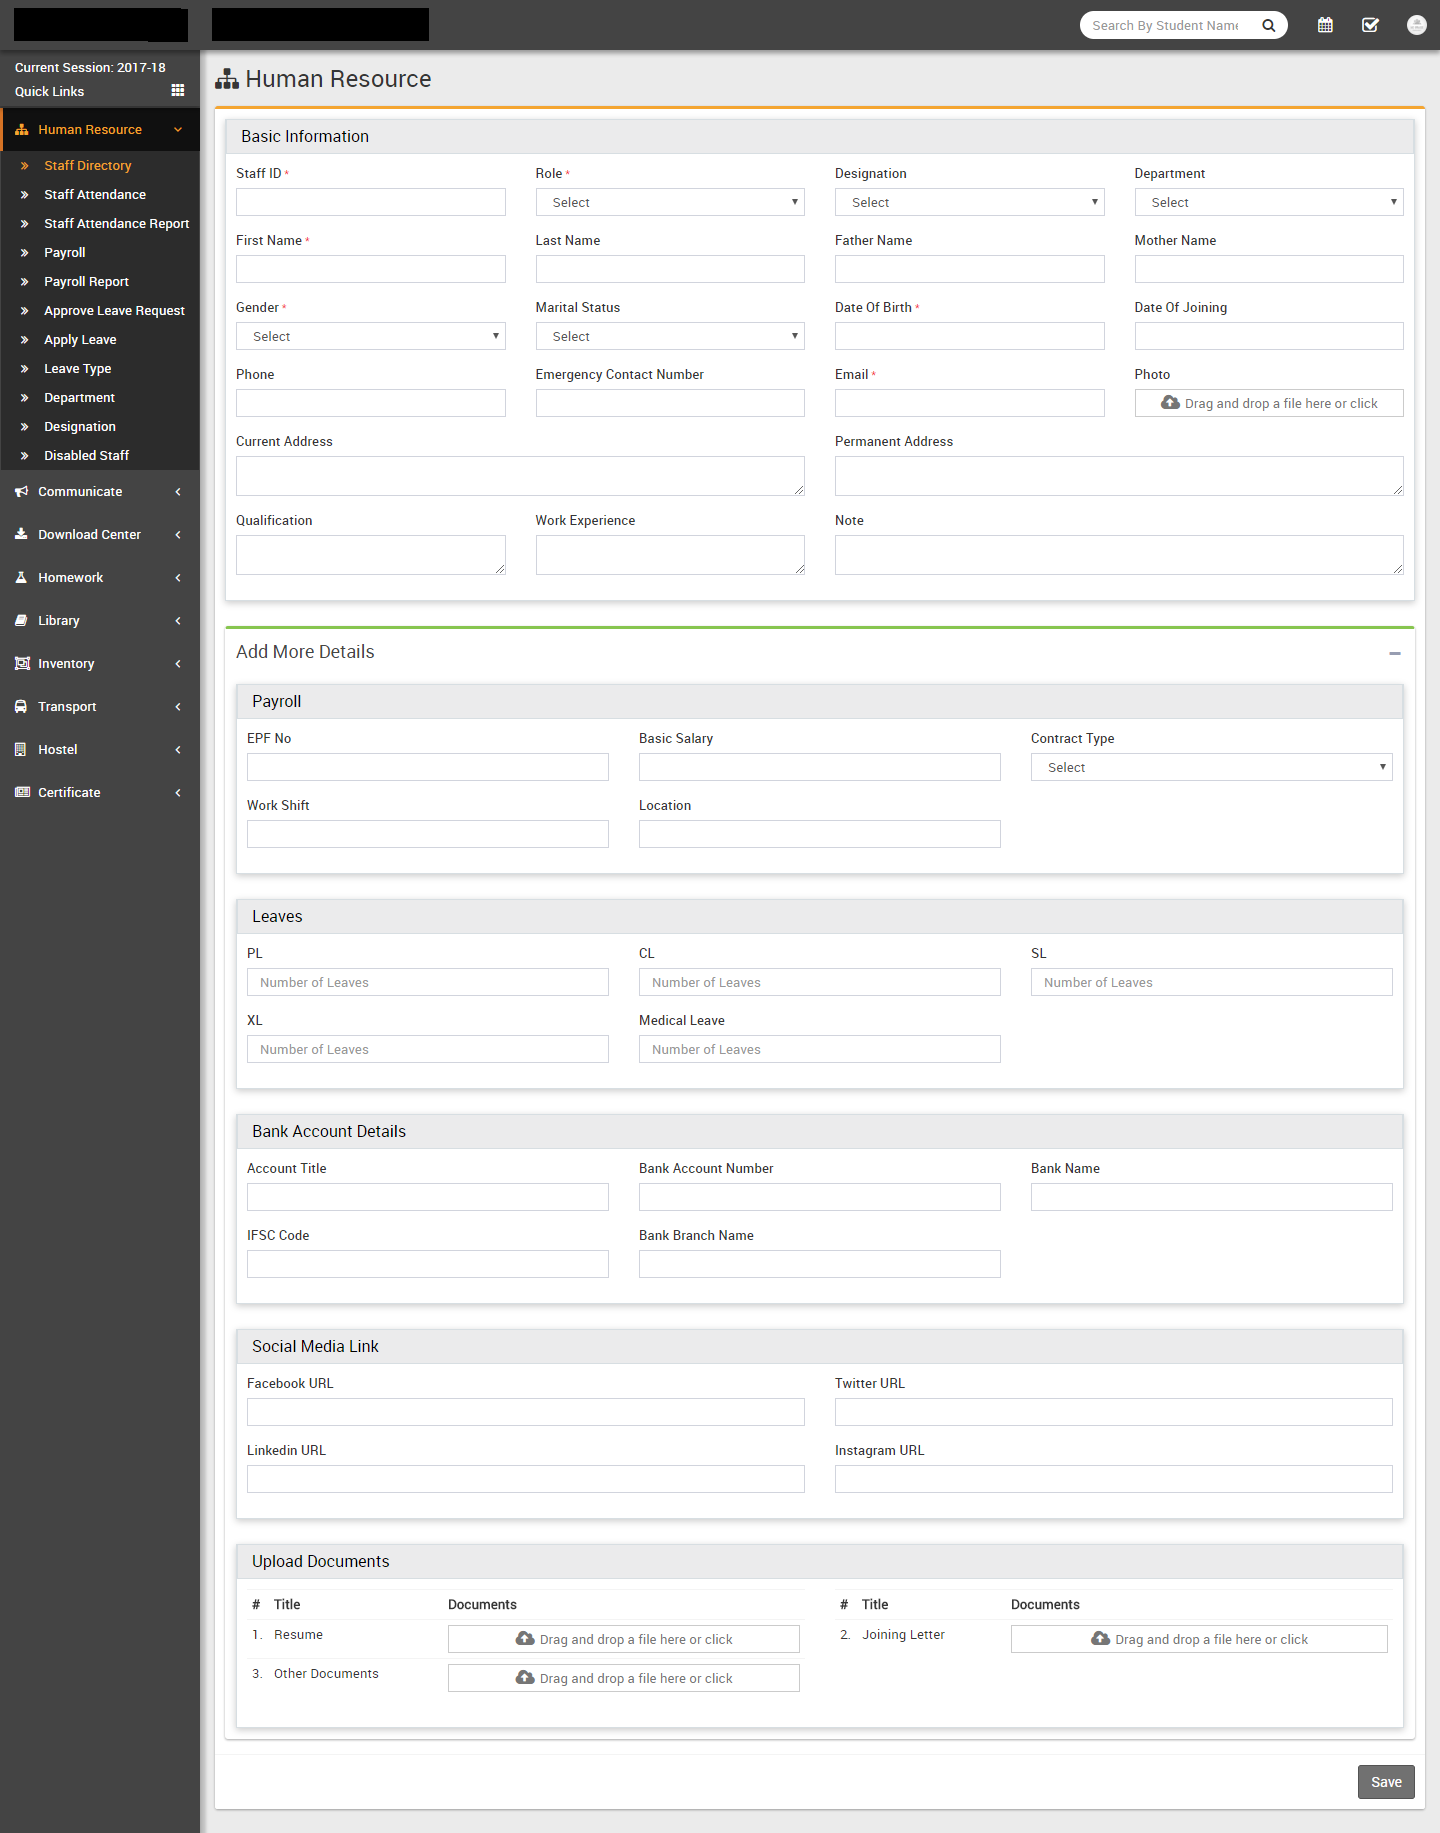
To add new staff member click on + Add Staff button from top right corner of this page. Enter Staff ID (if you want to use auto generation of staff id number then enable it from System Setting > General Setting), select Role (roles can be manage from System Settings > Roles Permission), Designation, Department, First Name, Last Name, Father Name, Mother Name, Gender, Marital Status, Date Of Birth, Date Of Joining, Phone, Emergency Contact Number, Email, Photo, Current Address, Permanent Address, Qualification, Work Experience, Note, EPF No (Employee Provident Fund Number), Basic Salary, Contract Type, Work Shift, Location, Number Of Leaves, Bank Account Title, Bank Account Number, Bank Name, IFSC Code, Bank Branch Name, Facebook URL, Twitter URL, LinkedIn URL, Instagram URL, Upload Resume, Joining Letter and Other Documents then click on Save button.
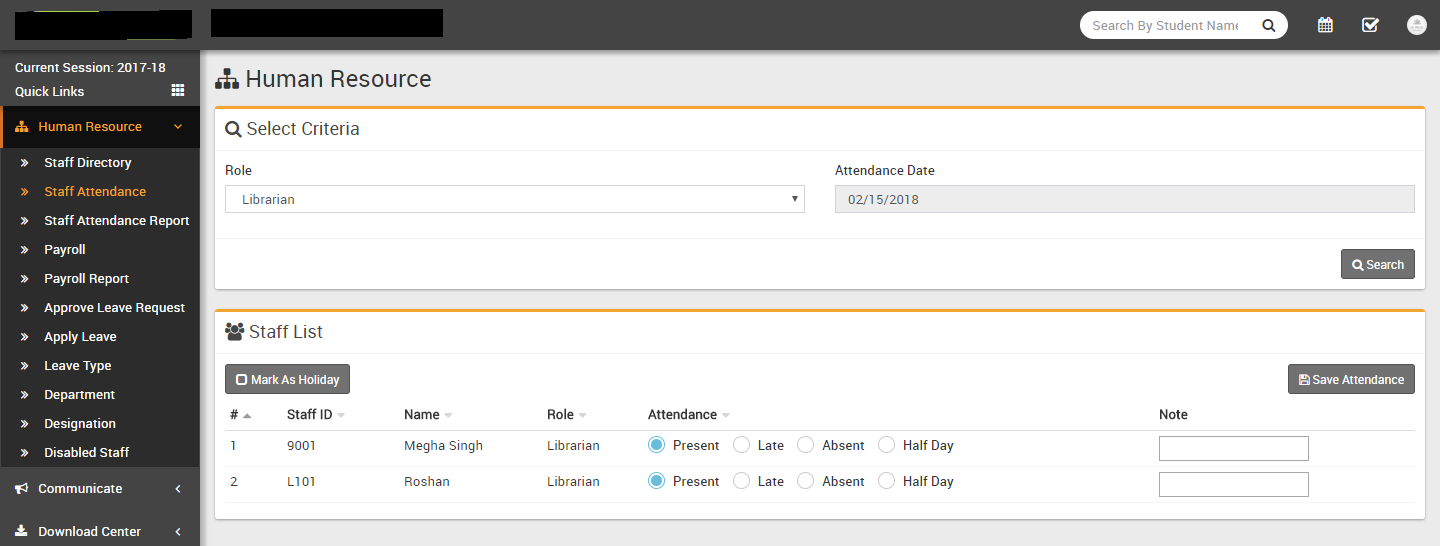
- Staff Attendance- Go to Human Resource > Staff Attendance
here you can record staff attendance (staff attendance currently does not have support for
biometric device attendance). Select Staff Role and Attendance
Date then click on Search button. Now can see staff list,
select attendance radio button for Present/Late/Absent/Half Day and enter
any Note then click on Save Attendance button to submit
attendance. If you mark selected date as Holiday then check button Mark As
Holiday. If attendance has been already submitted then you will get message of
"Attendance Already Submitted You Can Edit Record" in this case you can still edit exiting
attendance.
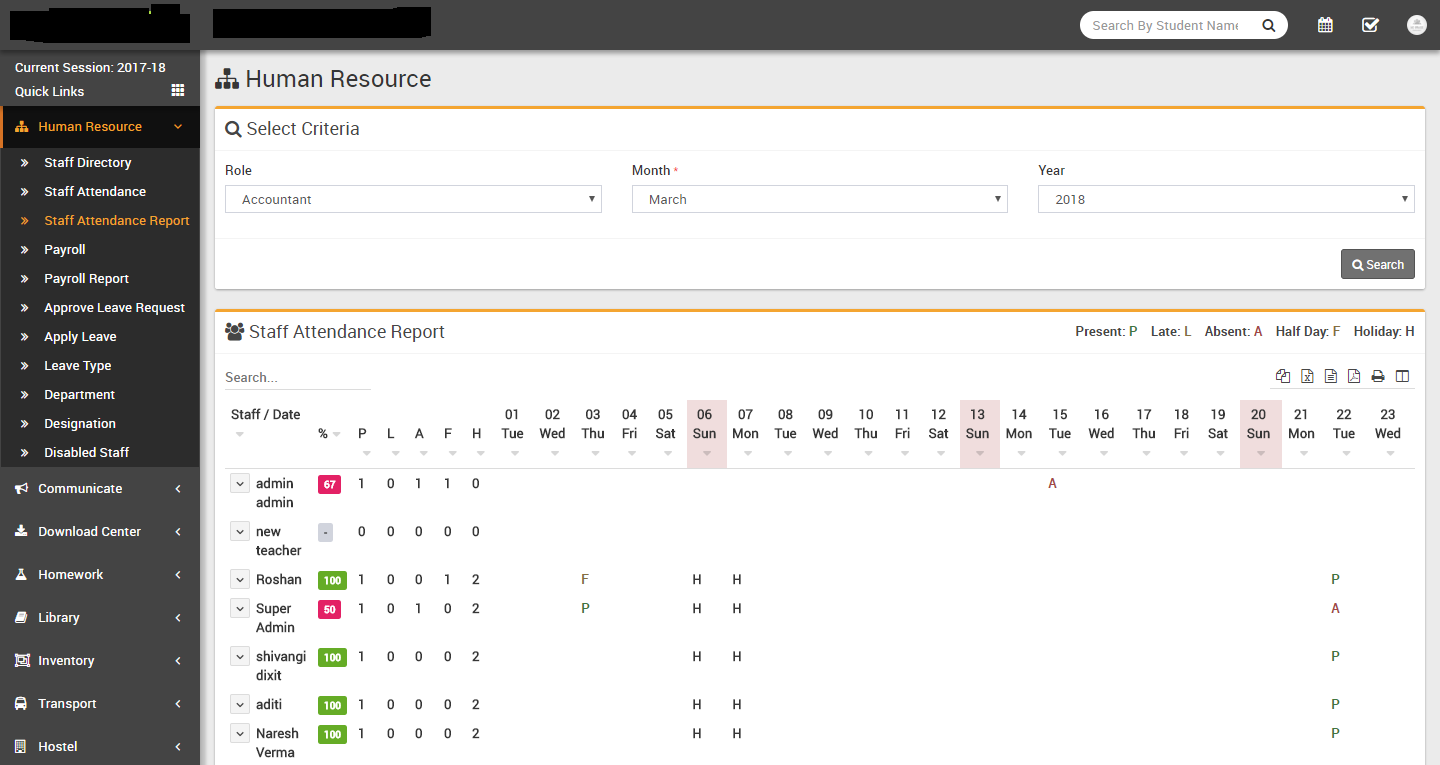
- Staff Attendance Report- Go to Human Resource > Staff Attendance
Report here you can check staff monthly report, Present/Late/Absent/Half
Day/Holiday, Gross Present % etc.
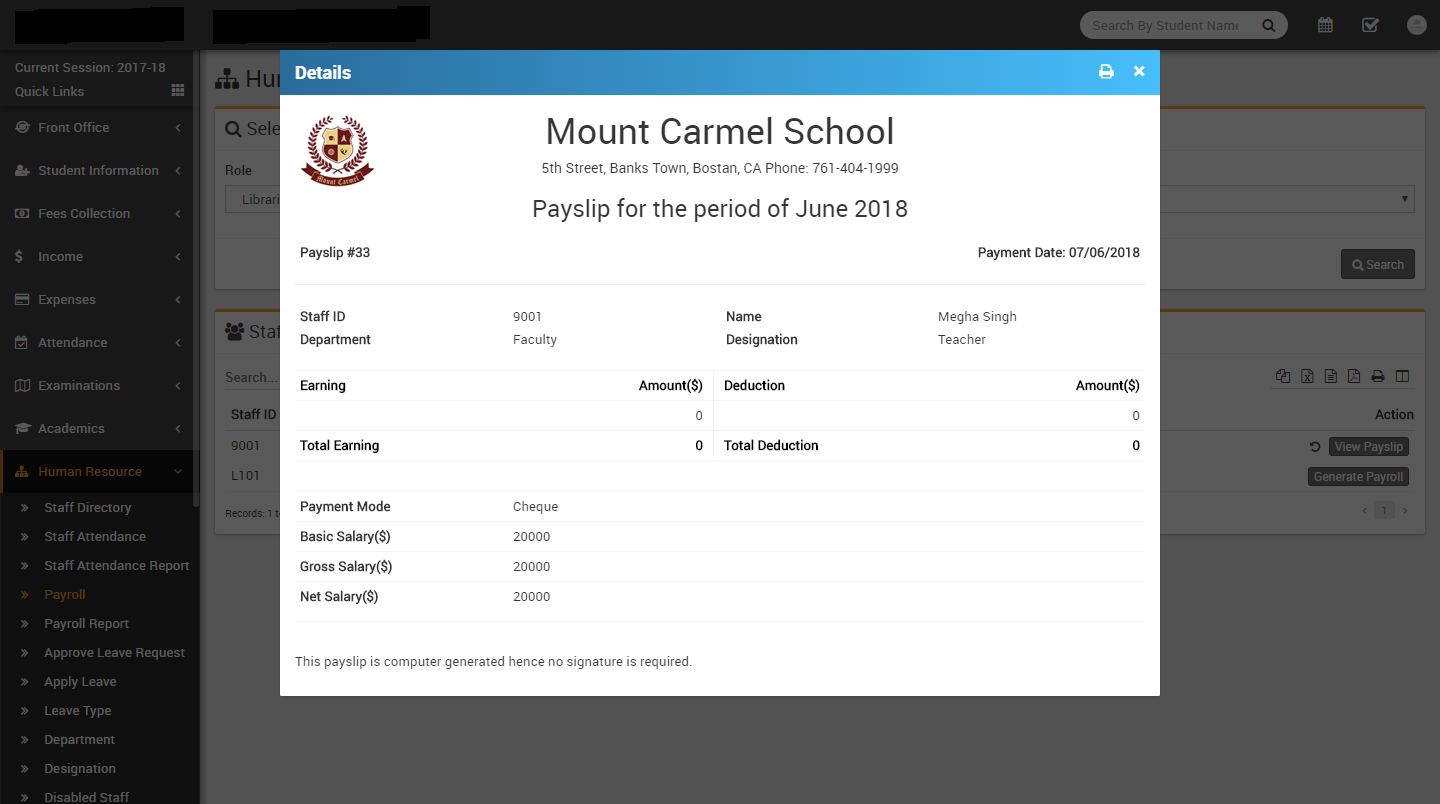
- Payroll- Go to Human Resource > Payroll here we will
generate monthly salary of staff members. Select Role, Month and
Year then click Search button to see staff members list
and their payroll status. Now you can see staff list, from Status column you can see current
salary status available option from Action column. Payroll has three status
Not Generated -> Generated -> Paid. If status is Not Generated then you can see Generate
Payroll button, if status is Generated then you can see Proceed To Pay button and if status
is Paid then you can see View Payslip button in Action column. If status is Generated or
Paid then you can revert this status in previous status.
Now click on Generate Payroll button from Action column. At this page you can see staff profile, attendance, approve leaves details. In earning column add earning Type and Amount then in deduction column enter deduction Type and Amount (from top right corner Attendance section you can check this month all attendance and approve details based on this you can calculate deduction for this staff) then in Payroll Summary column enter any tax if applied then finally click on Calculate button to calculate Net Salary amount then click on Save button to save this salary generation.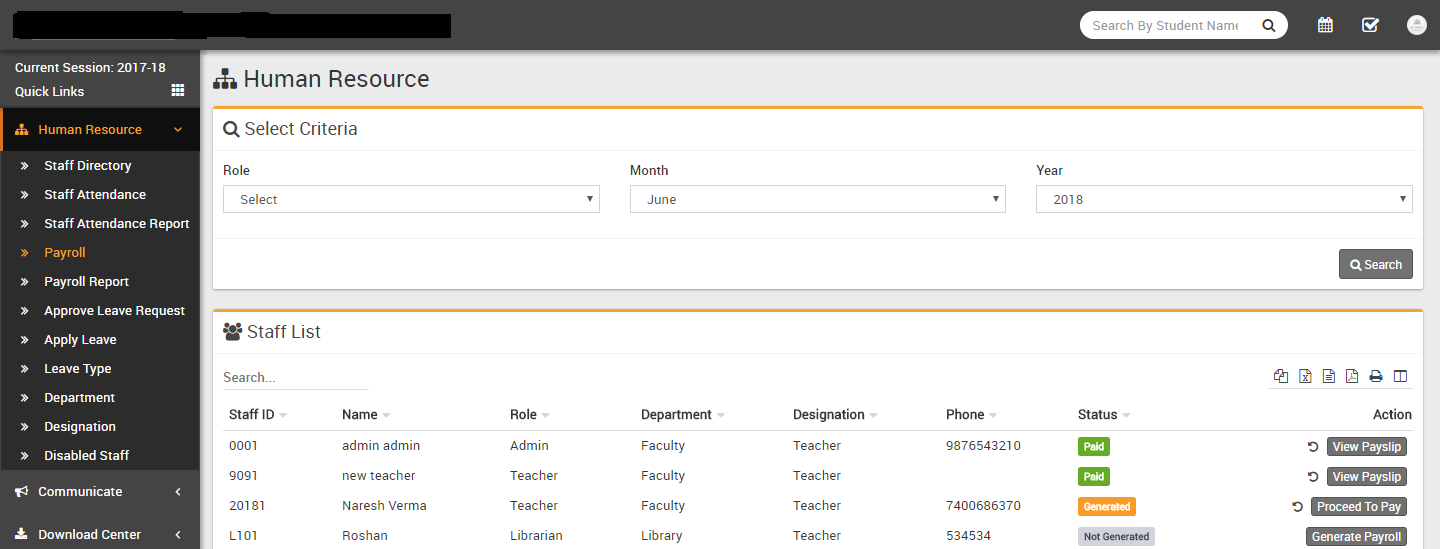
Now come again on payroll page and check this staff payroll status for same month now it should be Generated and in Action column Proceed To Pay button should be visible. Here click on Proceed To Pay button to pay generated salary to this staff. Now at Proceed To Pay modal popup window you can Staff, Net Payment Amount, Month-Year, select Payment mode through which you are paying salary, Payment Date, and Note then click on Save button.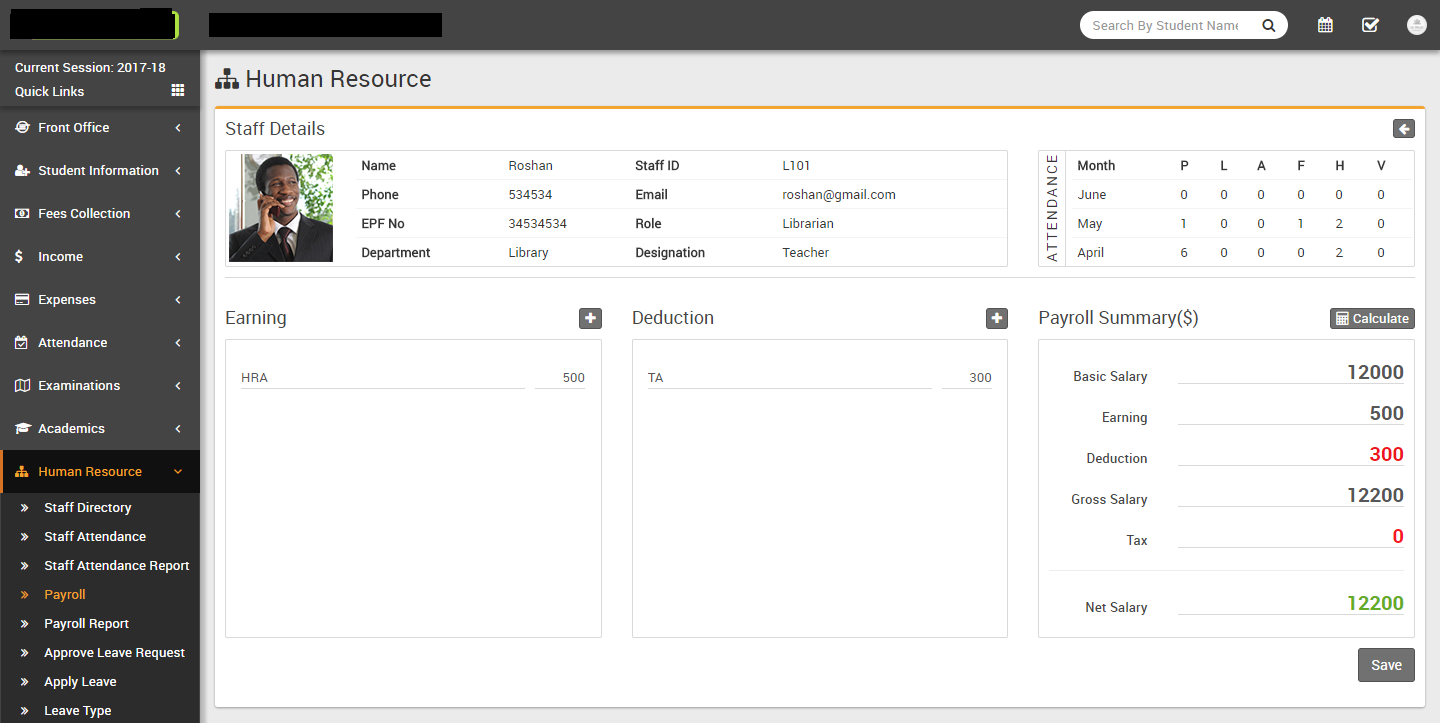
Now come again on payroll page and check this staff payroll status for the same month now it should be Paid and in Action column View Payslip button should be visible. Here click on View Payslip button to see and print payslip.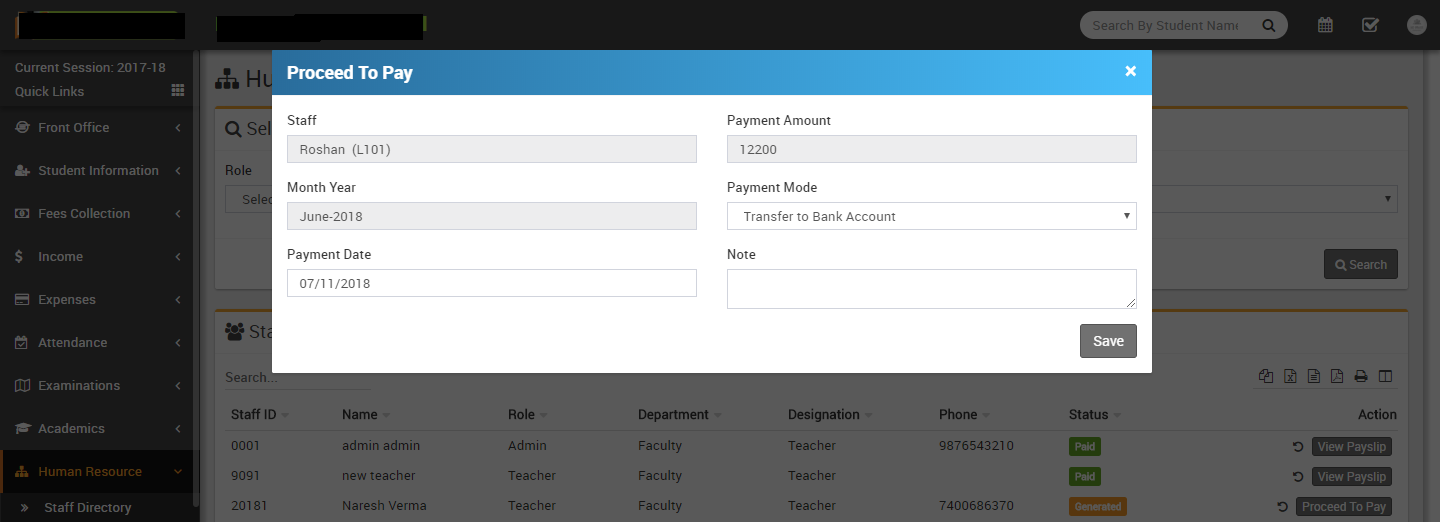
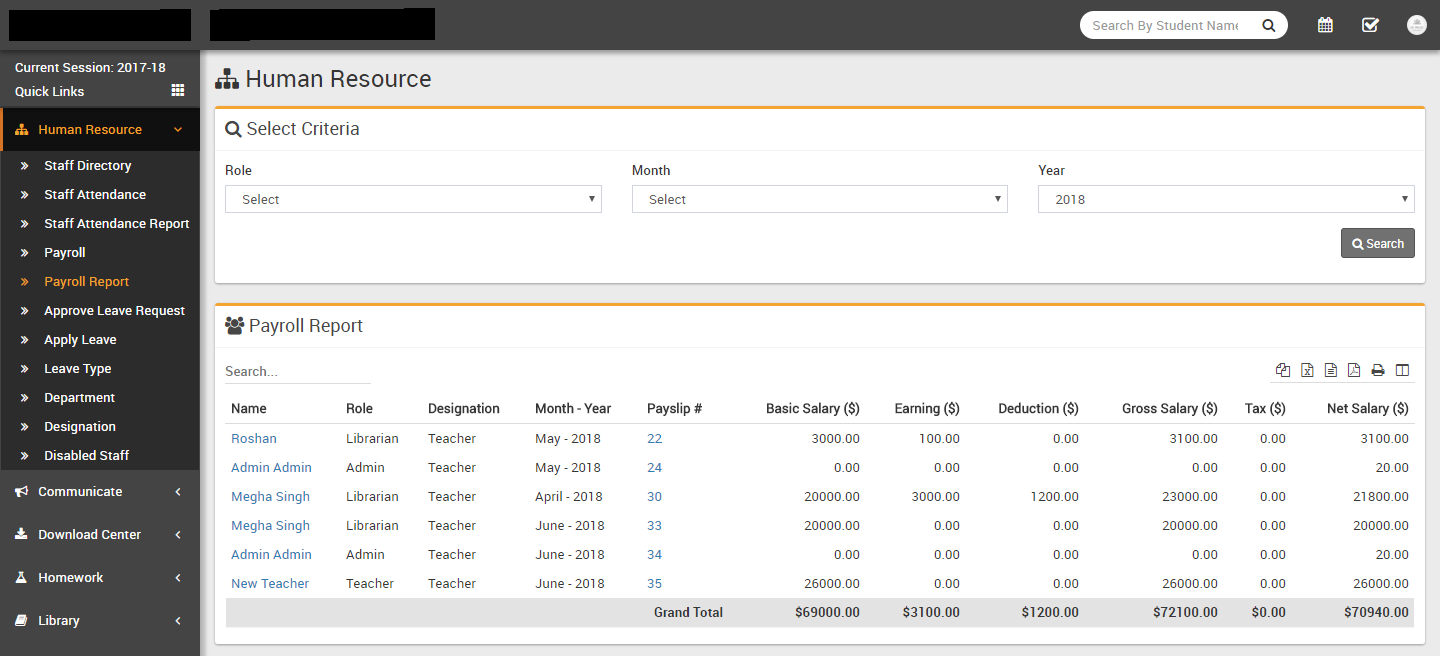
- Payroll Report- Go to Human Resource > Payroll Report here
we will check payroll report. Select Role, Month and Year
then click on Search.
- Approve Leave Request- Go to Human Resource > Approve Leave
Request here you can view, approve or manually submit staff leave request.
Click on View icon button from Action column to see
details of applied leave request. Now at this modal popup window you can see details of
leave request and change its status to Approve/Disapprove/Pending then
enter any Note then click on Save button.
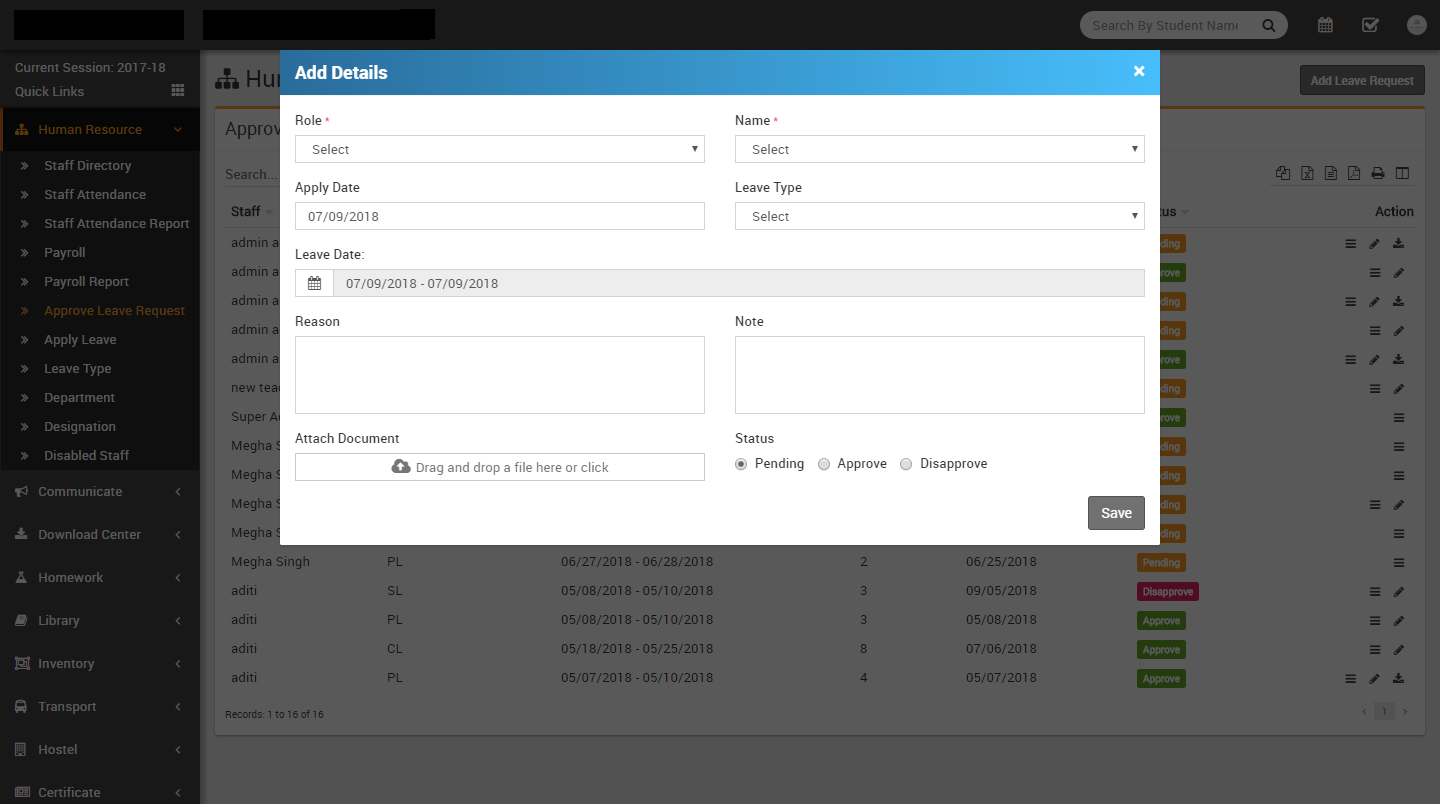
To add leave request manually click on Add Leave Request button from top right corner. Here select Role, Staff Name, Apply Date, Leave Type, Leave Date, reason, Note, Attach Document and Status of leave request then click on Save button.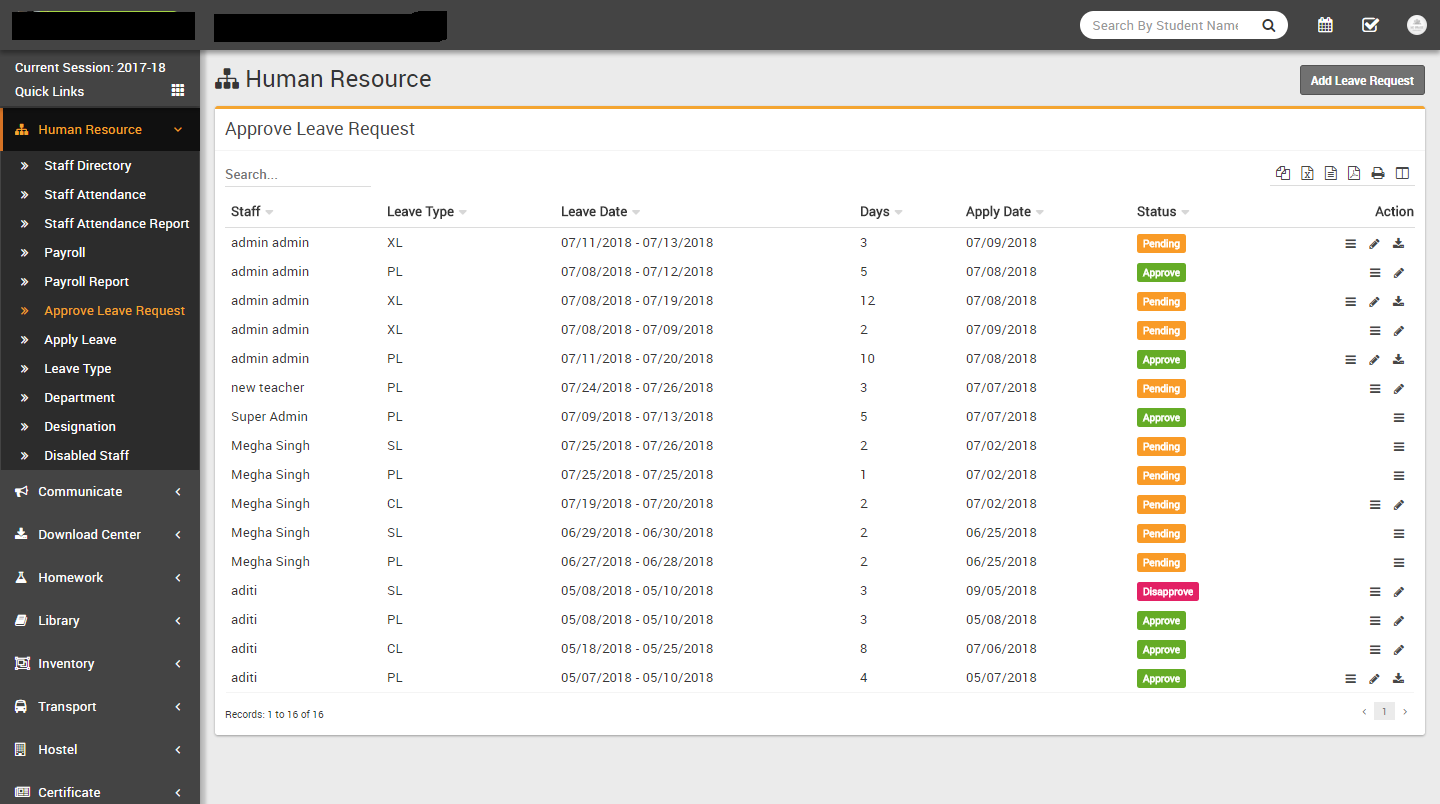
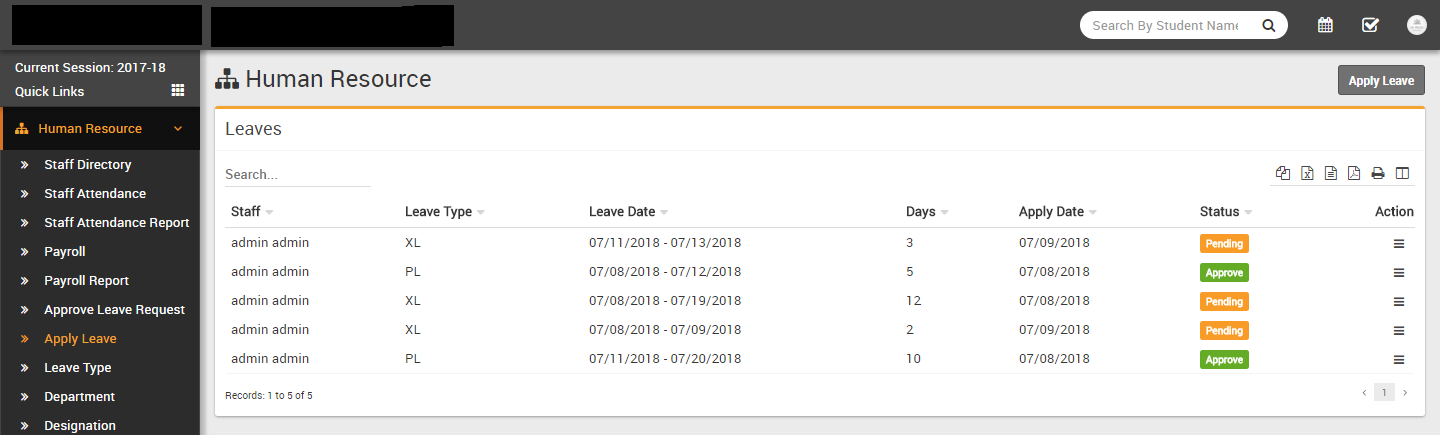
- Apply Leave- Go to Human Resource > Apply Leave here
logged in staff user can apply/view leave request for his own only. To view applied leaves
click on View icon button from Action column. To apply
leave click on Apply Leave button from top right corner.
- Teachers Rating- Go to Human Resource > Teachers Rating
here you can see teachers rating and reviews submitted by students. Ratings needs approval,
to approve rating click on Approve button. To display ratings on teachers profile page at
least 3 ratings required.

- Disabled Staff- Go to Human Resource > Disabled Staff here
you can see all Disabled Staff. Click on any staff to see his/her profile. At profile page
you can see Delete Staff button, by deleting staff all profile data will be
deleted. To Enable any Disabled staff click on green color hands up icon button.
Communicate
This module has 4 sections -
- Notice Board
- Send Email
- Send SMS
- Email / SMS Log
We will send messages through Notice Board or Email / SMS and then sent messages can be check at Notice Board or Email / SMS Log
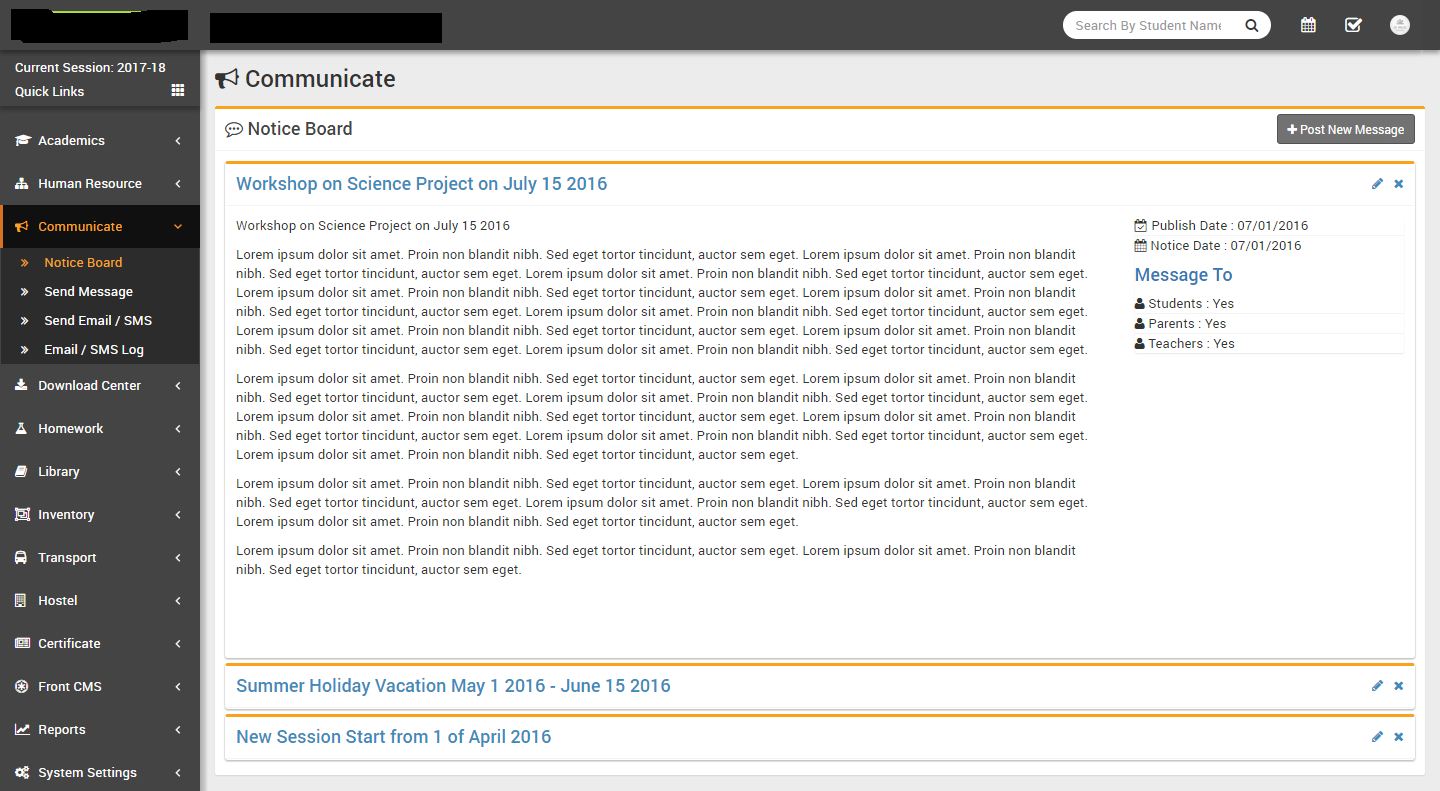
- Notice Board- Go to Communicate > Notice Board here you
can see all the posted messages. To send new message click on Post New Message button then
enter
Message Title, Message, Notice Date,
Publish Date, Message To & click Save
button. Note that, Notice Date is the date at which notice is being post & Publish Date is
the date at which notice is being visible to Staff, Students & Parents.
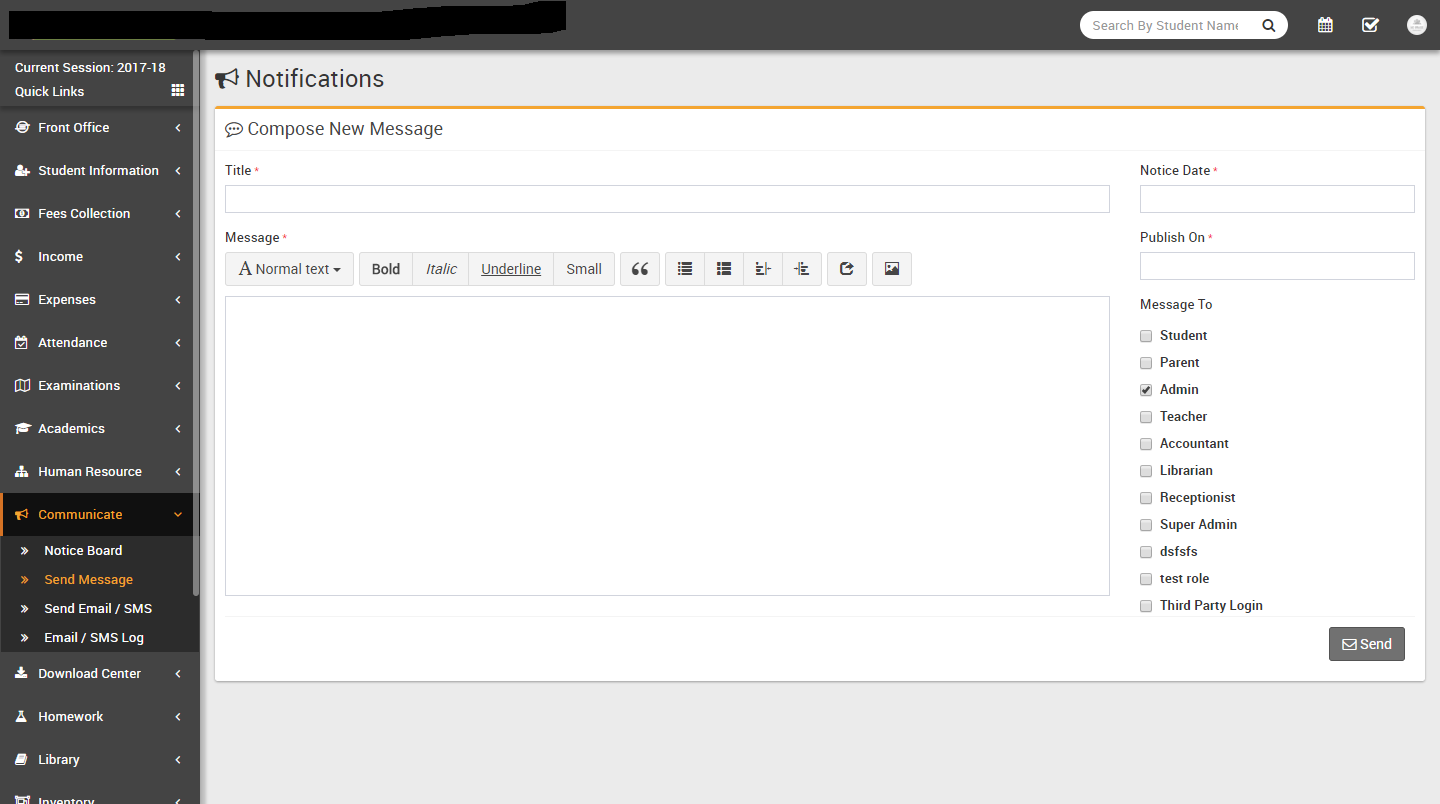
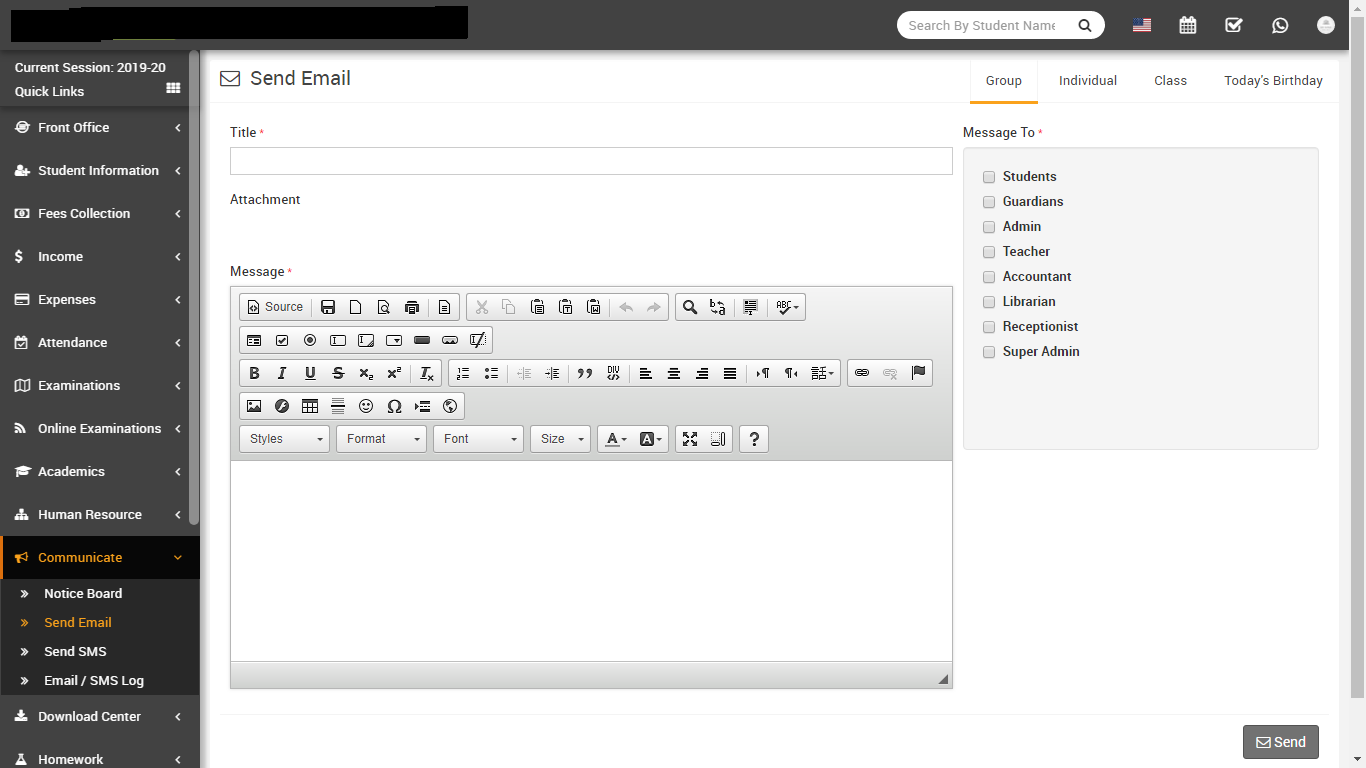
- Send Email- Go to Communicate > Send Email at this page
four are three tabs Group, Individual, Class and
Today's Birthday
to select which users group you want to send email.
Open Group tab to send email to all Students, Guardians and Staff enter message Title , then enter Message then select all those users groups (Students, Guardians and Staff) you want to send this Email then click to Send button.
Open Individual tab to send email to individually selected Students, Guardians and Staff.

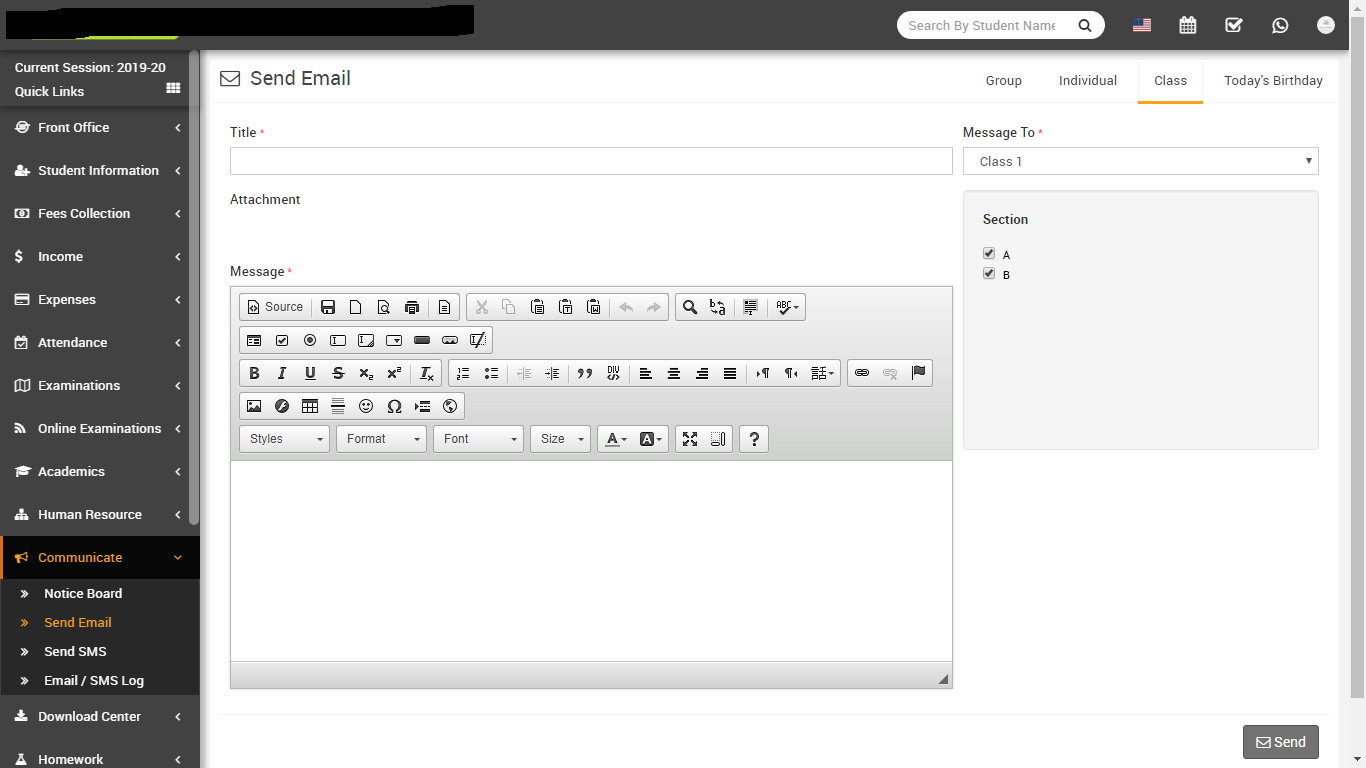
Open Class tab to send email to all students under selected Class-Section.
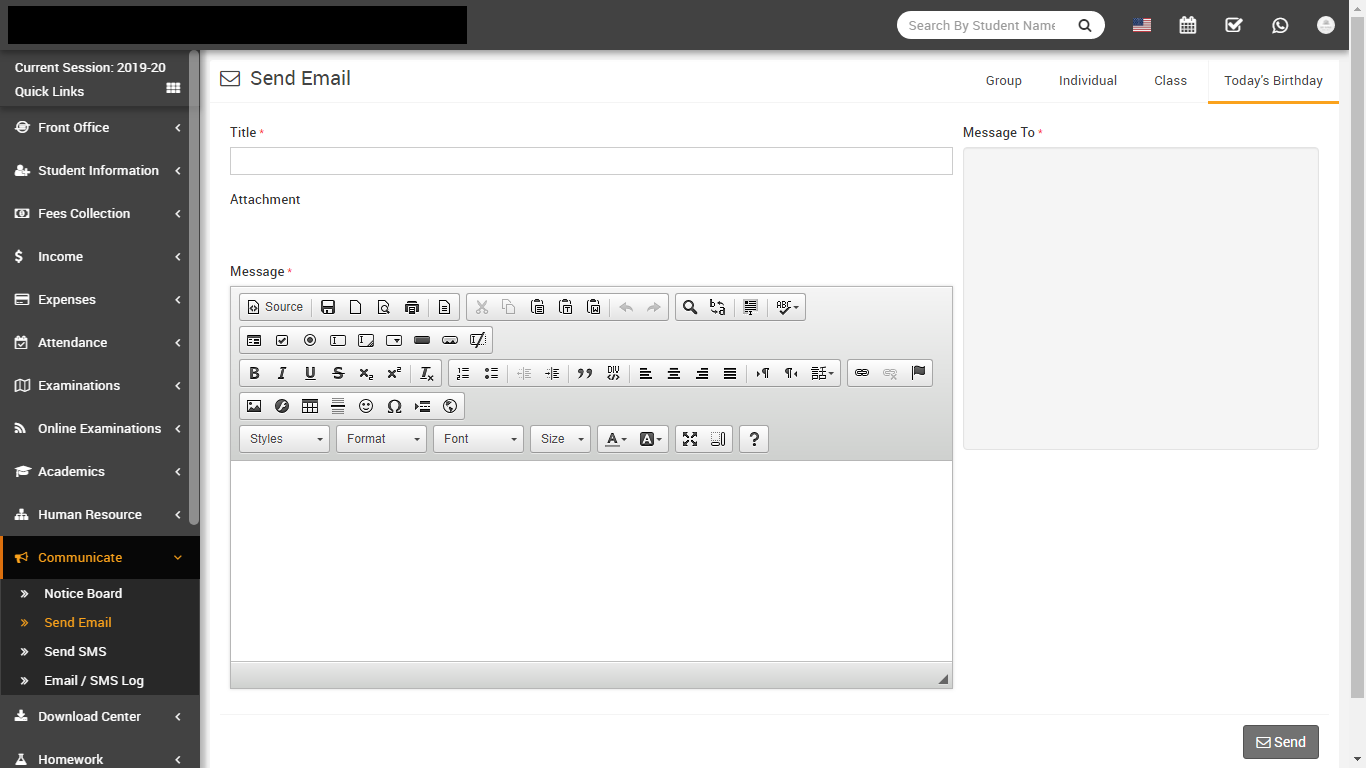
Open Today's Birthday tab to send email to all students who has birthday today.
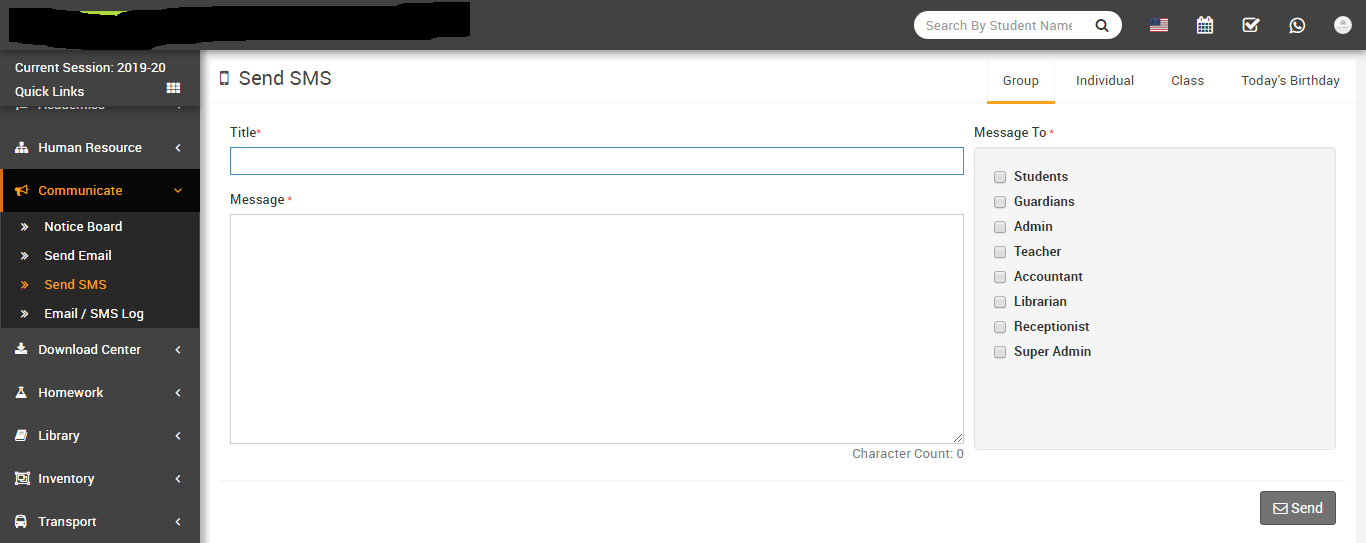
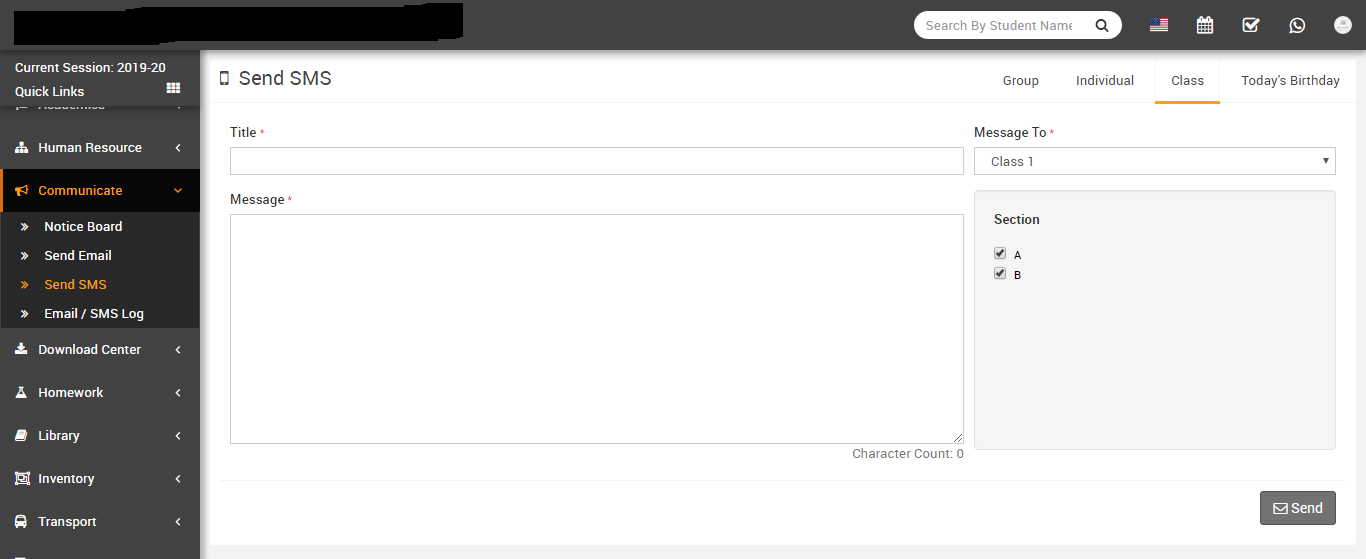
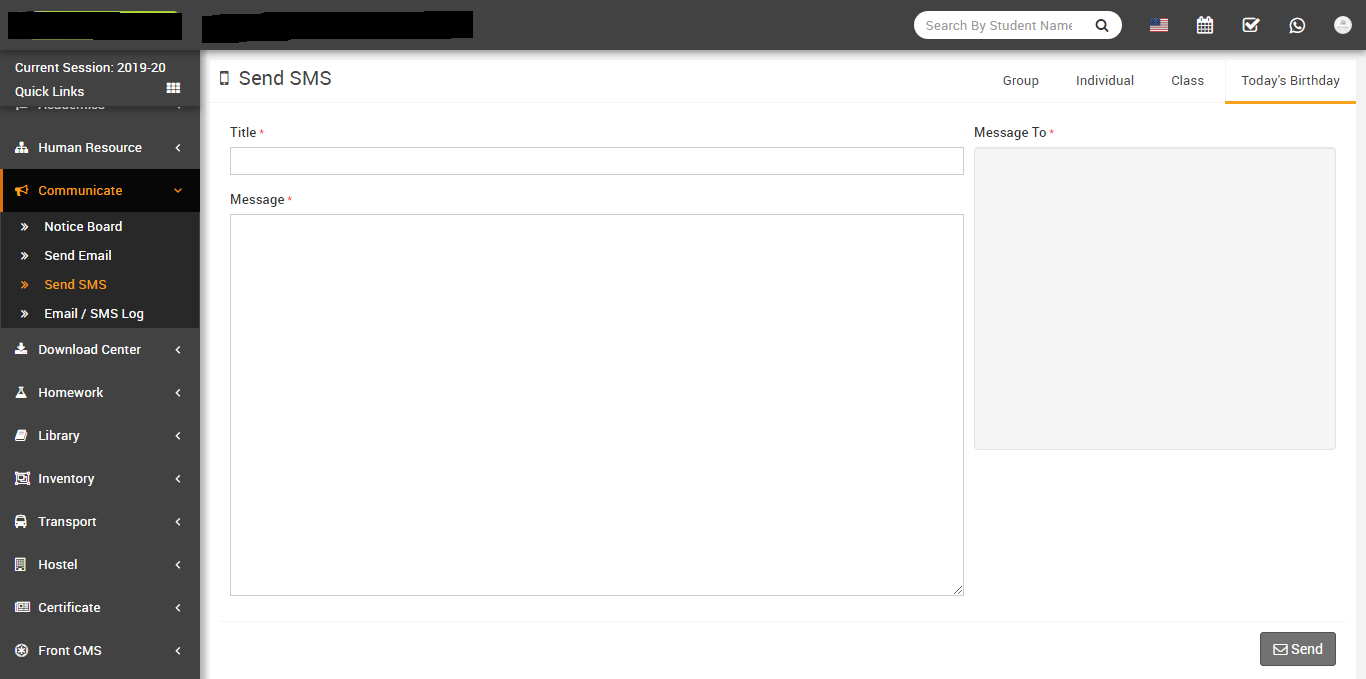
- Send SMS- Go to Communicate > Send SMS at this page there
are four tabs Group, Individual, Classand Today's
Birthday
to select which users group you want to send SMS.
Open Group tab to send SMS to all Students, Guardians and Staff enter message Title , then enter Message then select all those users groups (Students, Guardians and Staff) you want to send this SMS then click to Send button.
Open Individual tab to send SMS to individually selected Students, Guardians and Staff.
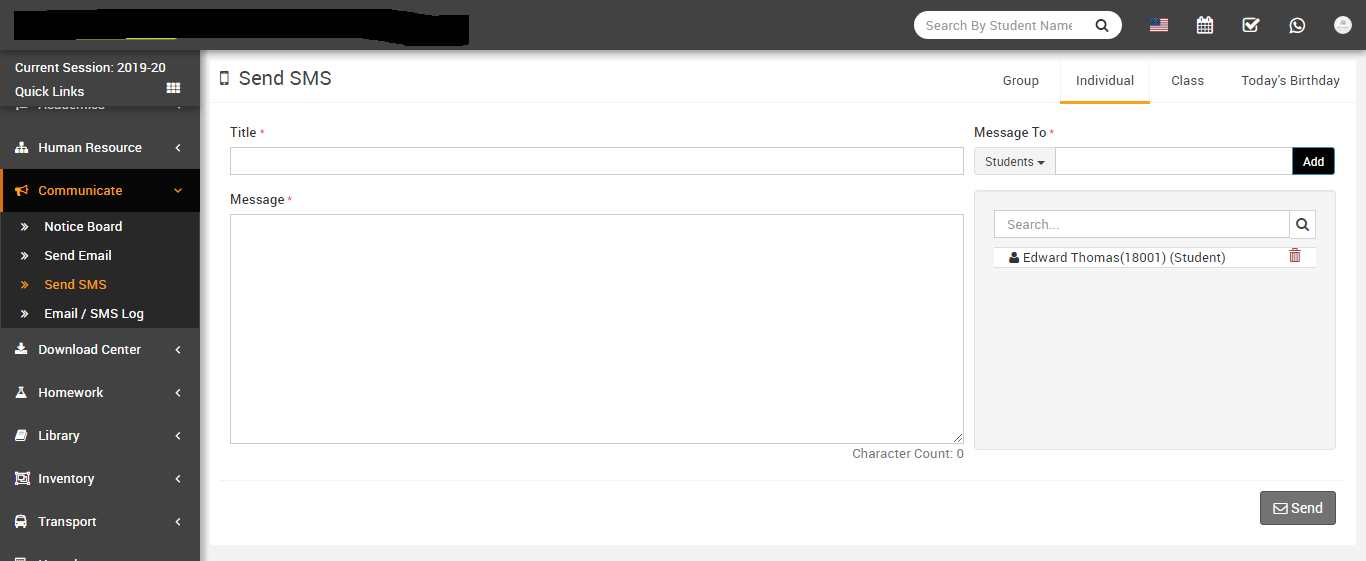
Open Class tab to send SMS to all students under selected Class-Section.
Open Today's Birthday tab to send SMS to all students who has birthday today.
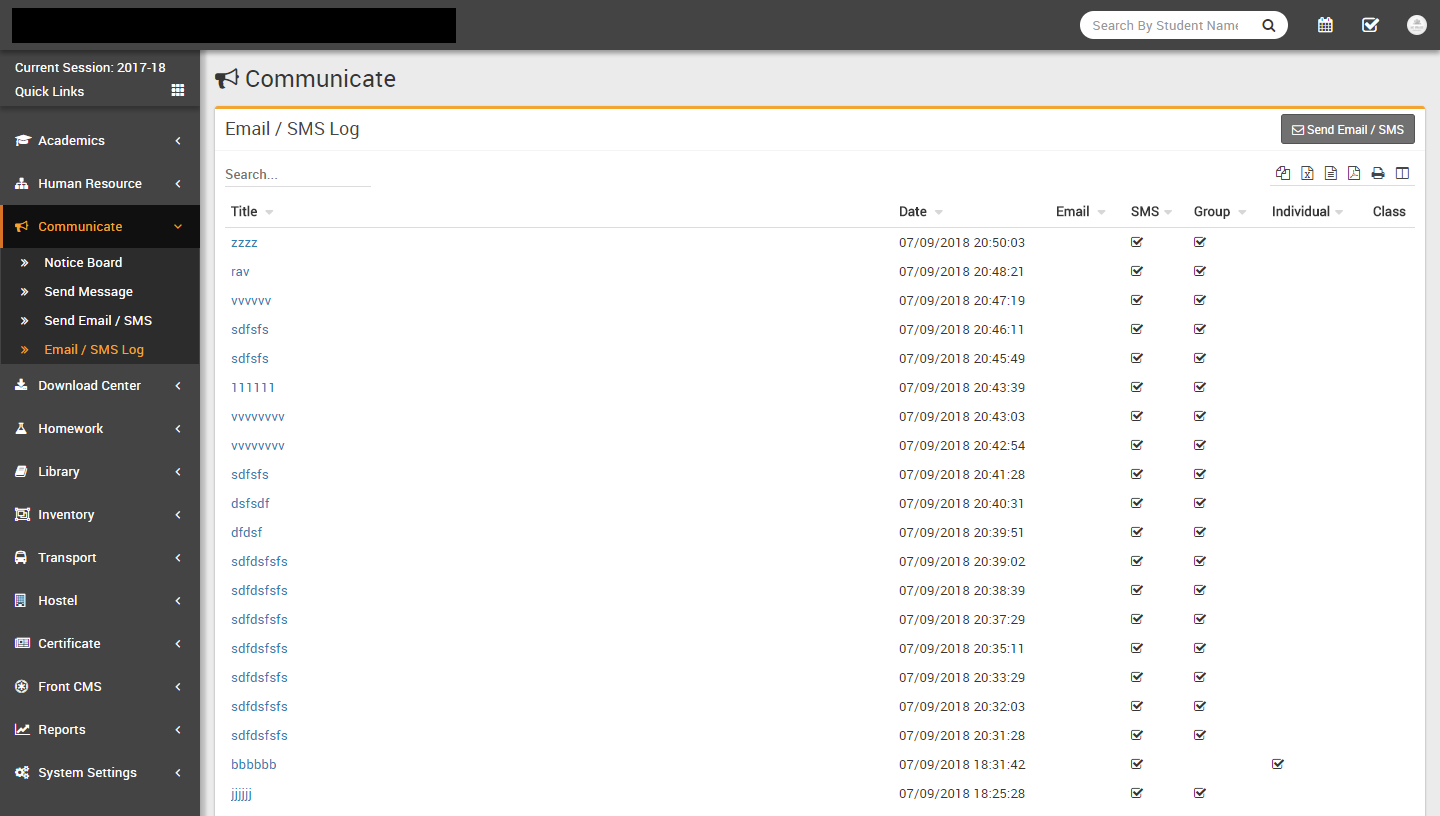
- Email / SMS Log- Go to Communicate > Email / SMS Log here
you can see all the email / sms sent through Send Email / SMS.
Download Center
This module has 5 sections -
- Upload Content
- Assignments
- Study Material
- Syllabus
- Other Downloads
In Download Center we will upload all content from Upload Content section under four content types Assignments, Study Material, Syllabus, Other Download & rest of four sections are used for viewing uploaded content under these content types.
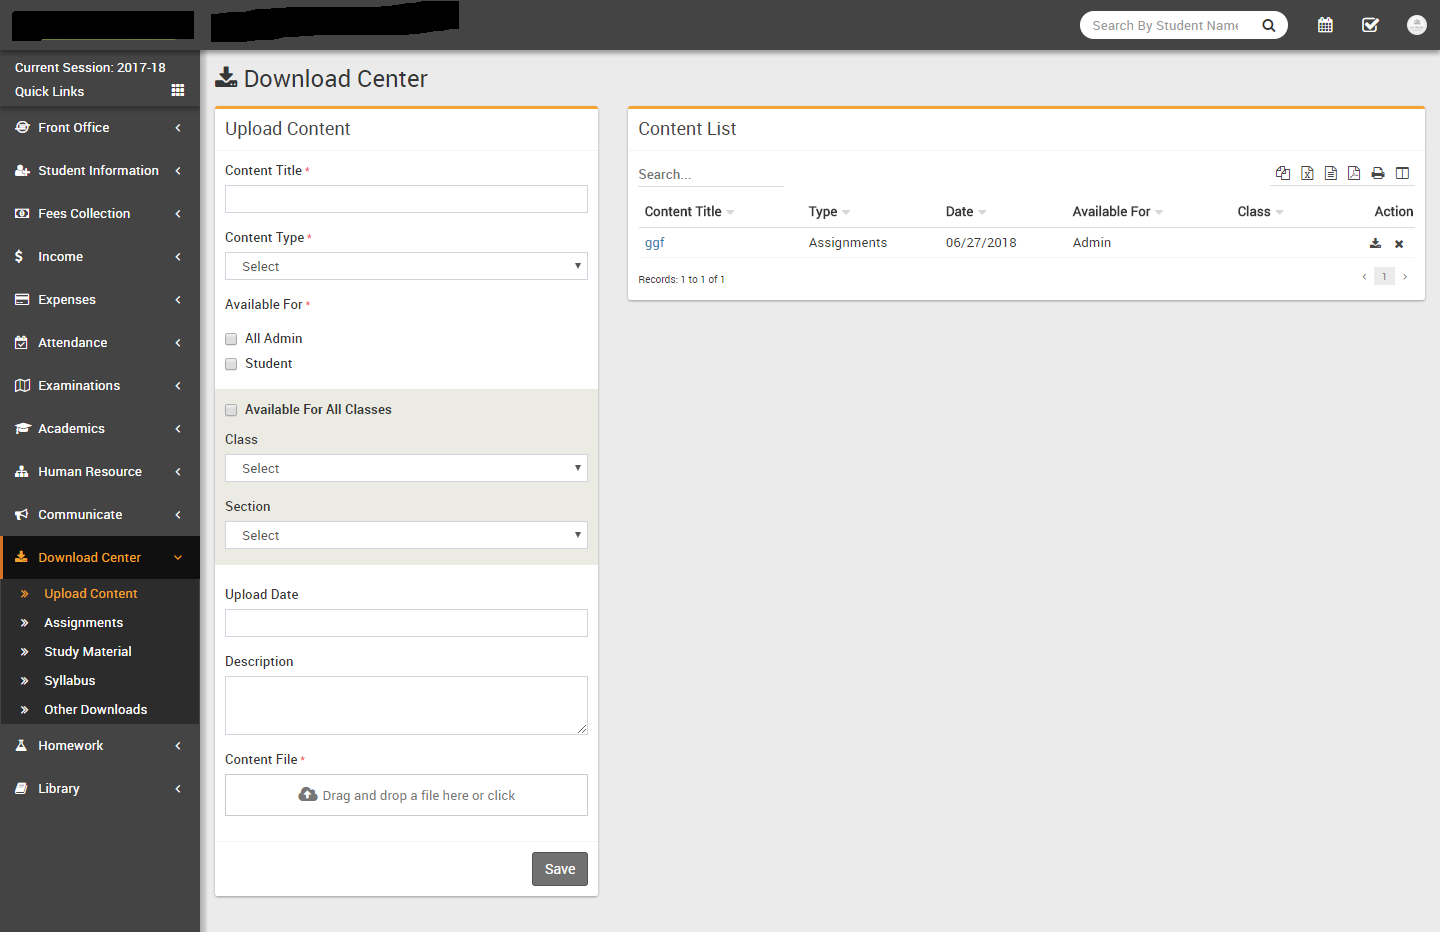
- Upload Content- Go to Download Center > Upload Content
enter
Content Title, Content Type, Available For,
Class,
Upload Date, Description, Select
File & click Save button. Recently uploaded 10 contents can be
see right side at this page. You can download content by clicking
Download button in action column.
- Assignments- Go to Download Center > Assignments all the content uploaded under Assignments content type can be see at this page.
- Study Material- Go to Download Center > Study Material all the content uploaded under Study Material content type can be see at this page.
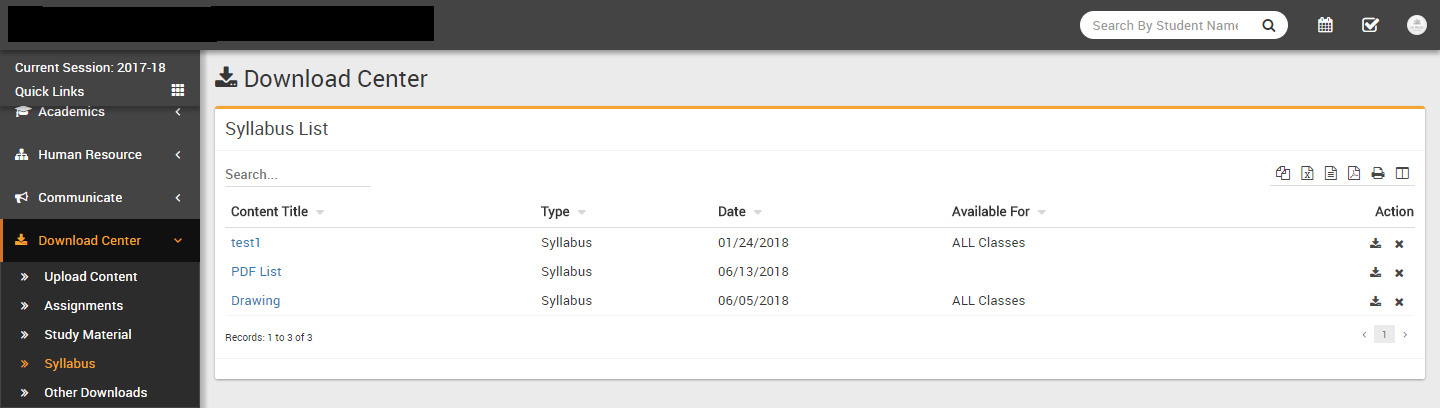
- Syllabus- Go to Download Center > Syllabus all the content
uploaded under Syllabus content type can be see at this page.
- Other Downloads- Go to Download Center > Other Downloads all the content uploaded under Other Downloads content type can be see at this page.
Homework
This module has 1 sections -
- Add Homework
Here Teachers can create Homework for their Class-Section. After creating homework teachers can evaluate homework for class-section students that who has completed homework or not completed. First we will Add Homework then we will evaluate homework.
- Homework- Go to Homework > Add Homework Here you can see
all previously created homework and search them different criteria.
To add new Homework click on + Add button to open Add Homework modal window. Here enter Class, Section, Subject Group, Subject, Homework Date, Submission Date, Attach Document and Description then click on Save button.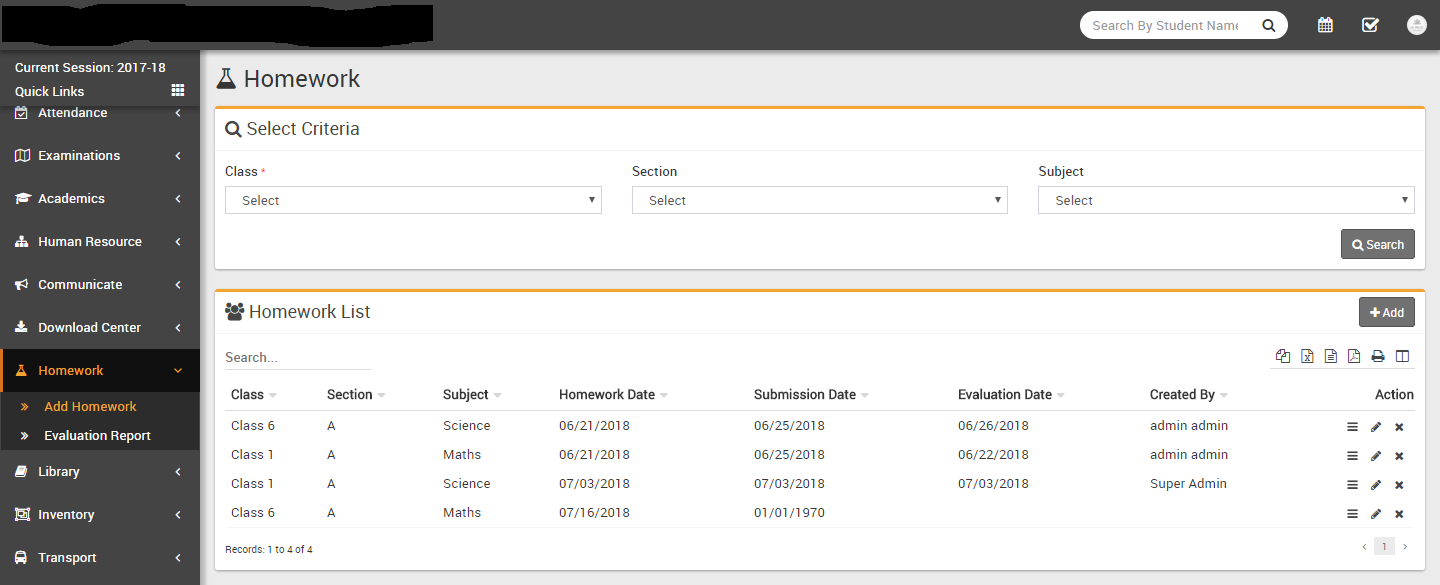
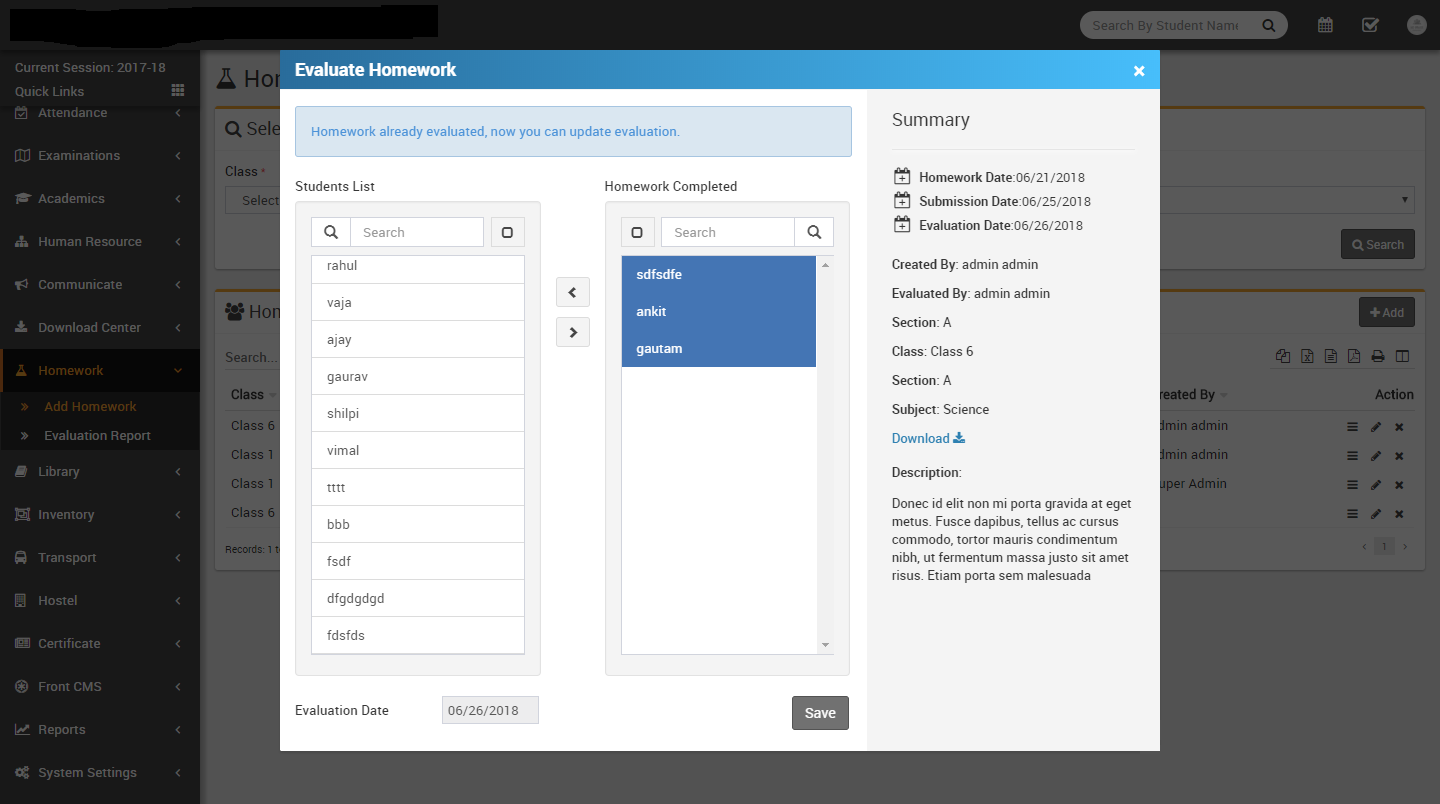
To evaluate homework click on View button from Action column to open Evaluate homework modal window. Here from left Student List select student who has completed this homework and move them to Homework Completed List then select Evaluation Date then click on Save button.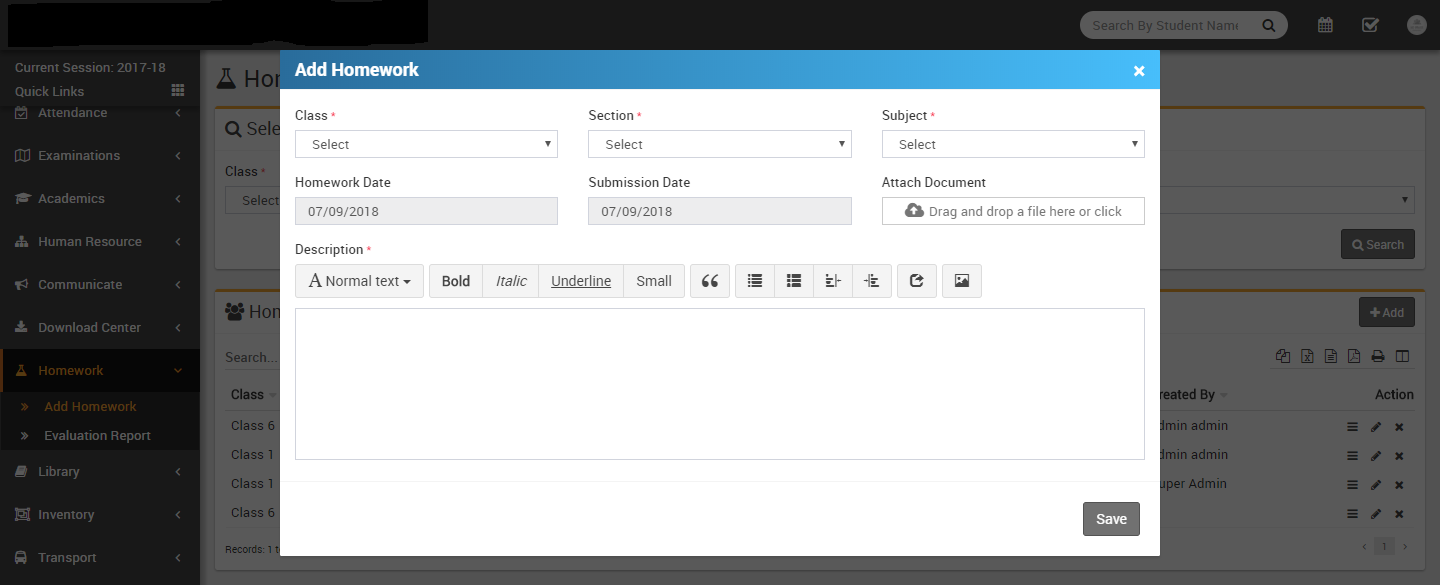
Library
This module has 4 sections -
- Book list
- Issue Return
- Add Student
- Add Staff Member
First we will Add Books in library then view & search books in Book List.
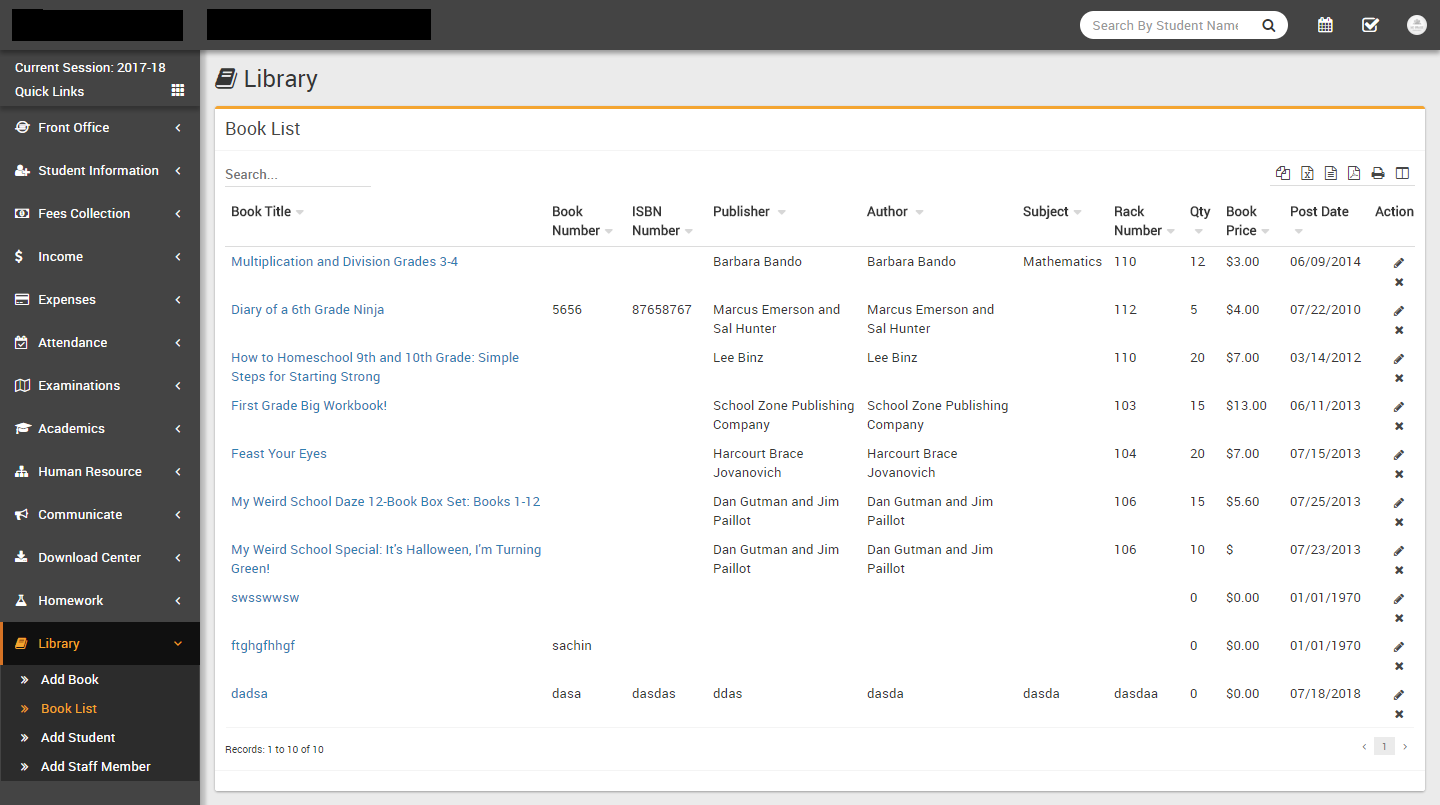
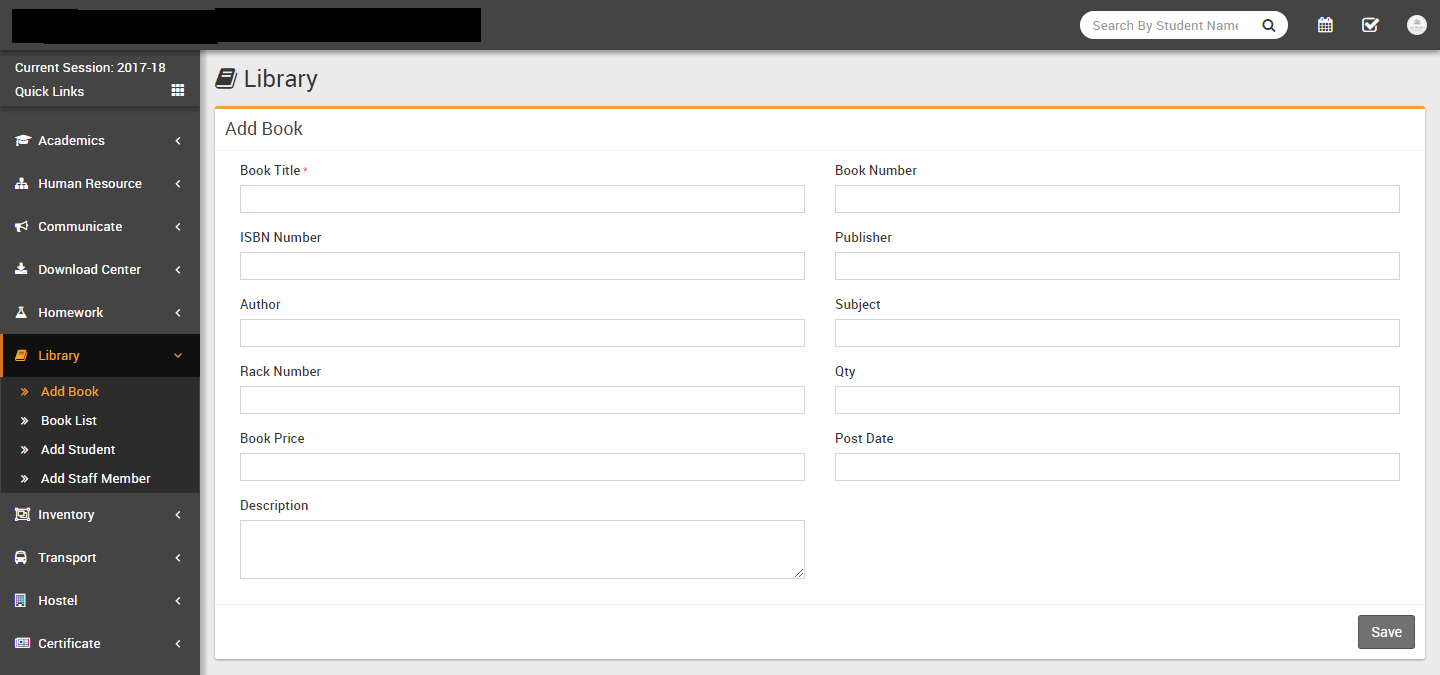
- Book List- Go to Library > Book List all the books in
library can be view and search at this page. To add book click on Add Book
button then at next page enter
Book Title, Book No, ISBN No,
Publisher, Author,
Subject, Rack No, QTY,
Book Price, Inward Date, Description &
click
Save button.
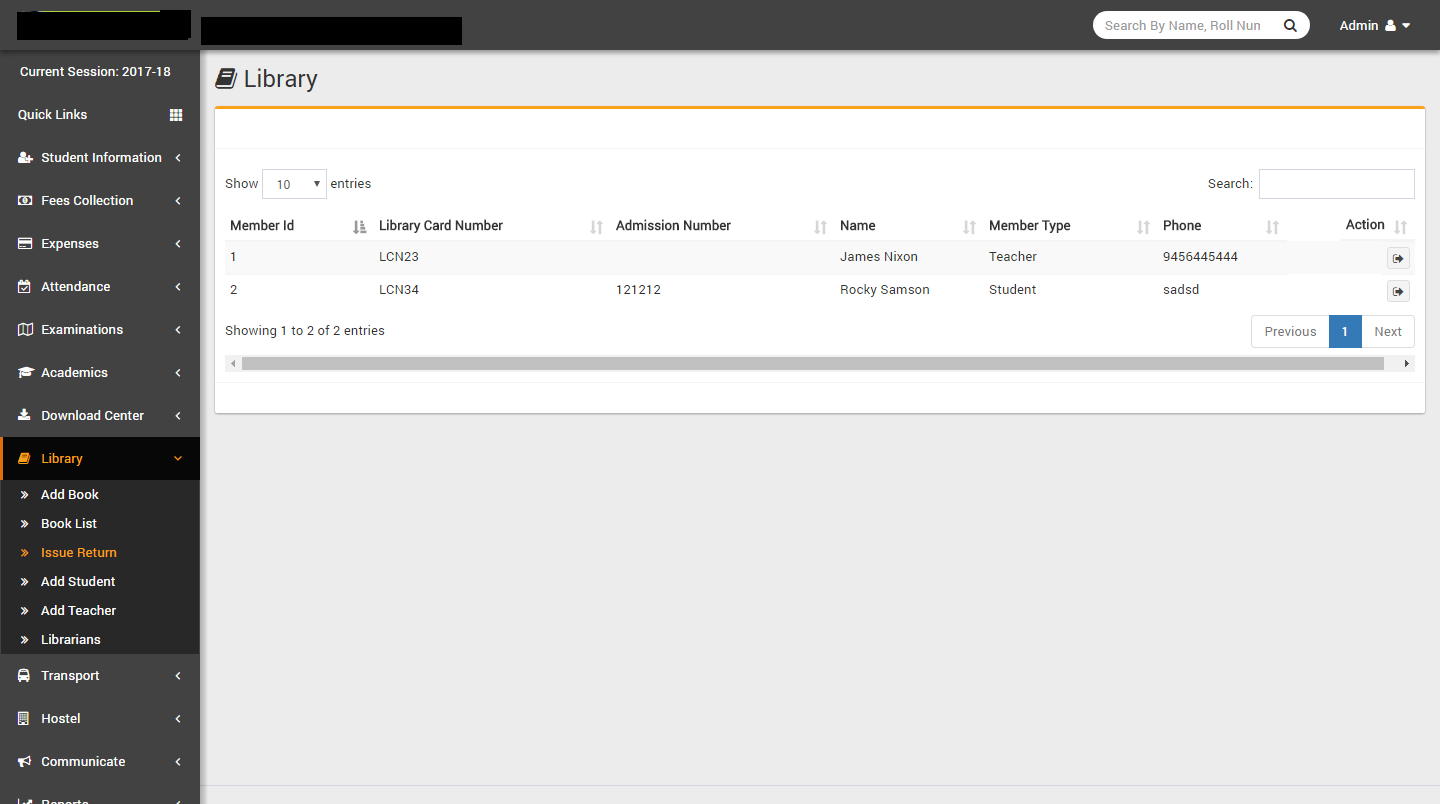
- Issue Return- Go to Library > Issue Return to issue/return
a book to library member click on Issue Return button from action column in Members List.
Now you will reach to Issue Return page. To Issue a book select Books,
Return Date from Issue Book section. Currently Issued Books can be see in
Books Issued section. To Return an issued book click on Return button in Action column.
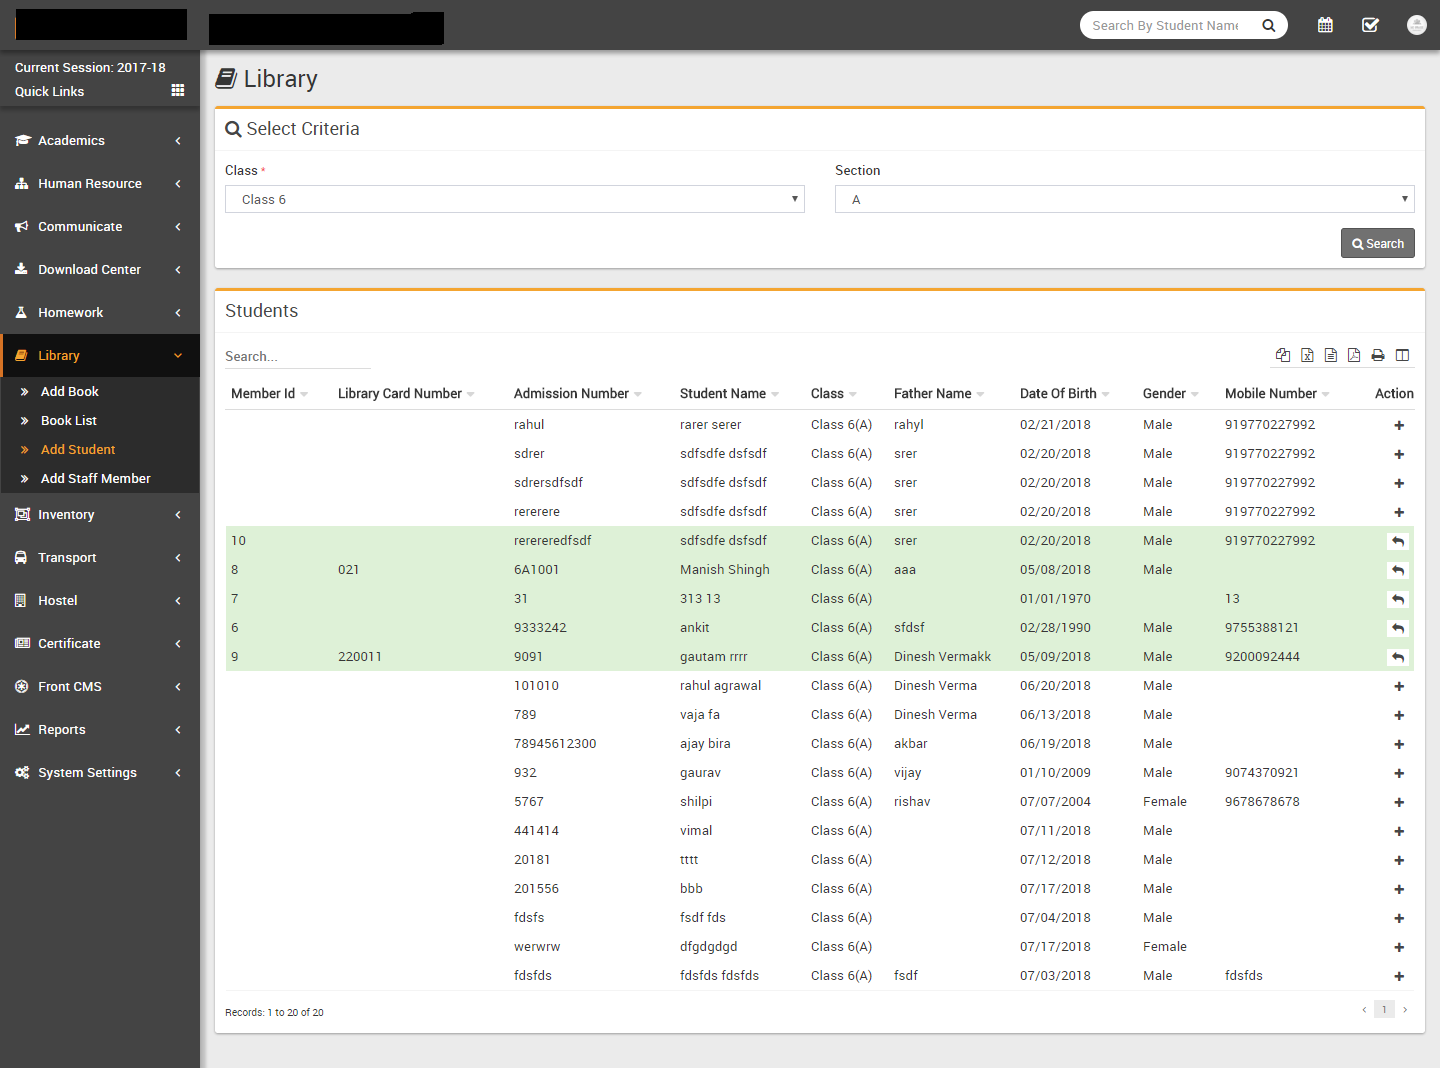
- Add Student- Go to Library > Add Student to add Student as
Library Member, select class and section then click on search button to display list of
students then click on + button from student's list action column, if student is already a
library member then this student row shows in green color and there will be Surrender button
in action column to surrender their membership.
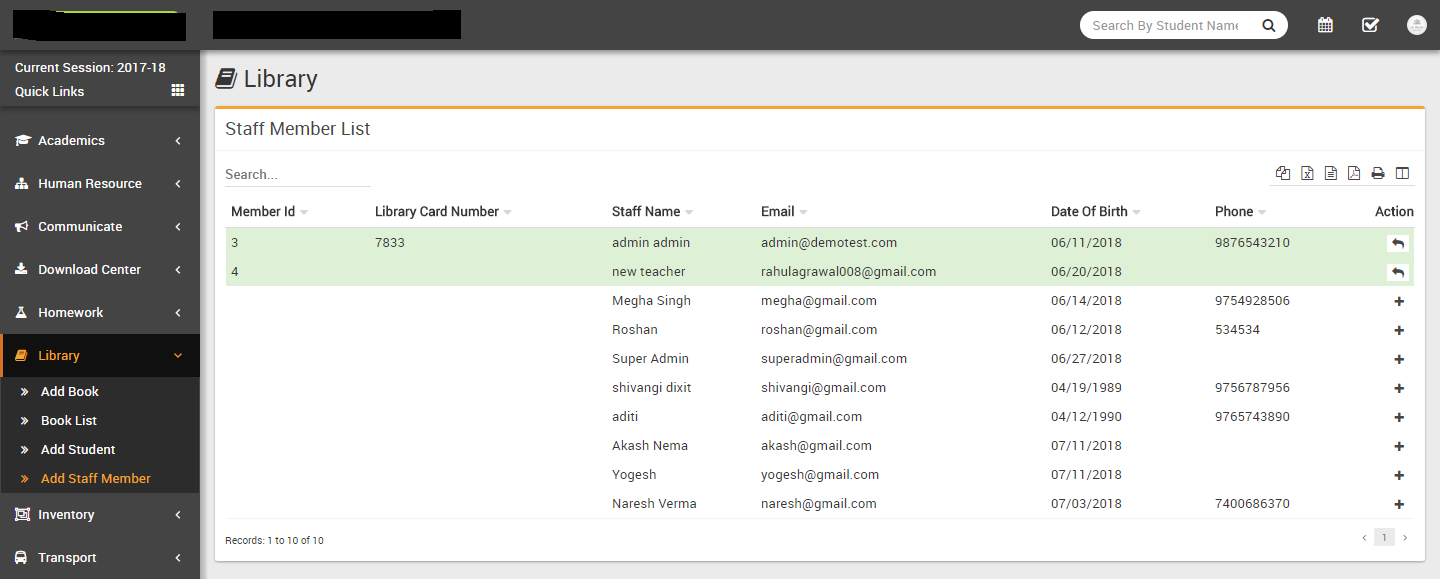
- Add Staff Member- Go to Library > Add Staff Member to add
Staff Member as Library Member click on + button visible Staff Member list action column, if
Staff Member is already a library member then this Staff Member row shows in green color and
there will be Surrender button in action column to surrender their membership.
Inventory
This module has 6 sections -
- Issue Item
- Add Item Stock
- Add Item
- Item Category
- Item Store
- Item Supplier
First we will create our Item Category then Item Store then Item Supplier then we will add Item then Item Stock then we will Issue Items to any staff members.
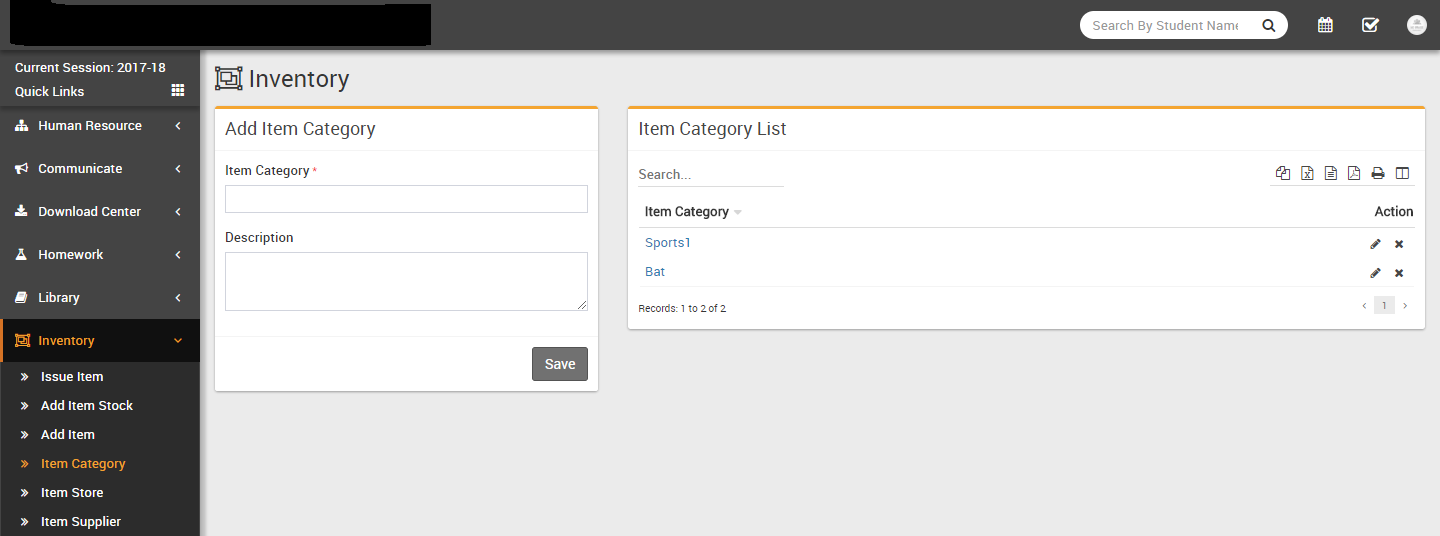
- Item Category- Go to Inventory > Item Category enter
Item Category and its Description then click on
Save button. All Item Category can be see right side of this page.
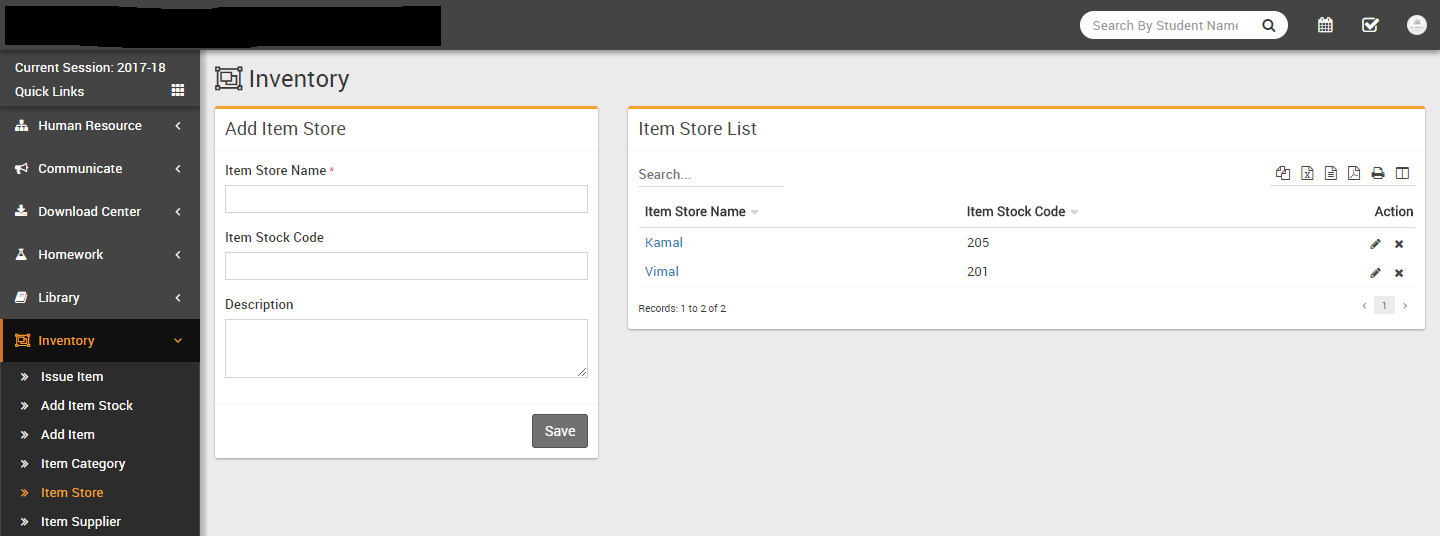
- Item Store- Go to Inventory > Item Store enter
Item Store Name, Item Stock Code and
Description then click on
Save button. All Item Store can be see right side of this page.
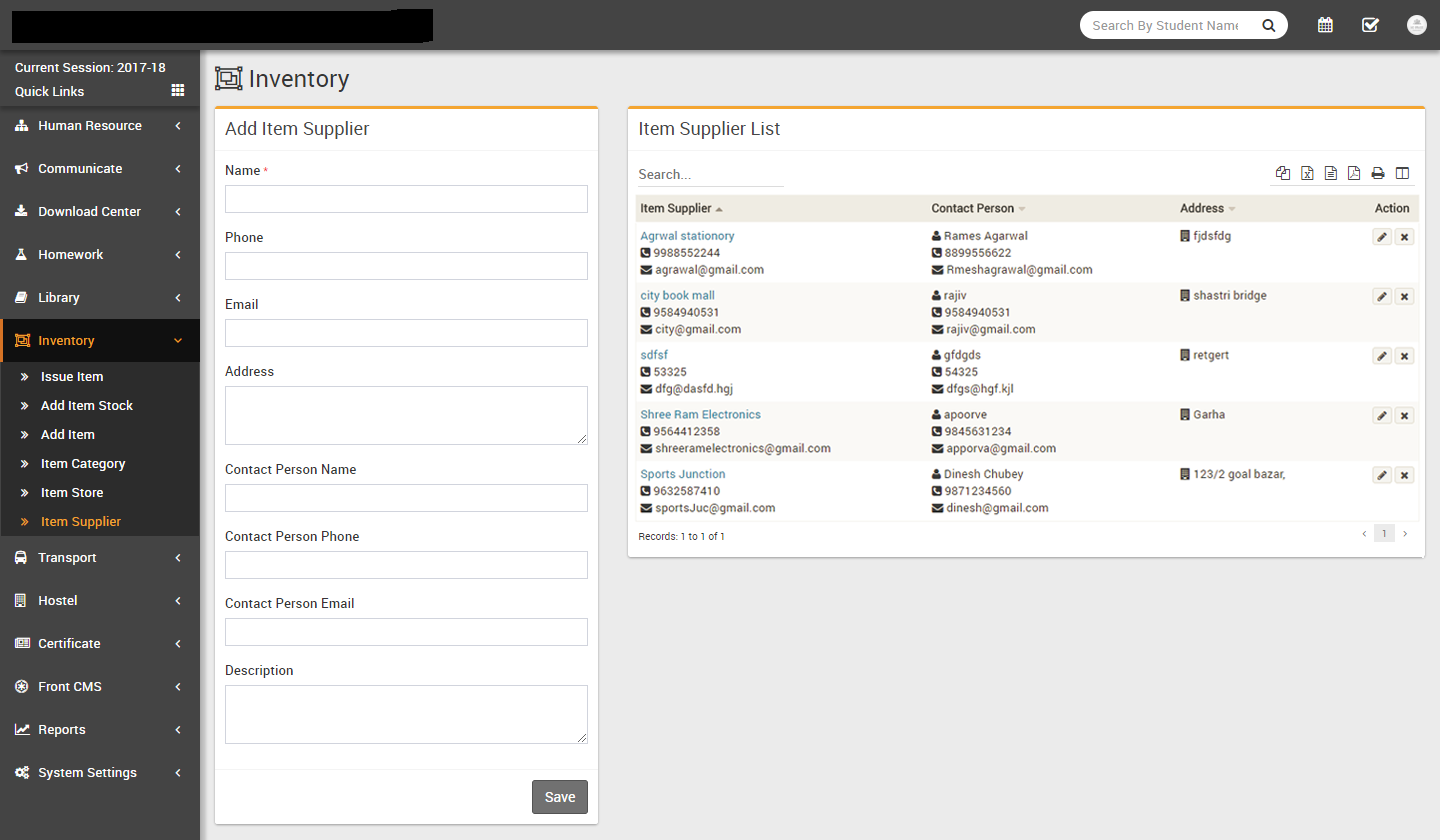
- Item Supplier- Go to Inventory > Item Supplier enter
Item Supplier Name, Phone, Email, Address then enter
Contact Person Name, Phone, Email and Description then
click on
Save button. All Item Supplier can be see right side of this page.
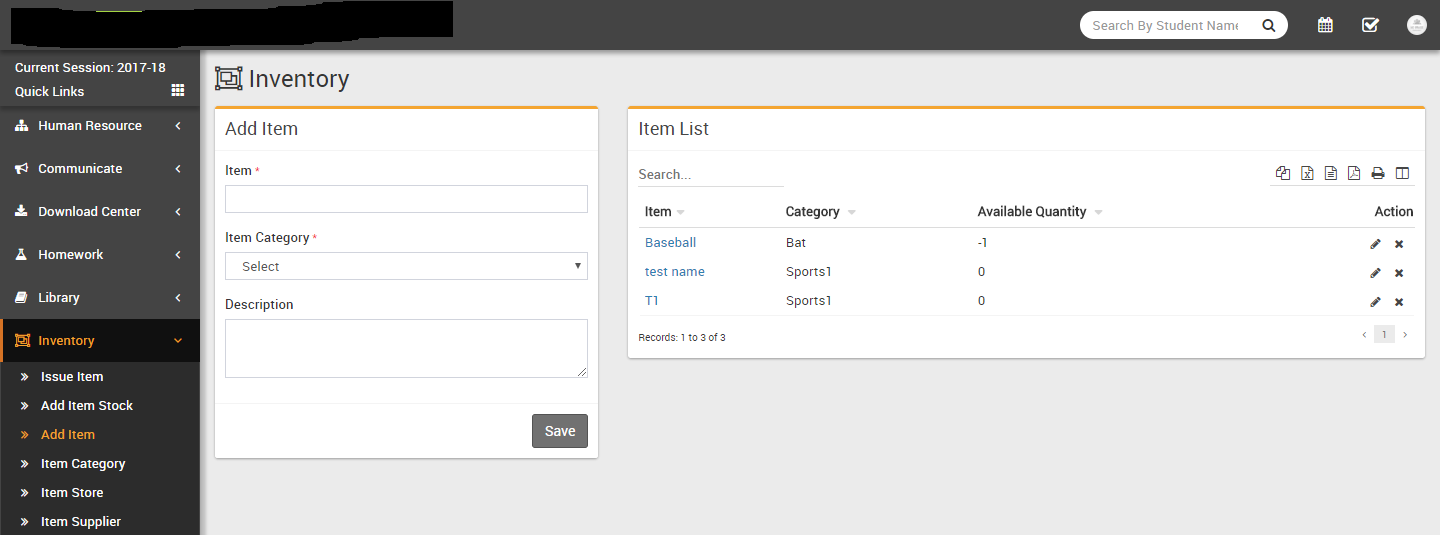
- Add Item- Go to Inventory > Add Item enter
Item Name, select Item Category and
Description then click on
Save button. All Items can be see right side of this page.
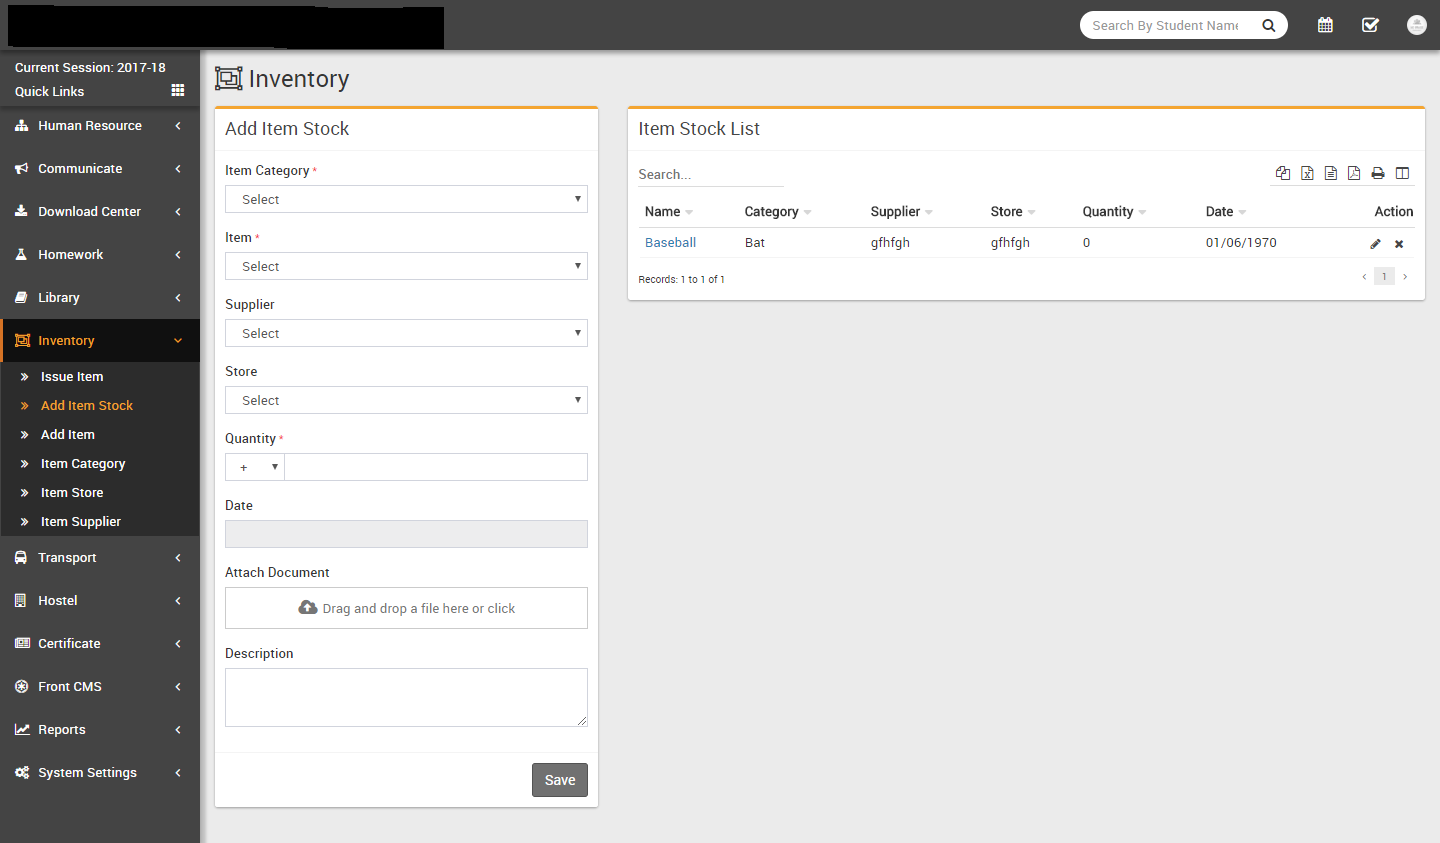
- Add Item Stock- Go to Inventory > Add Item Stock select
Item Category, Item, Supplier, Store then enter
Item Quantity, Date, select Attach Document and
Description then click on
Save button. All Item Stock can be see right side of this page.
- Issue Item- Go to Inventory > Issue Item at this page you
can see issued item status. To return an item click on Click to Return
button from Status column.
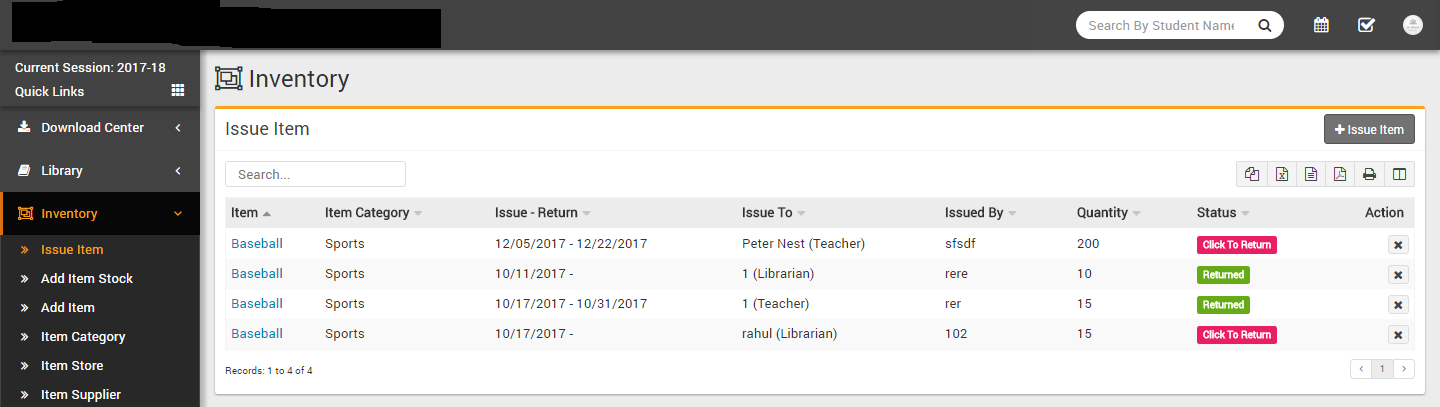
To issue an item click on Issue Item button present on top right side of this page. Now at this page select User Type then select person from Issue To then enter name who is issuing this Item in Issue By, select Issue Date, Return Date, enter Note then select Item Category, Item, enter Available Quantity then click on Save.

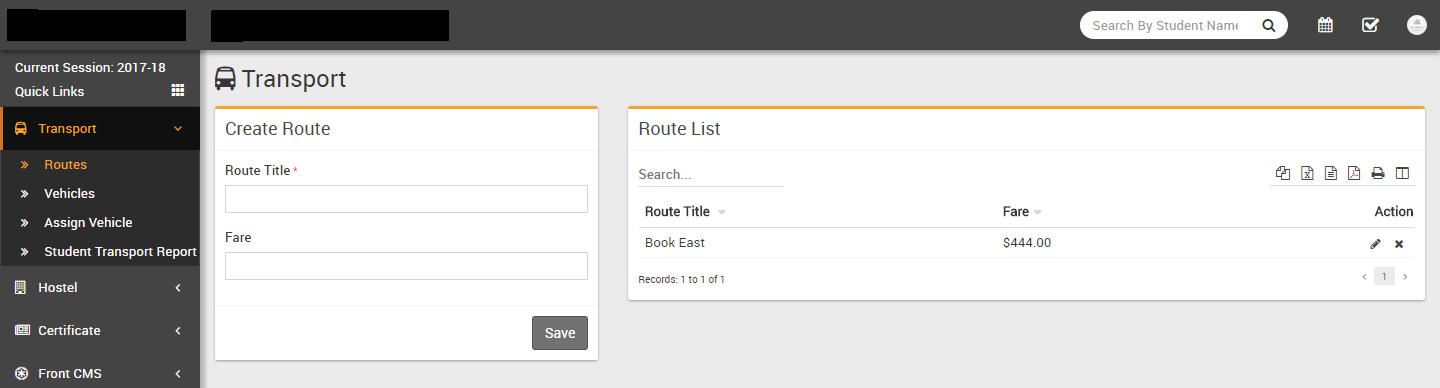
Transport
This module has 3 sections -
- Routes
- Vehicles
- Assign Vehicle
First we will add Routes then add Vehicles then Assign Vehicle on Routes then check Student Transport Report.
- Routes- Go to Transport > Routes enter
Route Title, Fare & click
Save button. All the routes can be see right side at this page.
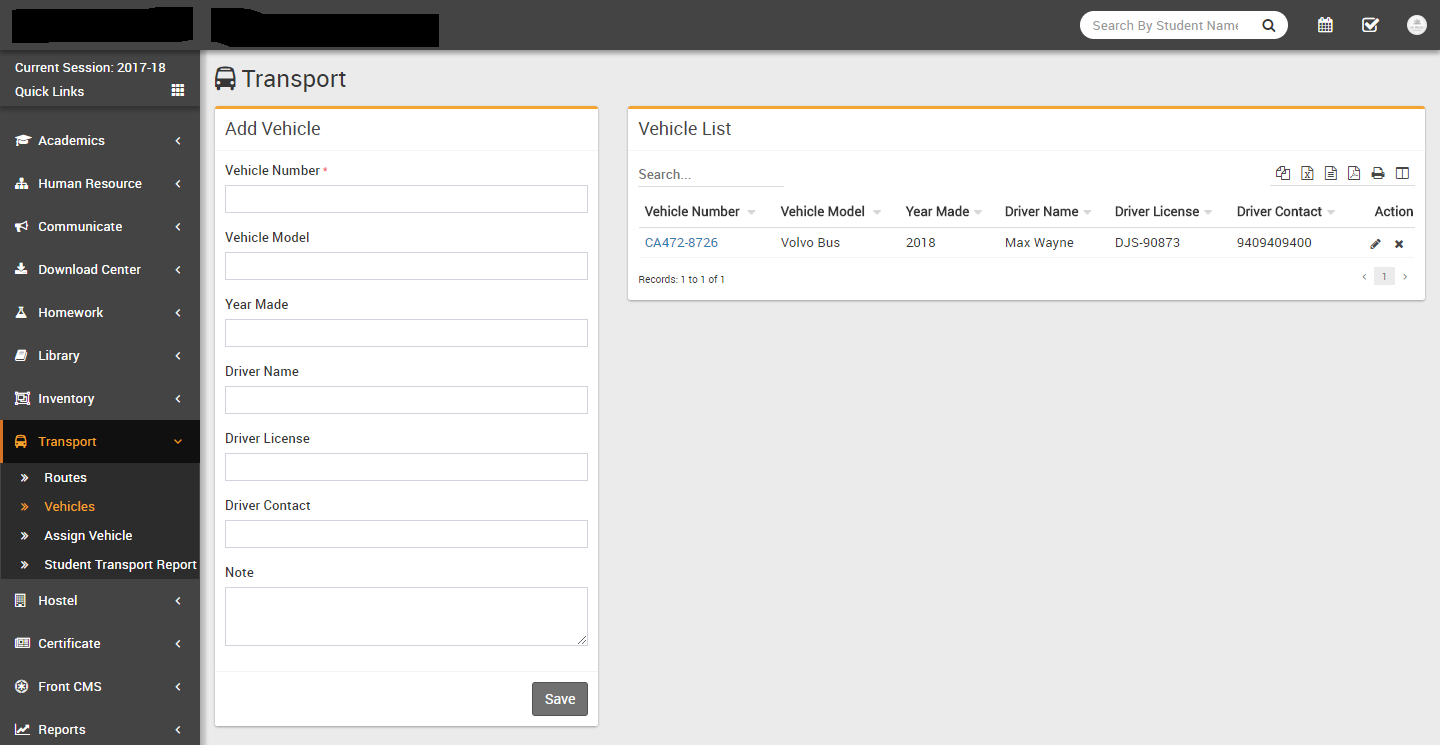
- Vehicles- Go to Transport > Vehicles enter
Vehicle No, Vehicle Model, Year Made,
Driver Name, Driver License, Driver
Contact, Note & click
Save button. All the vehicles can be see right side at this page.
- Assign Vehicle- Go to Transport > Assign Vehicle select
Route then Vehicle & click
Save button. All the assigned vehicles can be see right side at this page.

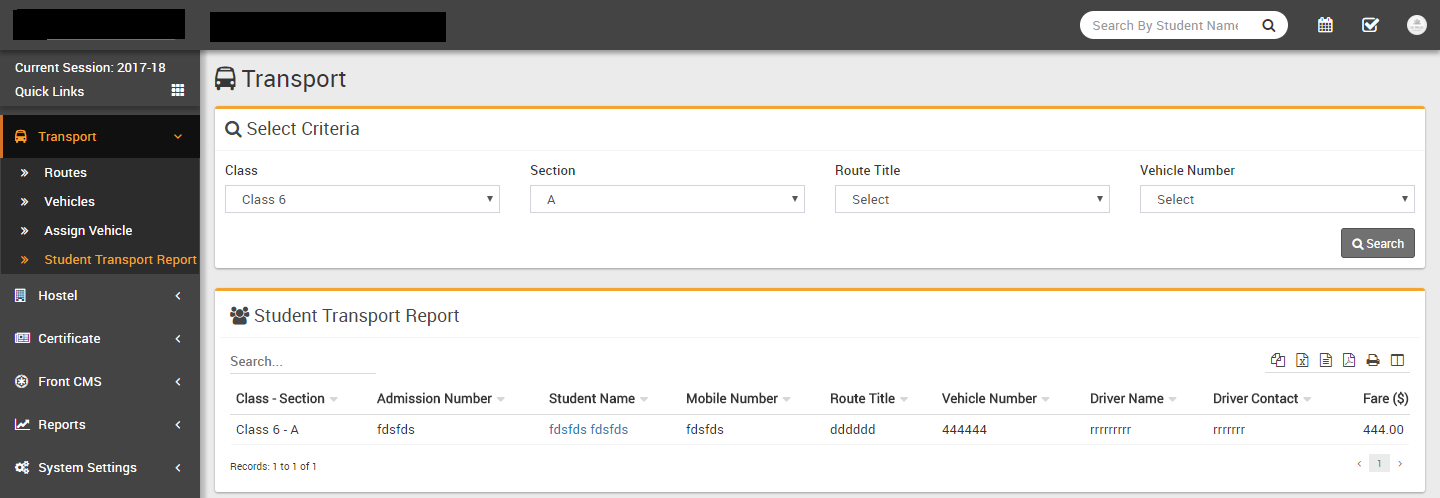
- Student Transport Report- Go to Student Information > Student
Transport Report here you can view all students list who has availed transport
facility.
Hostel
This module has 3 sections -
- Hostel Rooms
- Room Type
- Hostel
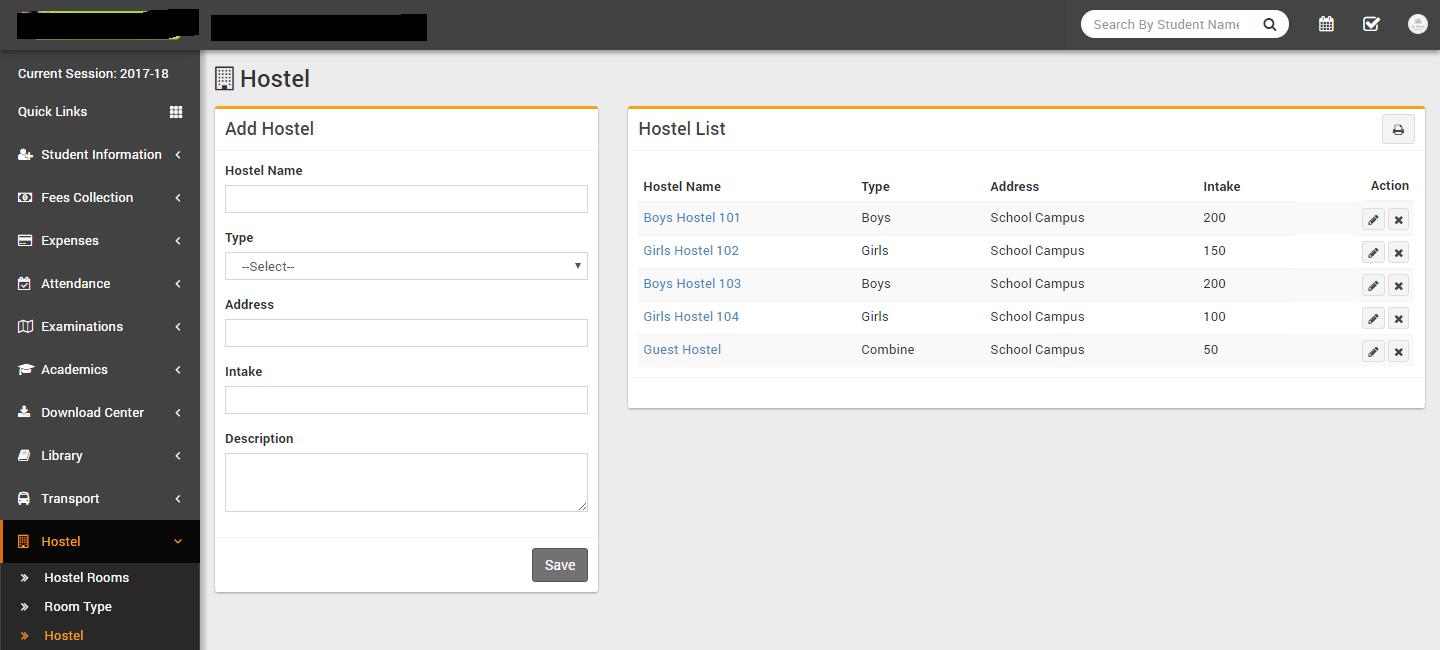
First we will add Hostel then Room Type then add Hostel Rooms.
- Hostel- Go to Hostel > Hostel enter
Hostel Name, Type, Address,
Intake, Description & click Save button.
All the hostels can be see right side at this page.
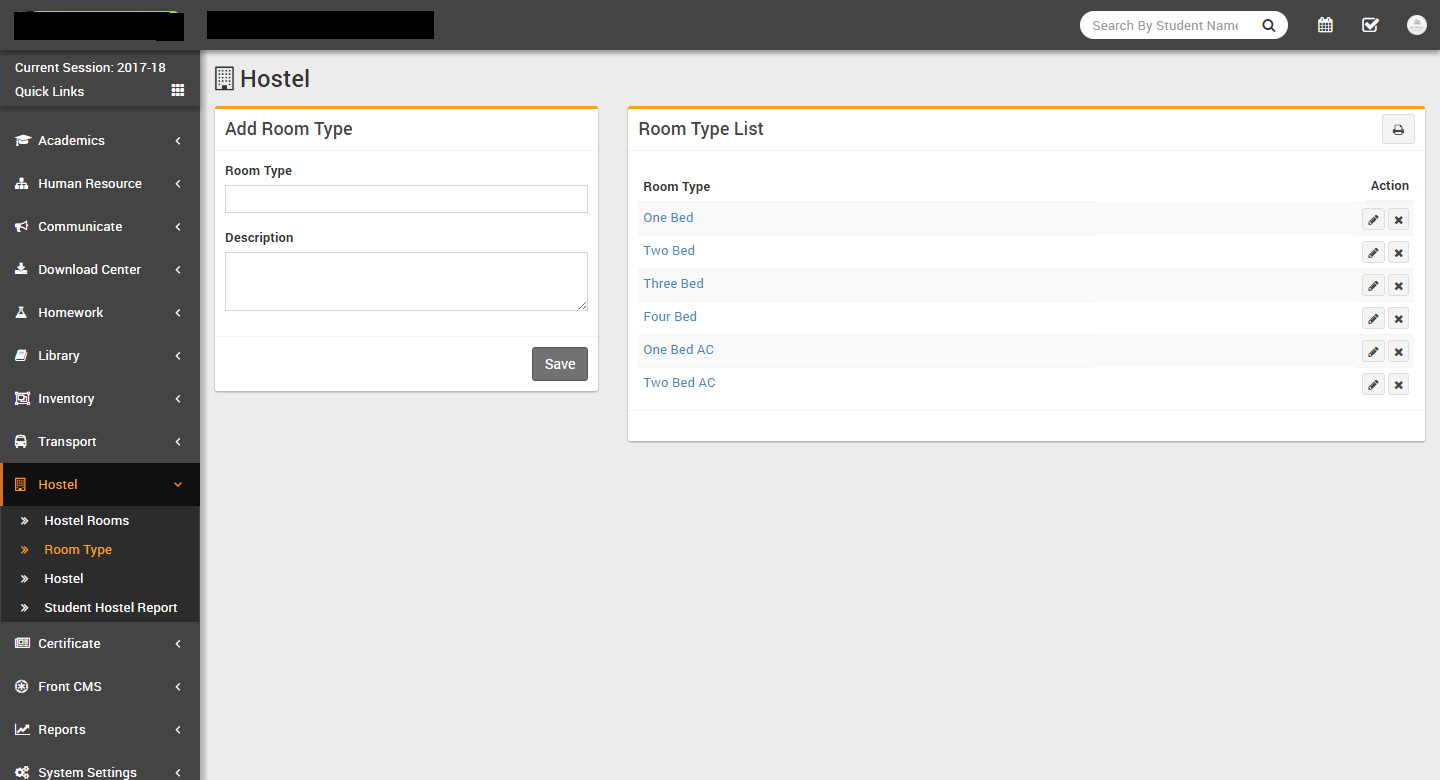
- Room Type- Go to Hostel > Room Type enter
Room Type, Description & click Save
button. All the room types can be see right side at this page.
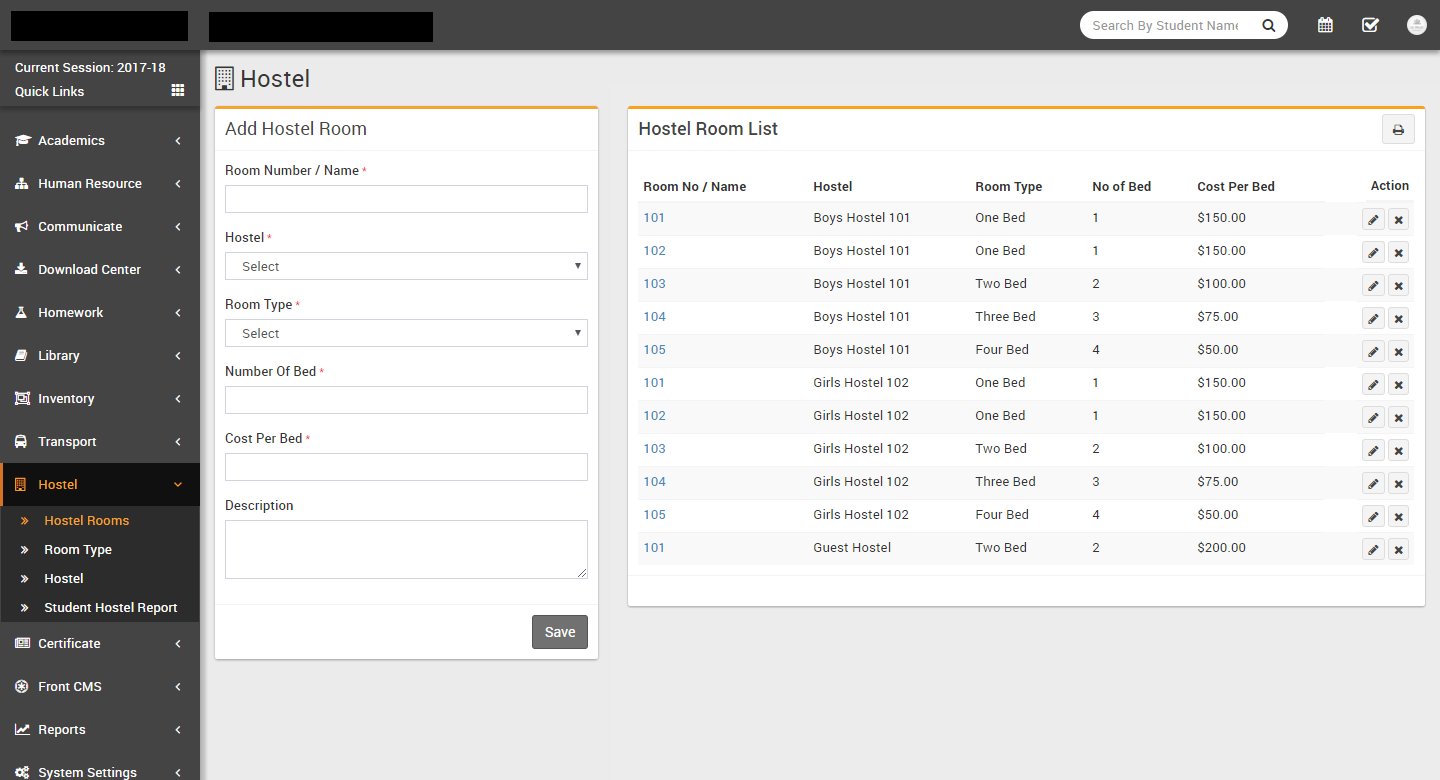
- Hostel Rooms- Go to Hostel > Hostel Room
enter Room No / Name, Hostel,
Room Type, No of Bed, Cost Per Bed,
Description & click Save button. All the hostel
rooms can be see right side at this page.
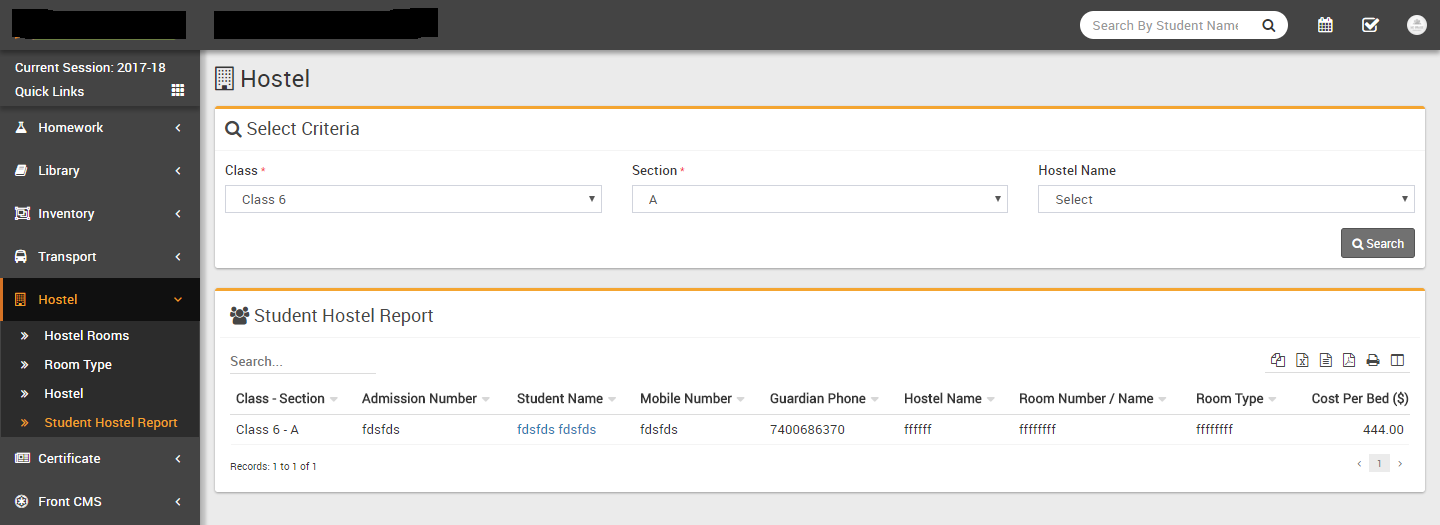
- Student Hostel Report- Go to Student Information > Student Hostel
Report here you can view all students list who has availed hostel facility.
Certificate
This module has 4 sections -
- Student Certificate
- Generate Certificate
- Student ID Card
- Generate ID Card
First we will design student certificate or id card then we will generate/print them. If you will properly configure background, height, width etc. settings then you can design professional quality certificate or id cards very easily.
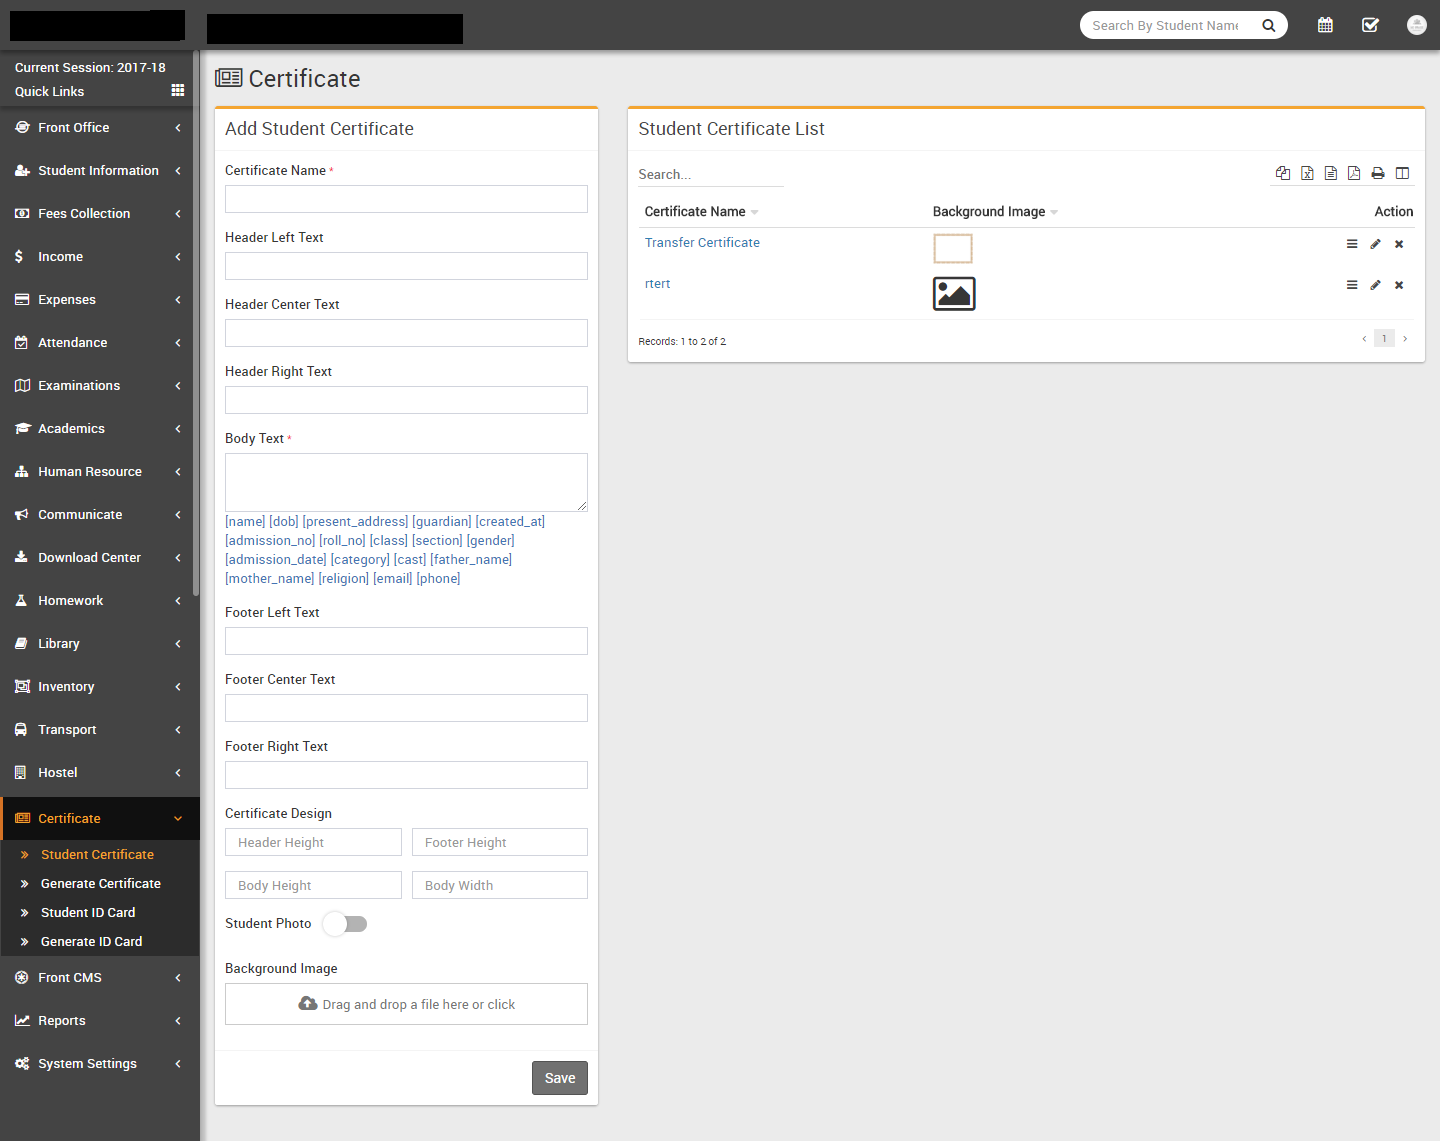
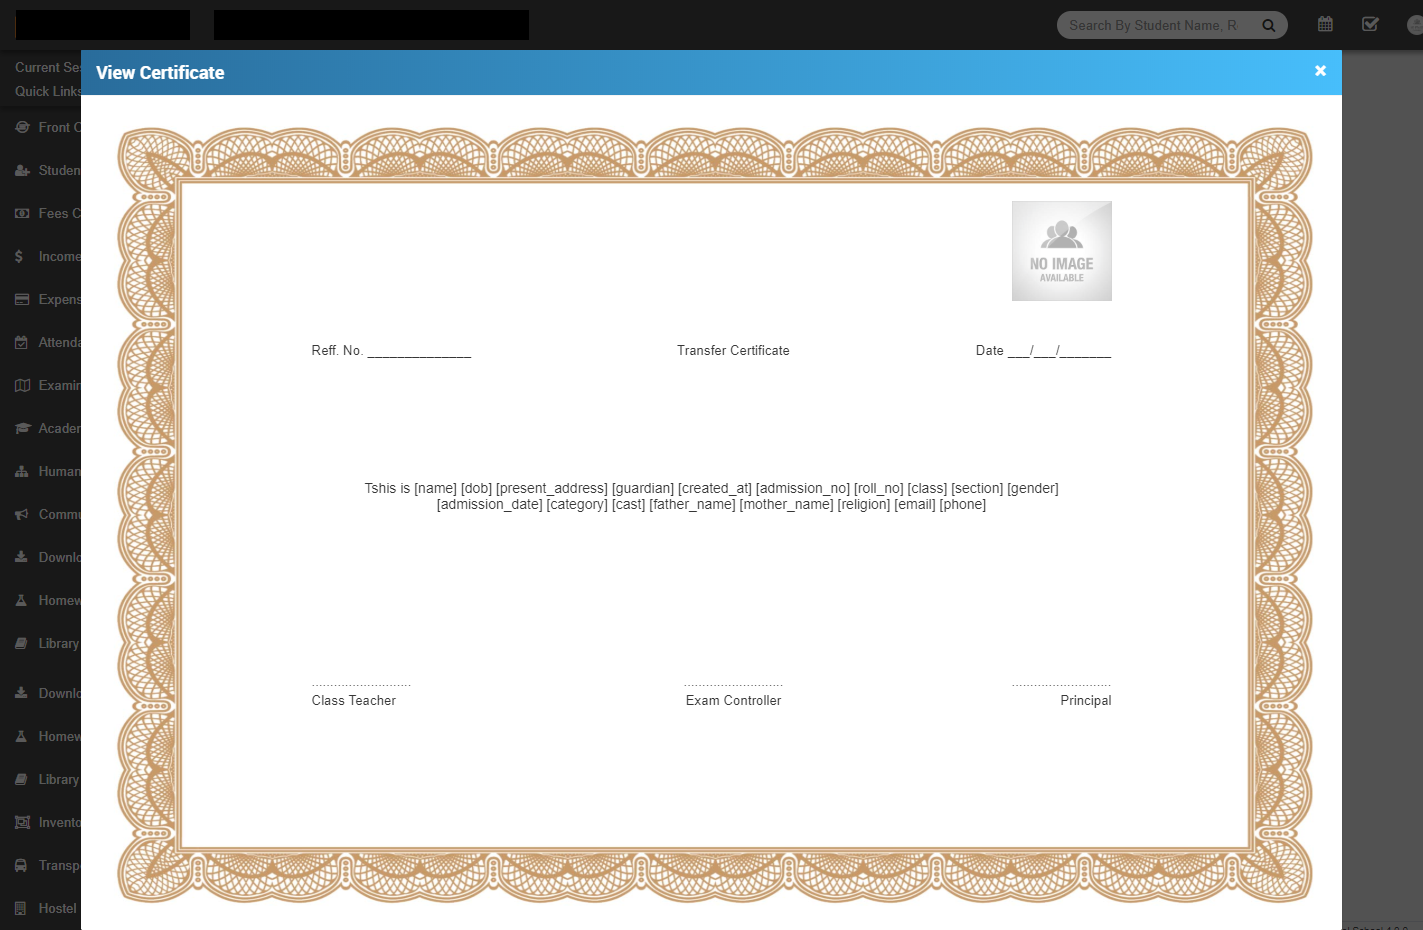
- Student Certificate- Go to Certificate > Student
Certificate enter Certificate Name (certificate name is only
for certificate design reference purpose it will not be print on actual certificate),
Header Left Text, Header Center Text, Header Right Text, Body Text (enter
specified keywords for replcing student data dynamically at time of certificate generation),
Footer Left Text, Footer Center Text, Footer Right Text, Certificate Design - Header
Height, Footer Height, Body Height, Body Width, Student Photo, Photo Height and
Background Image then click on Save button. In certificate
design we will suggest you to try to edit certificate design parameters by edit as many time
possible until you will get your perfect design. You have to adjust many time design
parameters to get your perfect design. While adjusting design parameters take browser final
print preview or print as pdf option from browser as final reference of print design by
using Generate Certificate link. Otherwise in final print you will get
little bit deviation in design. All Certificate designs can be see right side of this page.
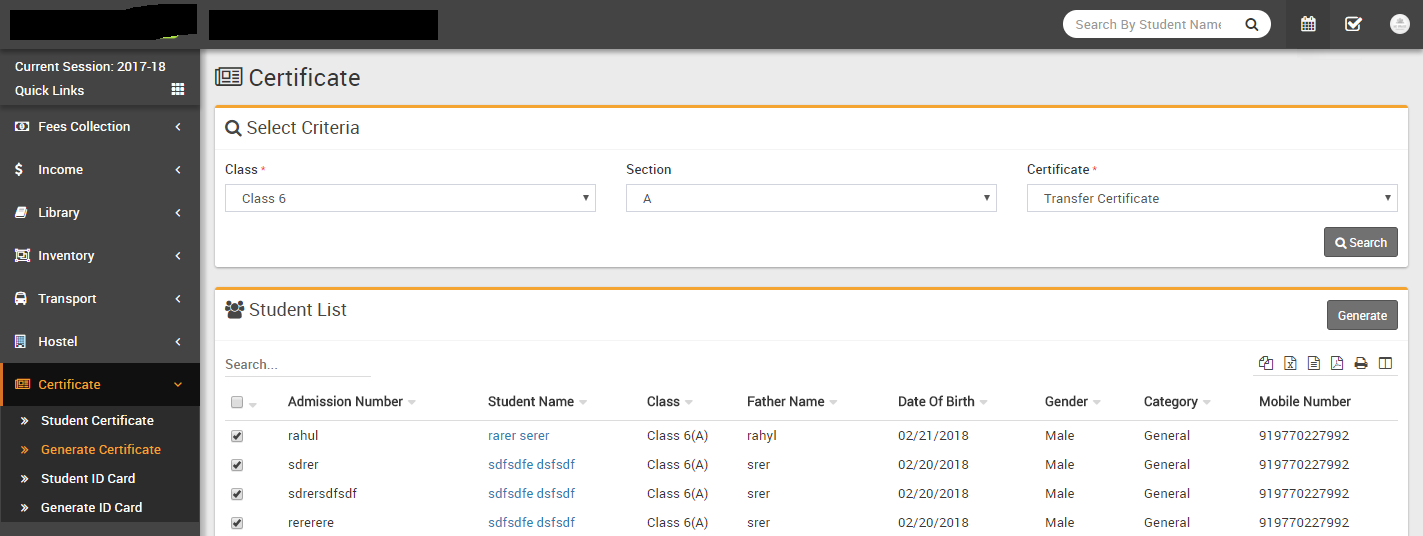
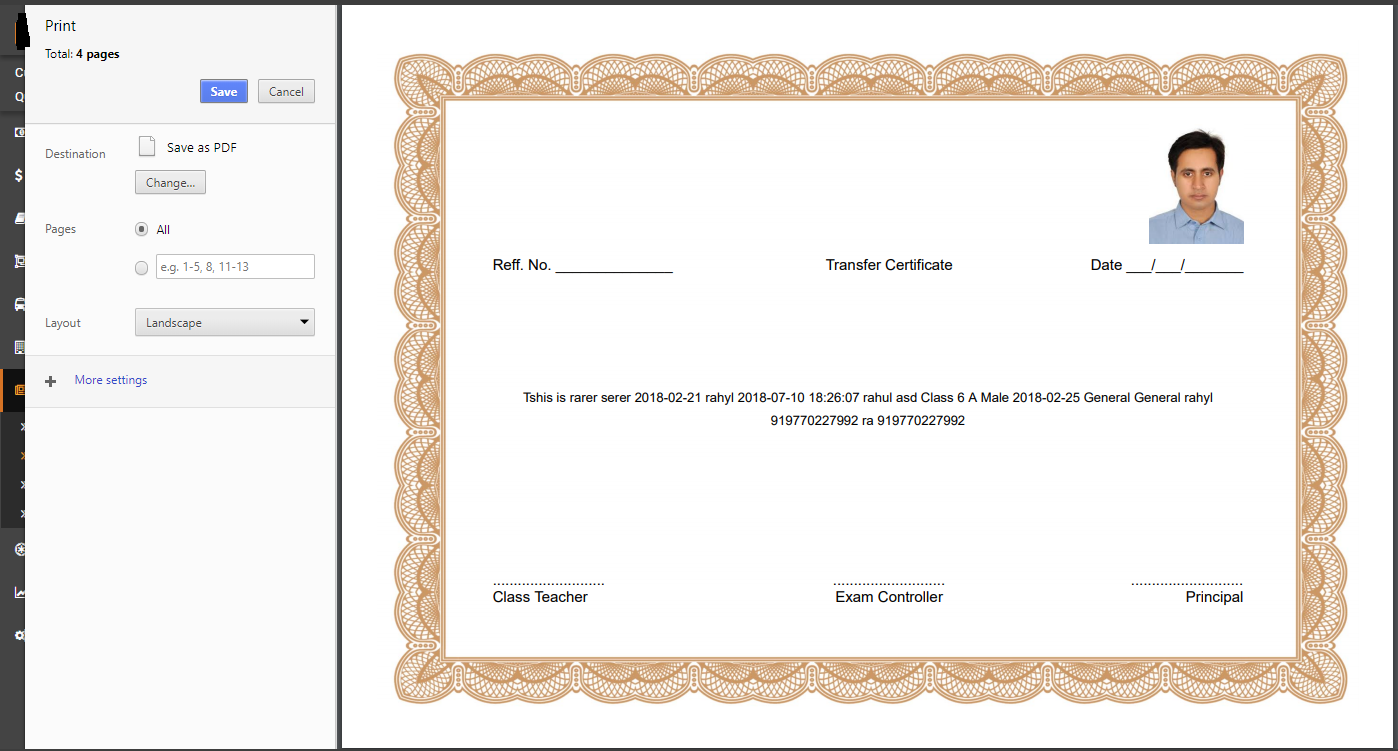
- Generate Certificate- Go to Certificate > Generate
Certificate here you can select students and certificate design to generate
certificate for those students.
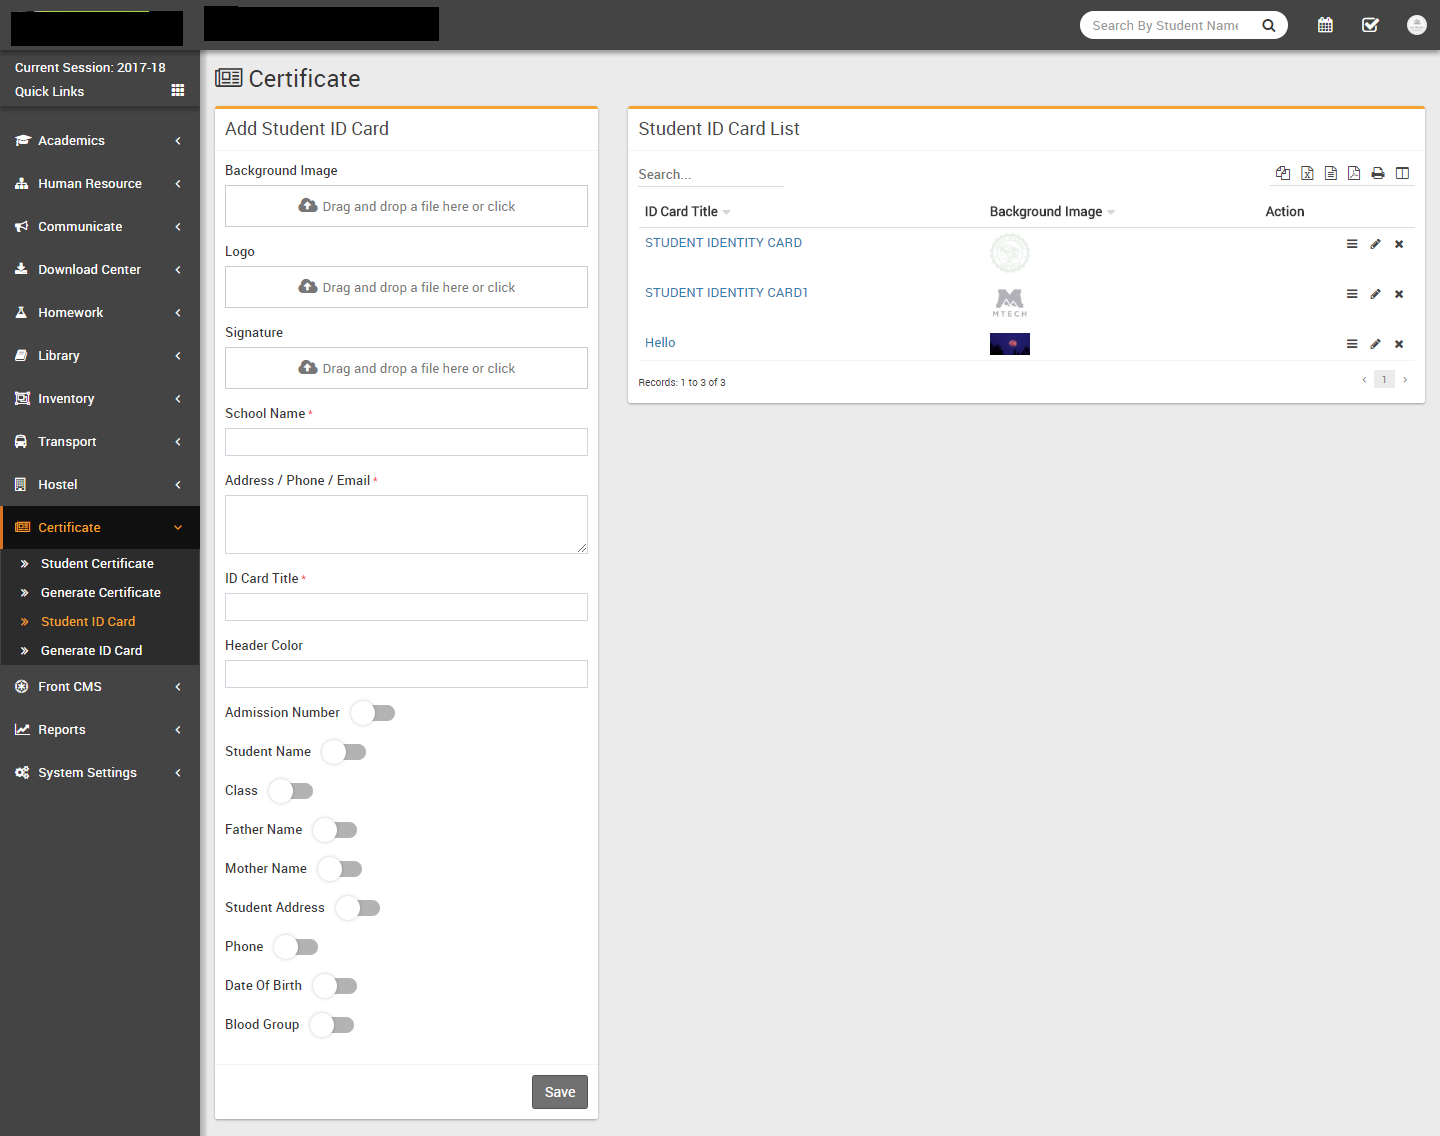
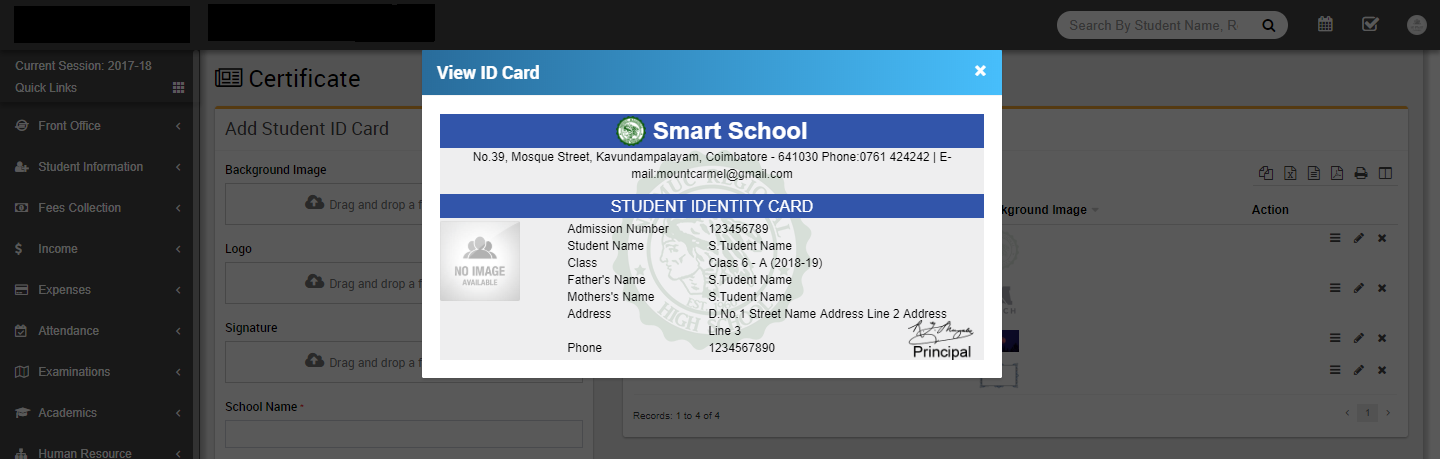
- Student ID Card- Go to Certificate > Student ID Card
select Background Image, Logo, Signature (principal or authorized person
signature image), School Name, Address/Phone/Email, ID Card Title, Header
Color(in hexadecimal code), Admission Number, Student Name, Class,
Father Name, Mother Name, Student Address, Phone (student Phone), Date
Of Birth and Blood Group then click on Save button. In id card
design we will suggest you to try to edit id card design parameters by edit as many time
possible until you will get your perfect design. You have to adjust many time design
parameters to get your perfect design. While adjusting design parameters take browser final
print preview or print as pdf optionfrom browser as final reference of print design from
Generate ID Card link. Otherwise in final print you will get little bit
deviation in design. All id card designs can be see right side of this page.
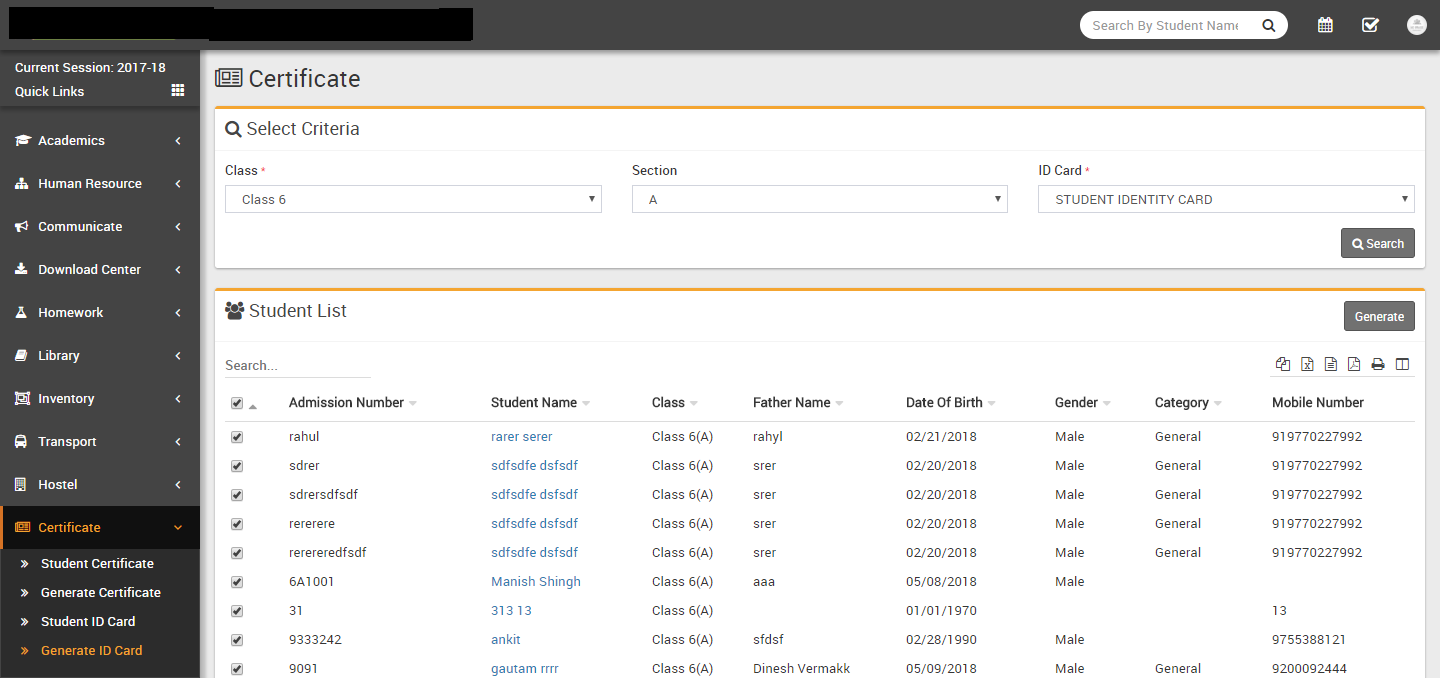
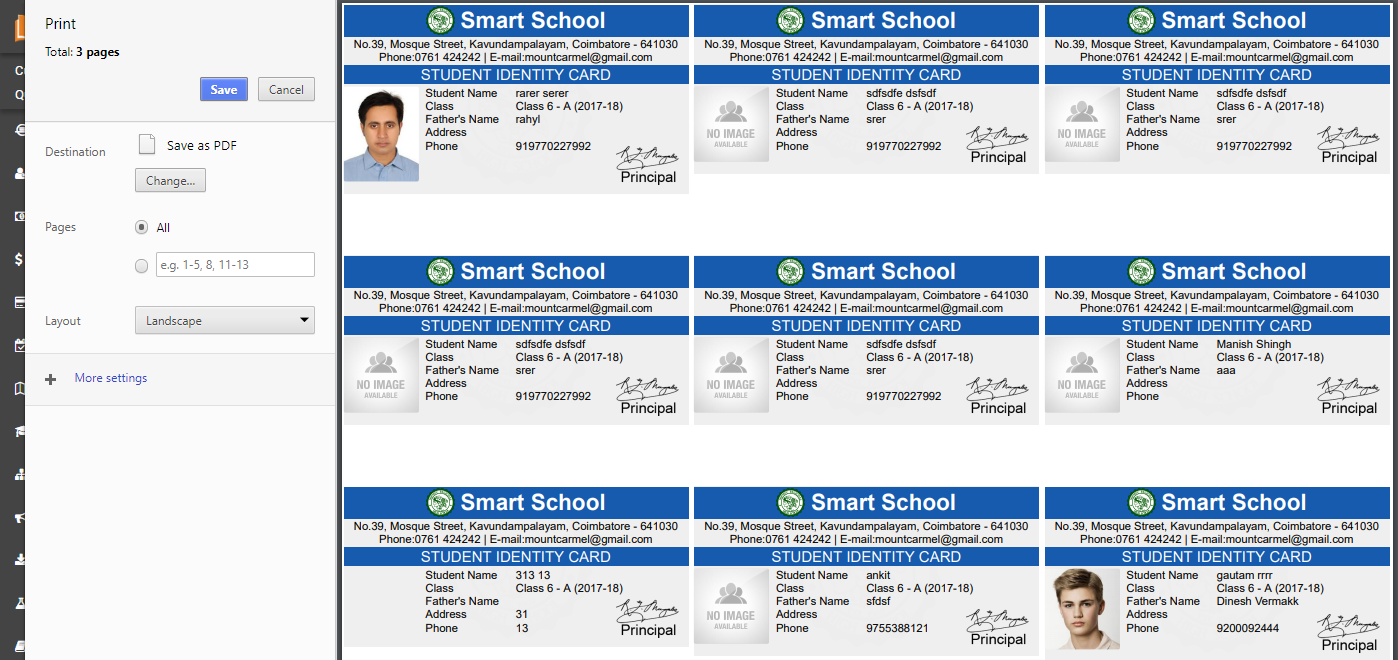
- Generate ID Card- Go to Certificate > Generate ID Card
here you can select students and id card design to generate id card for those students.
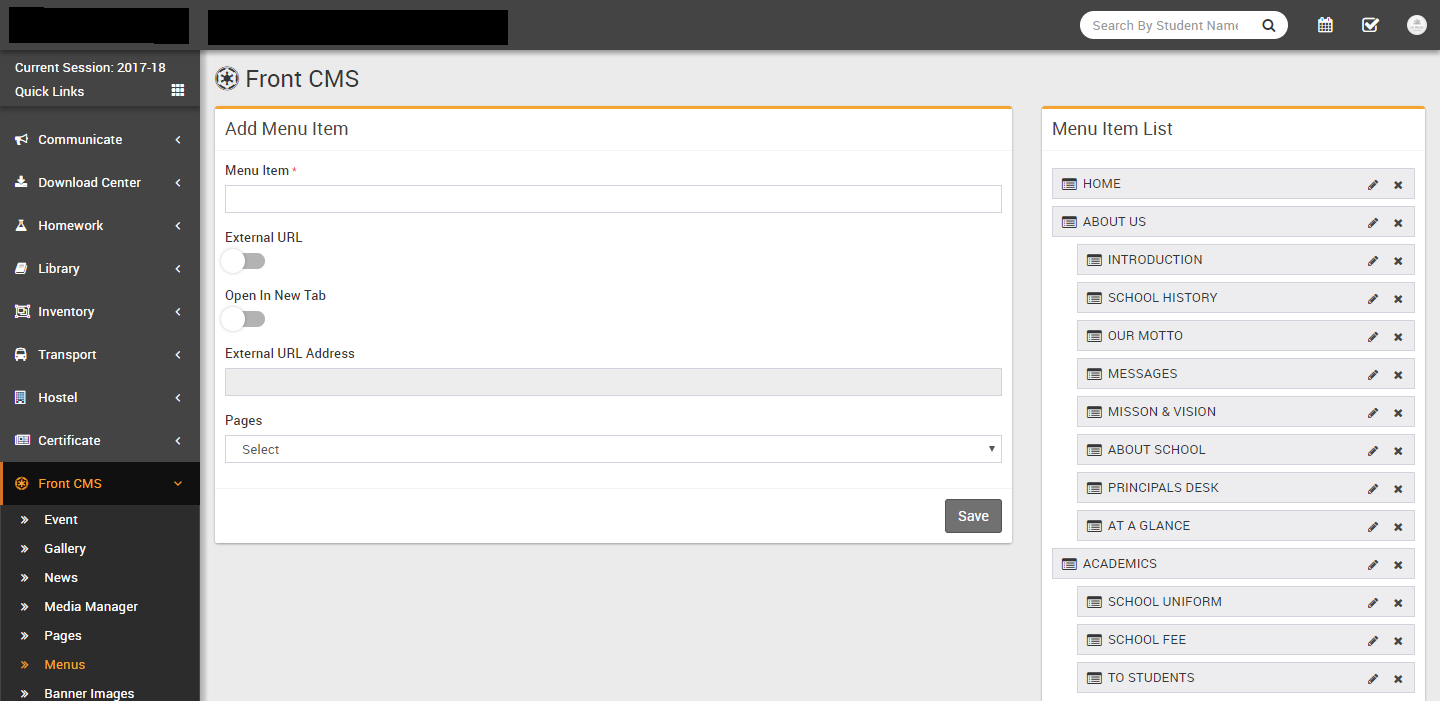
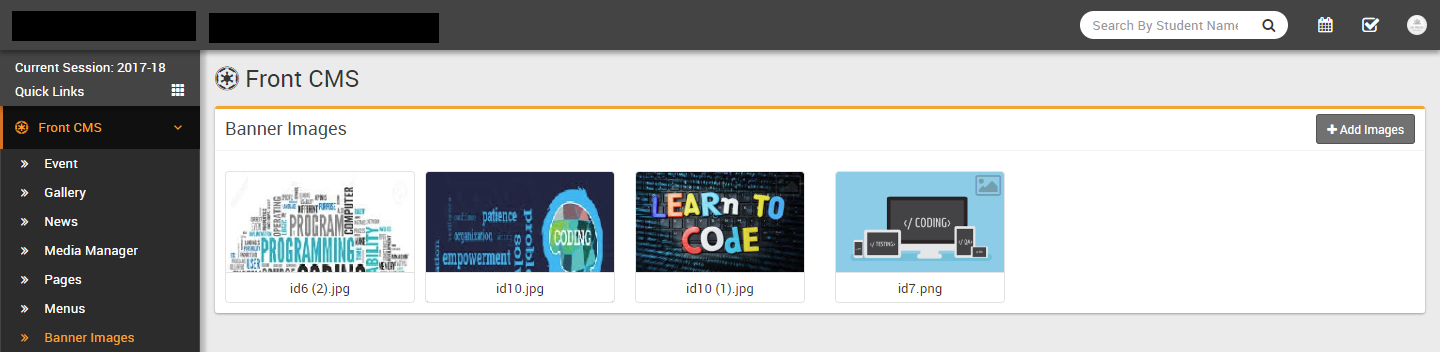
Front CMS
This module has 7 sections -
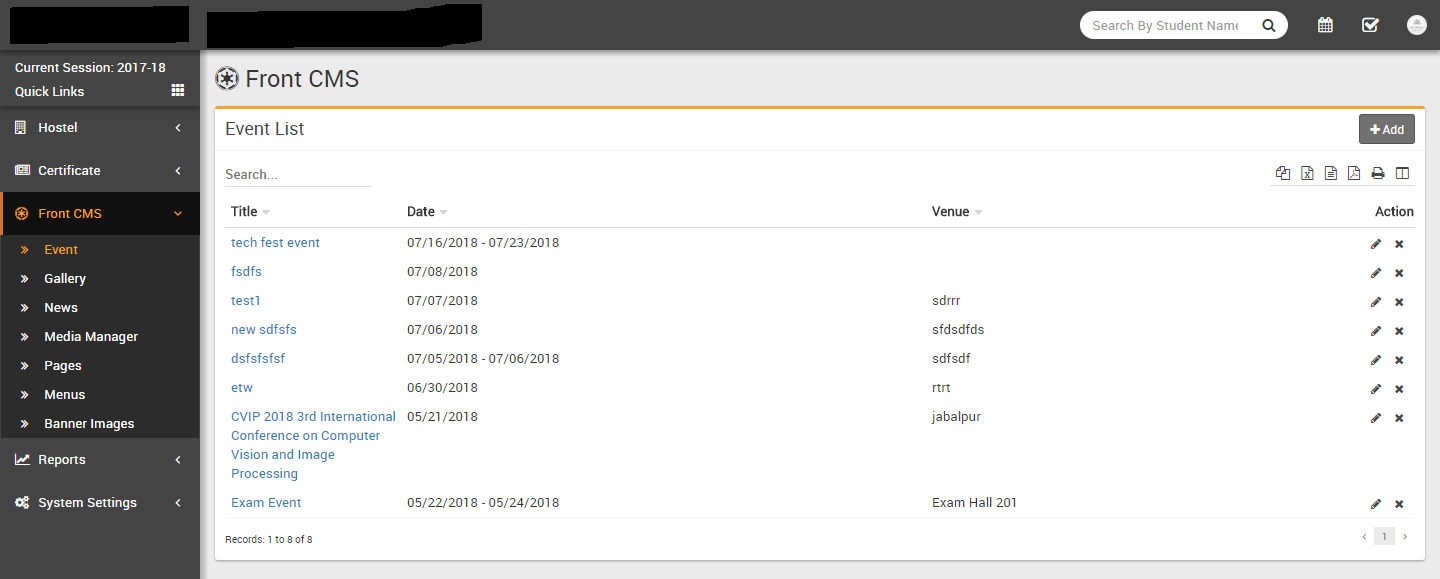
- Event
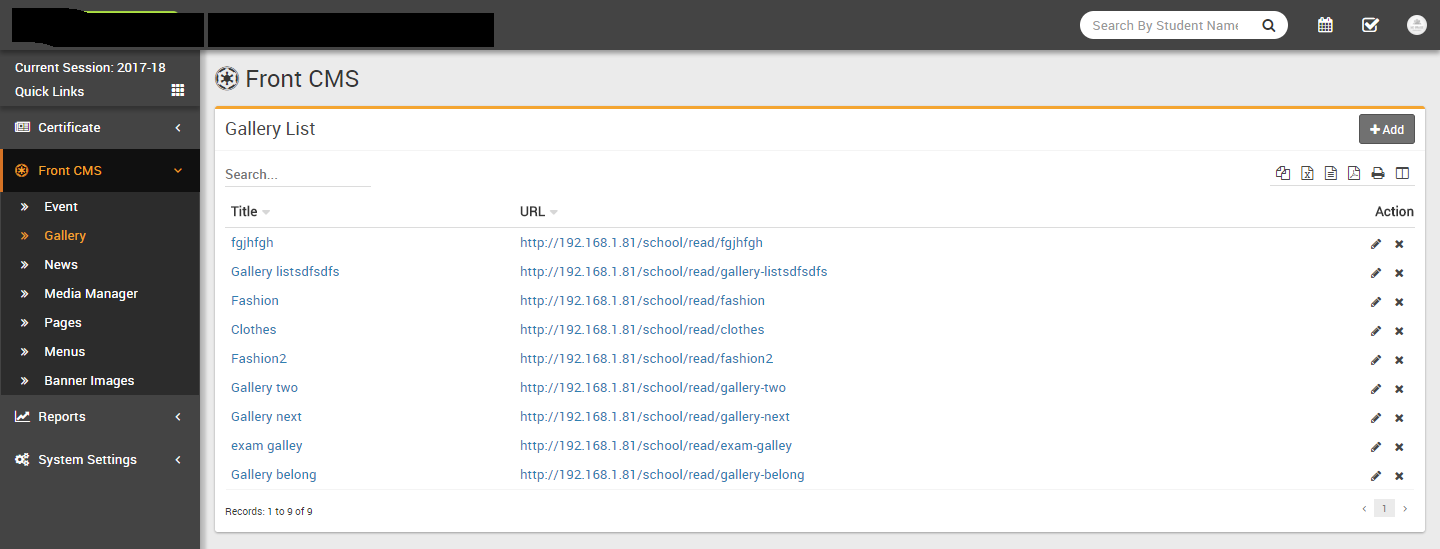
- Gallery
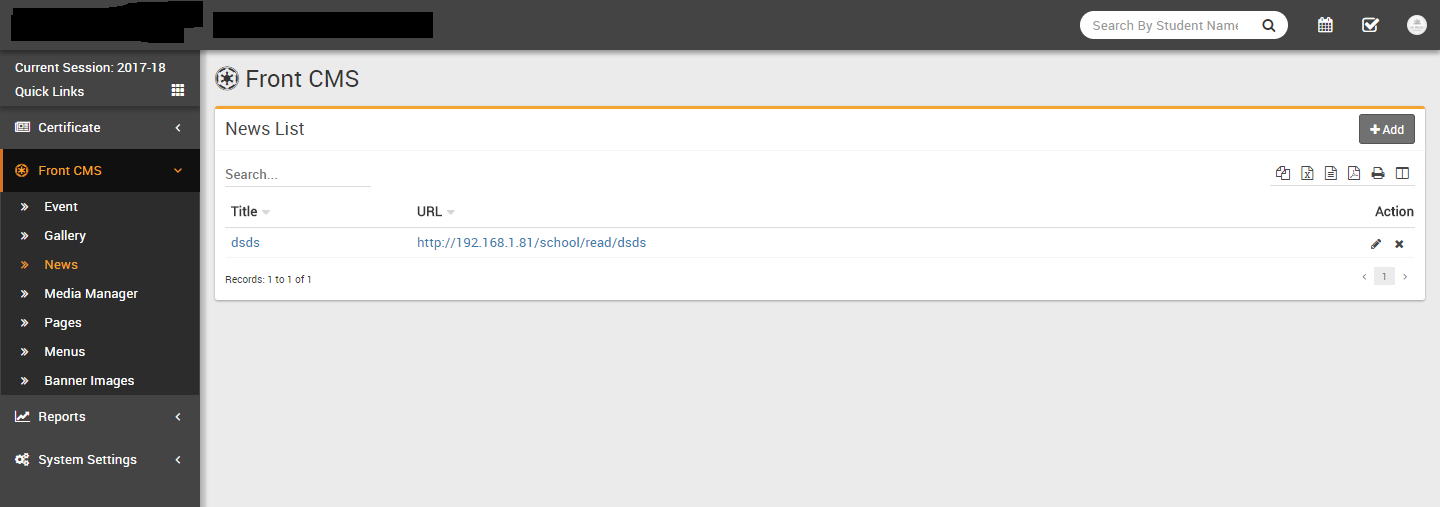
- News
- Media Manager
- Pages
- Menus
- Banner Images
With Front CMS we will manage our school frontsite. Here we will create Menu and Menu Item then Pages then Banner Images, Event, Gallery and News. We will use Media Manager to upload images or videos then use in different pages.
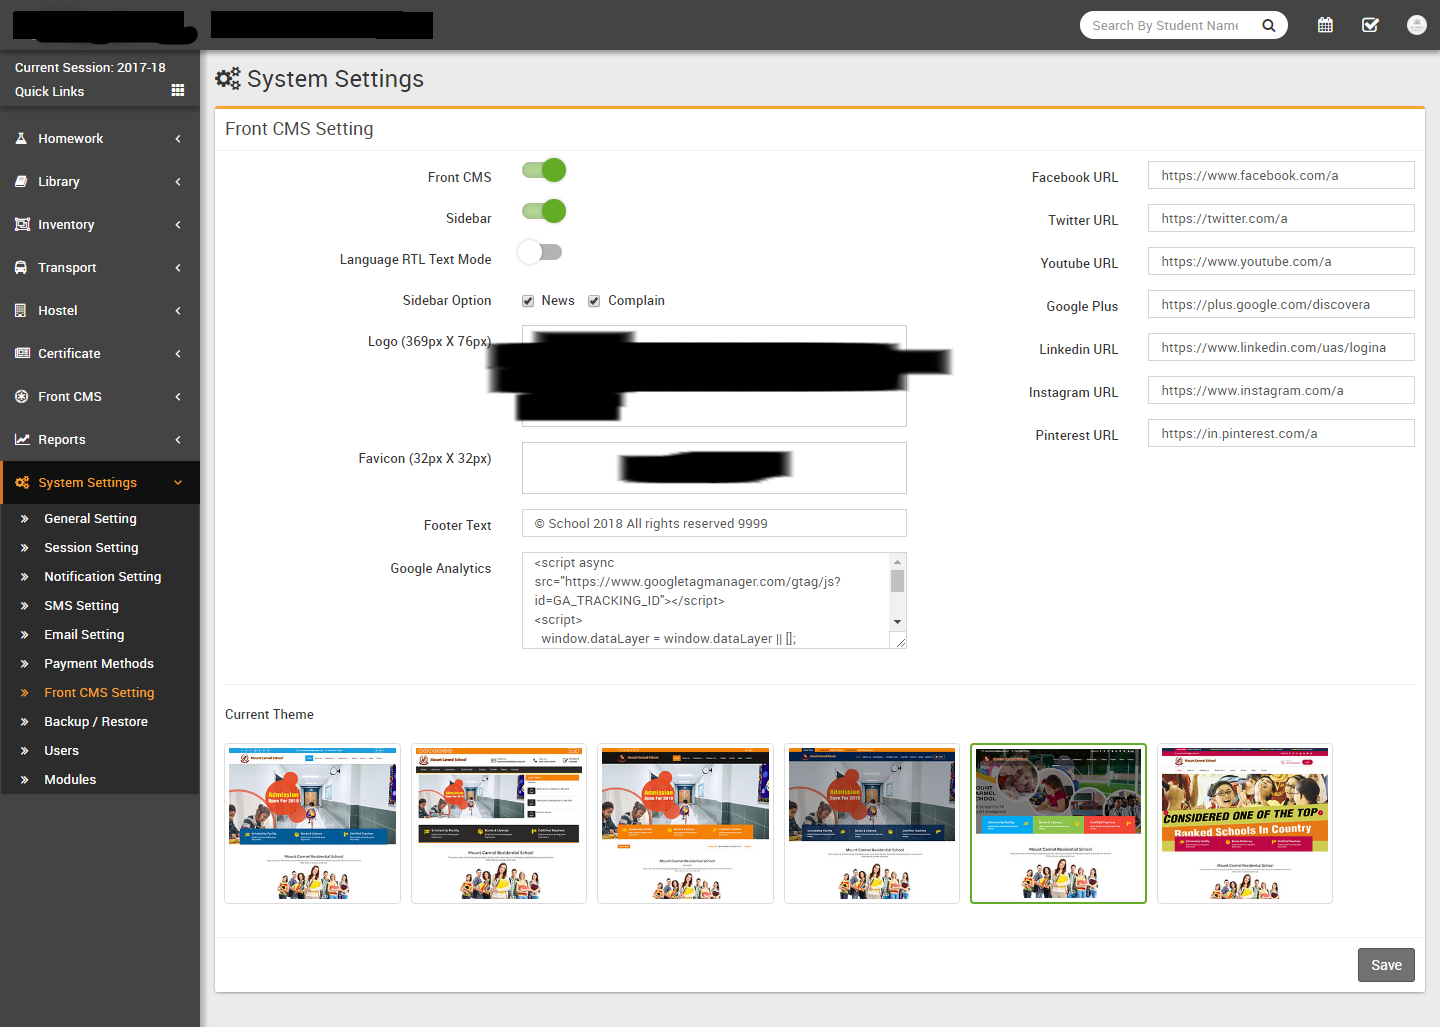
To use Front CMS first we will configure it by System Settings > Front CMS Setting here we can enable/disable Front CMS, Sidebar, Language RTL Text Mode, check Sidebar Option, upload Logo, Favicon, enter Footer Text, Google Analytics, Facebook URL, Twitter URL, Youtube URL, Google Plus, Linkedin URL, Instagram URL, Pinterest URL and Current Theme (there are 3 default themes supplied with Q Gurukul but you can create your own theme by copying "default" theme with your own name in same folder. For themes /application/views/themes contains php view files and /backend/themes folder contains css, js, images etc. files).

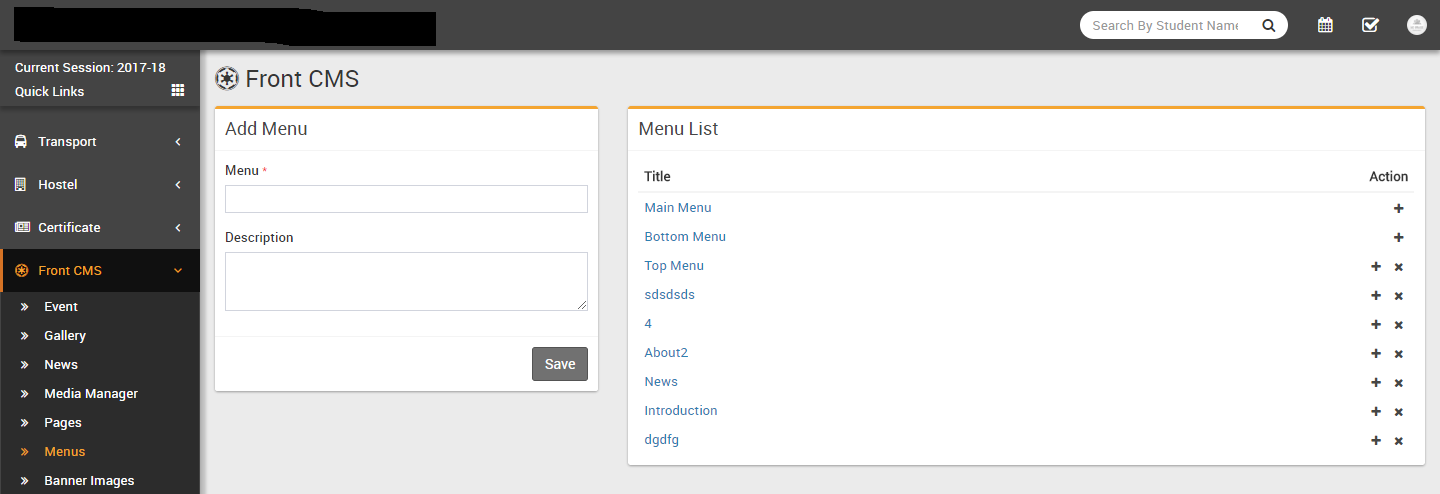
To add menu items under a menu click on + sign button from Action column. Now at Add Menu Items page enter Menu Item, External URL (if this menu is pointing to a external url), Open In New Tab (if you want after clicking this url will be open in new tab), External URL Address, Pages (If you want this menu item will point any cms pages) then click Save button. From right side you can see existing menu item list. From here you can arrange menu order or add a menu item as sub menu by drag and drop.


Alumni
Reports
Reports are self explanatory but further we will provide more details at online documentation.
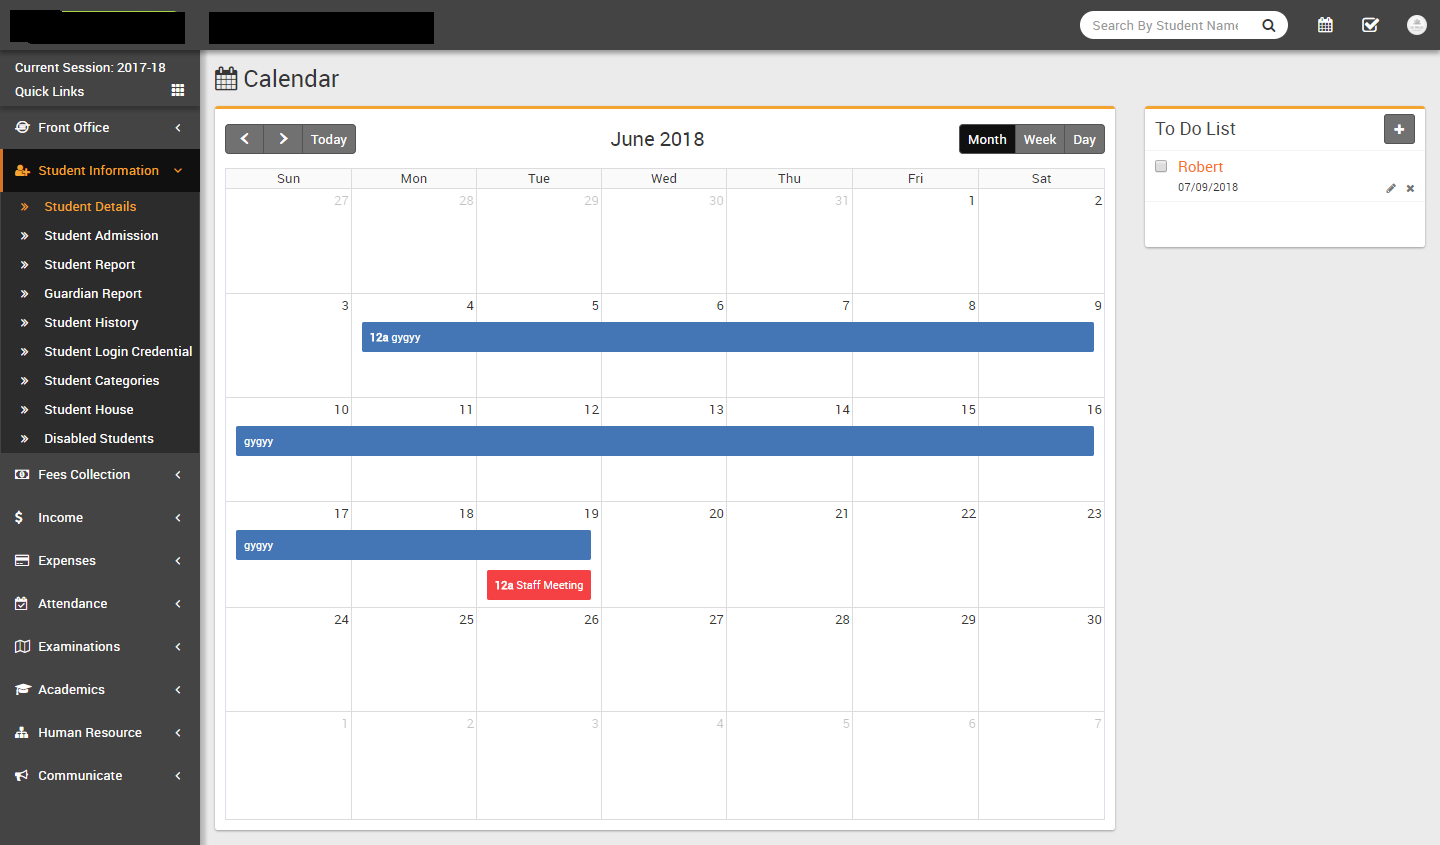
Calendar ToDo List
This module has 2 sections -
- Calendar
- ToDo List
In Calendar we can add personal or public events can be visible under login panels. In ToDo List we can add our personal task.
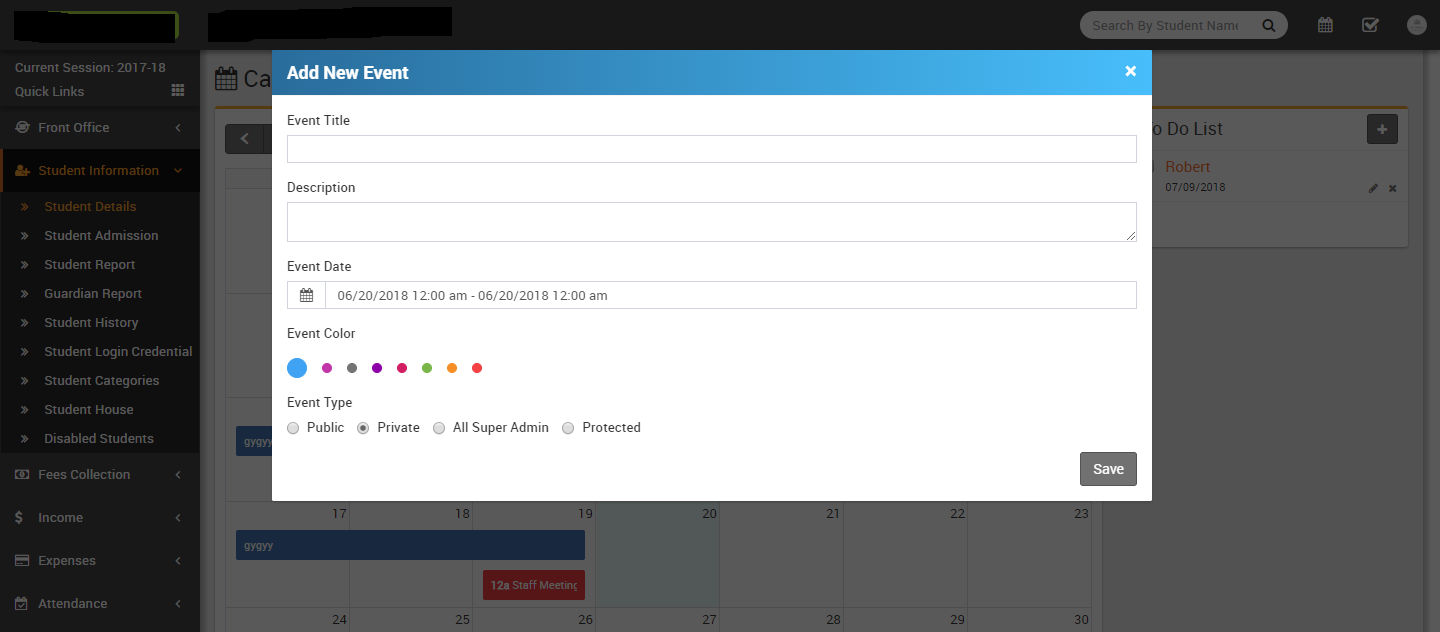
- Calendar- Go to top right corner of page besides your profile icon
you can see Calendar icon now at calendar page click on any date or time frame,
at this modal window enter Event Title, Description, Event Date, Event
Color and Event Type (Public is visible to
all, Private is only you can see this event, All <your
role> is this event will be visible to all users of your role,
Protected that means it is visible to all staff members but not student or
parent) then click on Save button.
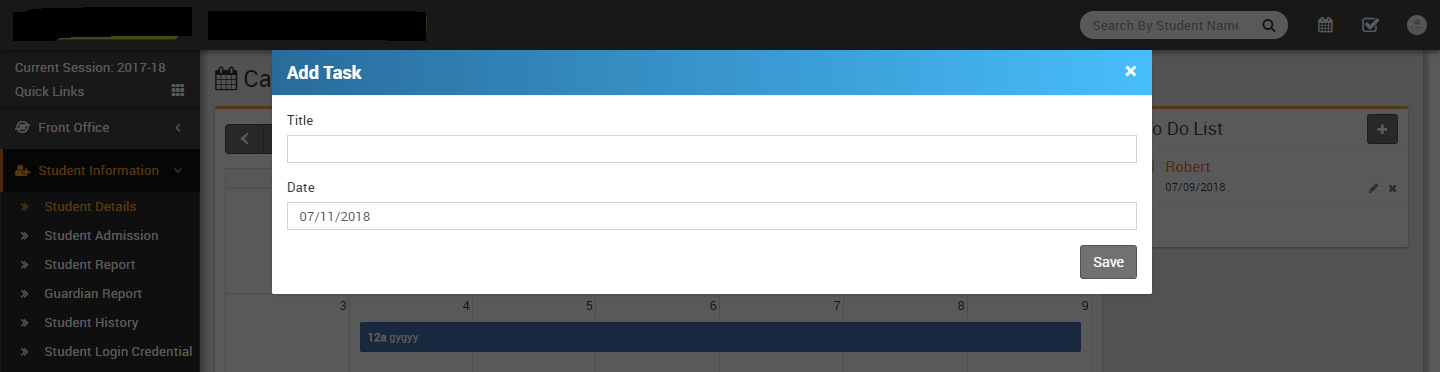
- ToDo List- Go to top right corner of page besides your profile icon
you can see ToDo List icon, click on View All
button now at calendar page right side you can see all your task click on
+ icon button, at this modal window enter Title and
Date then click on Save button.
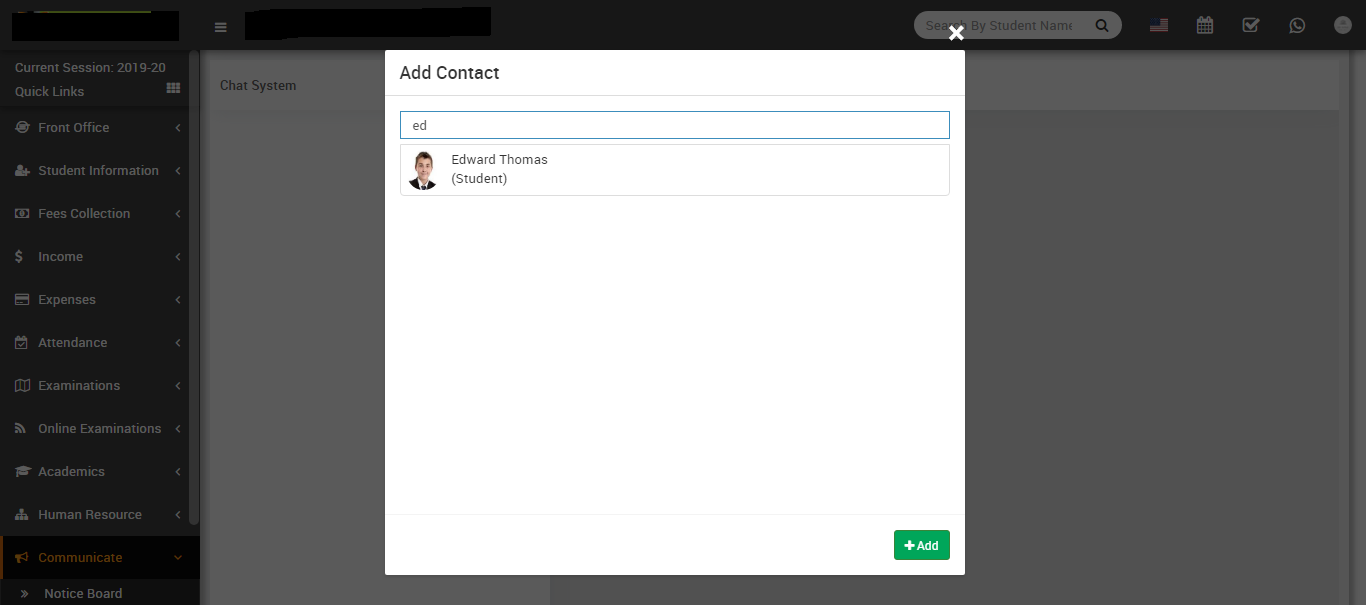
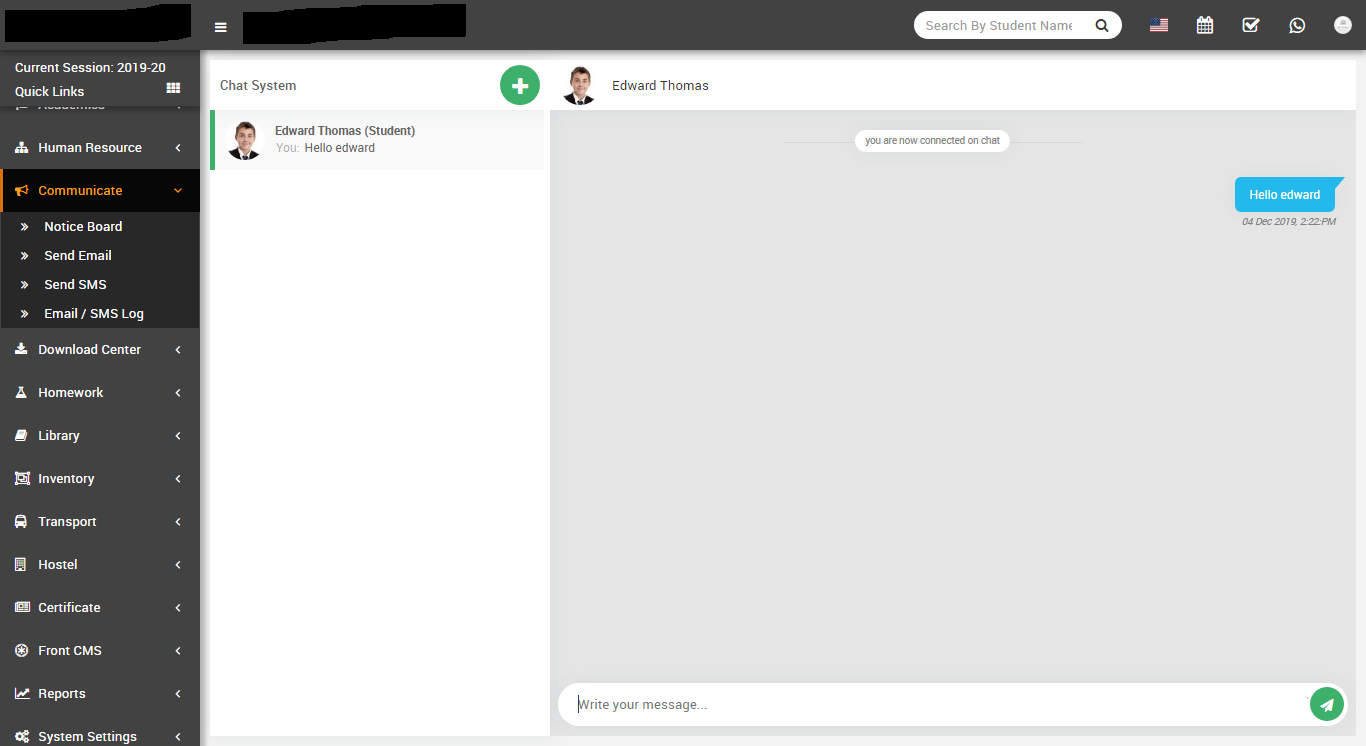
Chat
In Chat System, staff can chat with other staff members and student can also chat with other staff members
System Settings
This module has 16 sections -
- General Setting
- Session Setting
- Notification Setting
- SMS Setting
- Email Setting
- Payment Methods
- Print Header Footer
- Front CMS Setting
- Roles Permissions
- Languages
- Users
- Modules
- Custom Fields
- System Fields
All 16 sections of this module are mutually interdependent but need to configure to run whole system properly.
- General Setting- Go to System Settings > General Setting
Here update your
School Name, Address, Phone, Email, School Code (School Code is your school affiliation / accreditation no)
Session (current running Academic Session for the school), Session Start Month
Attendance Type, Biometric Attendance and Devices (Separate By Coma)
Language (Language in which you want to run your Q Gurukul), Language RTL Text Mode (for Arabian side languages)
Date Format and Timezone
Currency (ISO standard 3 digit currency code), Currency Symbol and Currency Symbol Place
Admission No, Admission No Prefix, Admission no digit, Admission Start From
Auto Staff ID, Staff ID Prefix, Staff no digit, Staff ID Start From
Duplicate Fees Invoice, Fees Due Days (used in Fees Carry Forward), Teacher Restricted Mode (if this Teacher Restricted Mode feature is Enabled then teachers will not have access to all students data, that means class teachers can access their allotted class whole data and subject teachers can access for only those classes student data for which they have assigned as subject teacher), Online Admission
Mobile App. API URL, Mobile App Primary Color Code and Mobile App Secondary Color Code these fields require to configure if you are using Q Gurukul mobile app. Please check mobile app documentation for these fields configuration.
Finally select your current admin theme then click on Save button to update record.
For updating your school print logo (used in fees receipt and payslip print) go to System Settings > General Setting in lower left side click on Edit Print Logo button (it is recommended for logo to use .png image with transparent or white background and around 200px x 200px in size). Now drag and drop or select your logo file. By clicking on Edit Admin Logo and Edit Admin Small Logo you can set logo for admin panel. Edit App Logo to set logo for mobile app.
-
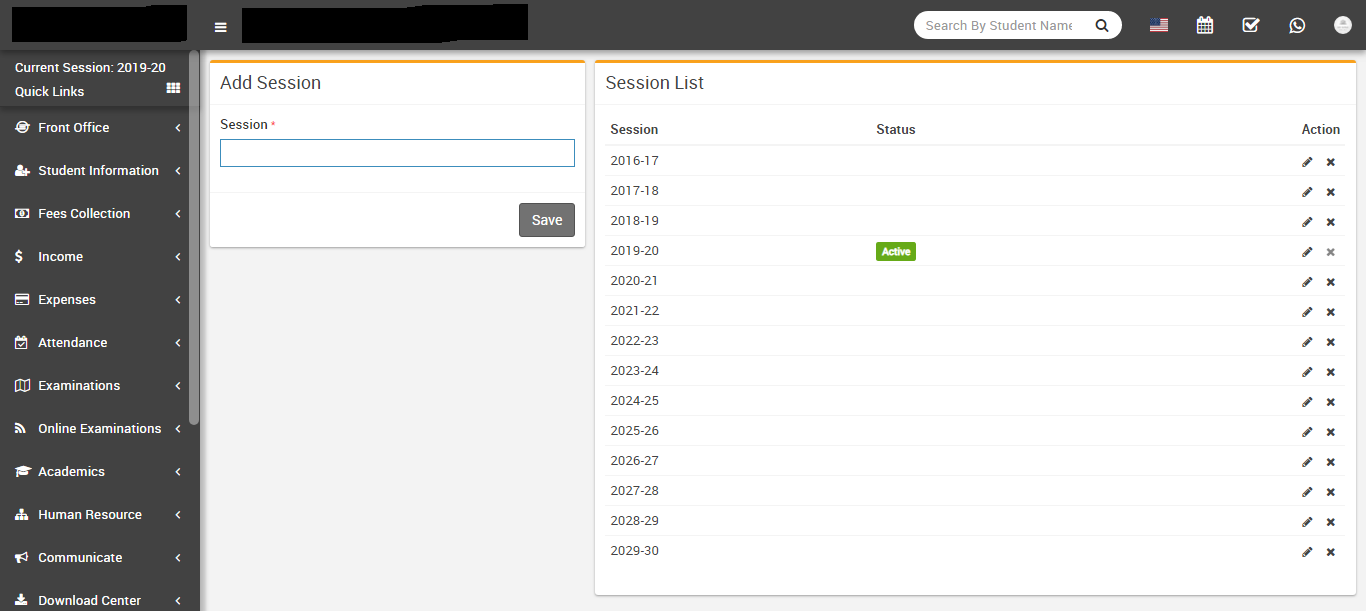
Session Setting- Go to System Settings > Session Setting
in Q Gurukul by default you get 15 years of Sessions data from 2015-16 to 2029-30 but still
you want to add more sessions then enter
Session (must be in format like 2015-16, 2016-17 etc.) & click
Save button. All the sessions can be see right side of page.
-
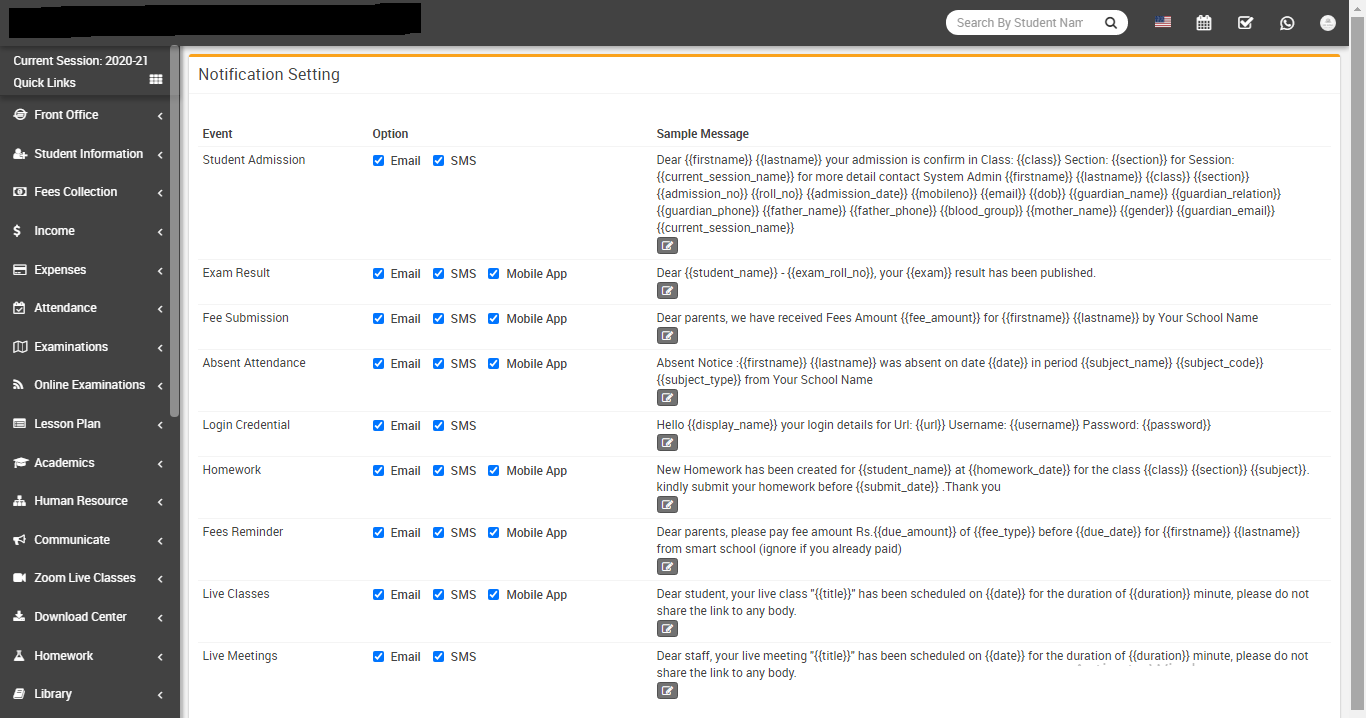
Notification Setting- Go to System Settings > Notification
Setting in Q Gurukul there are 7 events Student Admission, Exam Result,
Fees Submission, Absent Student, Login Credential,
Homework Created, Fees Due Reminder where automated Email
/ SMS are sending to concerning person's email / mobile number. To control, when email / sms
notifications will be send use Notification Setting.
Check the following at which event, which person receive notification
- Student Admission: Guardian
- Exam Result: Student
- Fees Submission: Guardian
- Absent Student: Guardian
- Login Credential: Student, Guardian, Staff
- Homework Created: Student, Guardian
- Fees Due Reminder: Guardian
- Live Classes: Student, Guardian
- Live Meetings: Staff
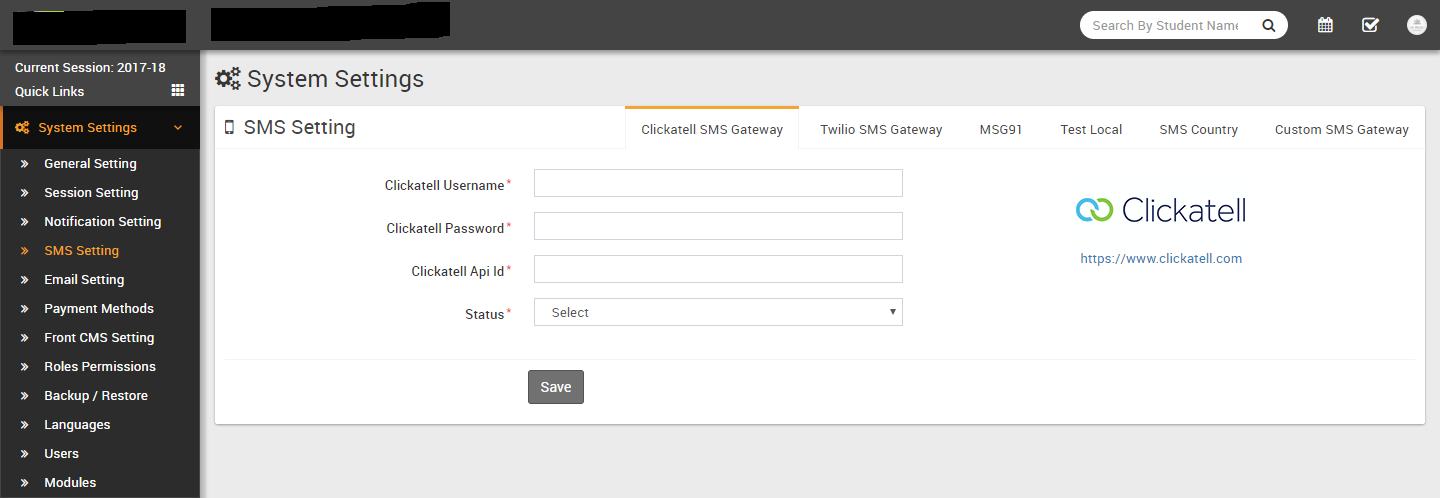
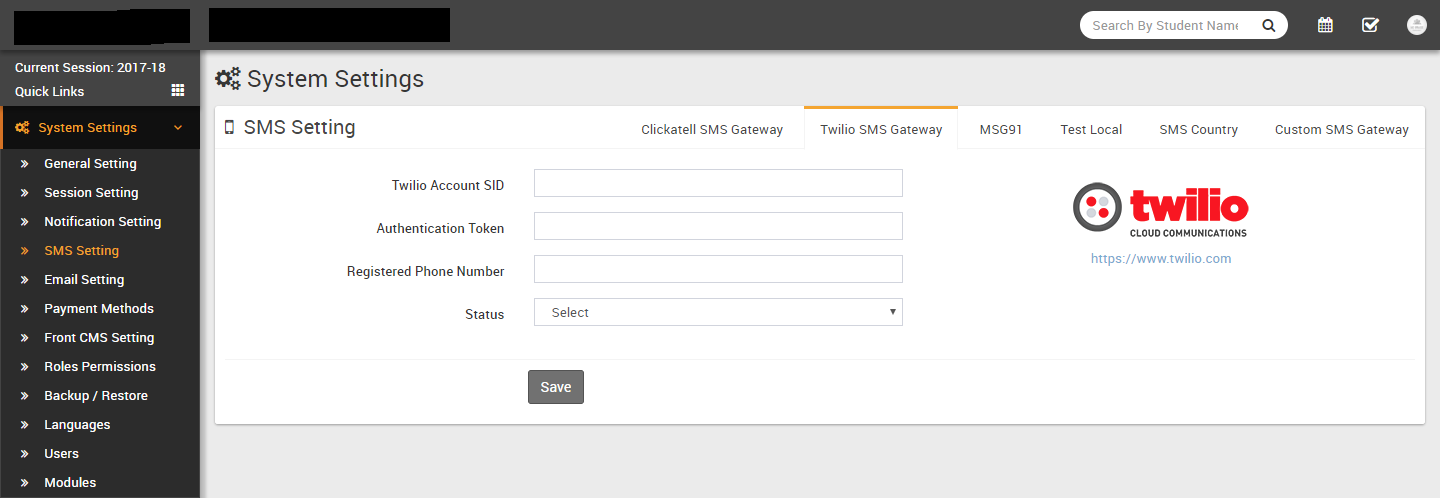
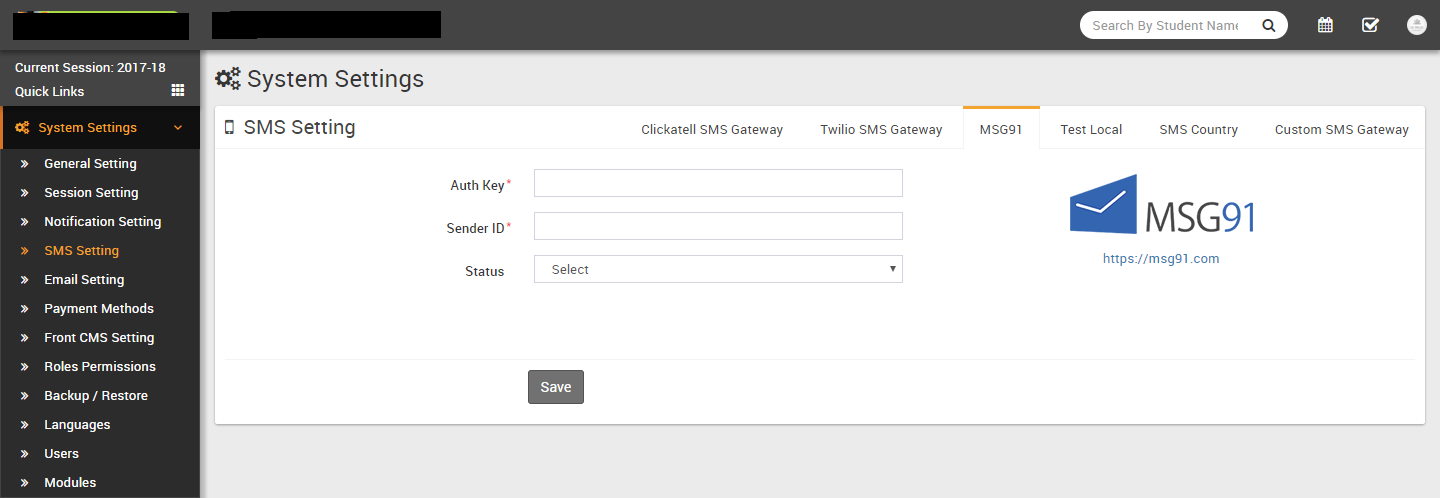
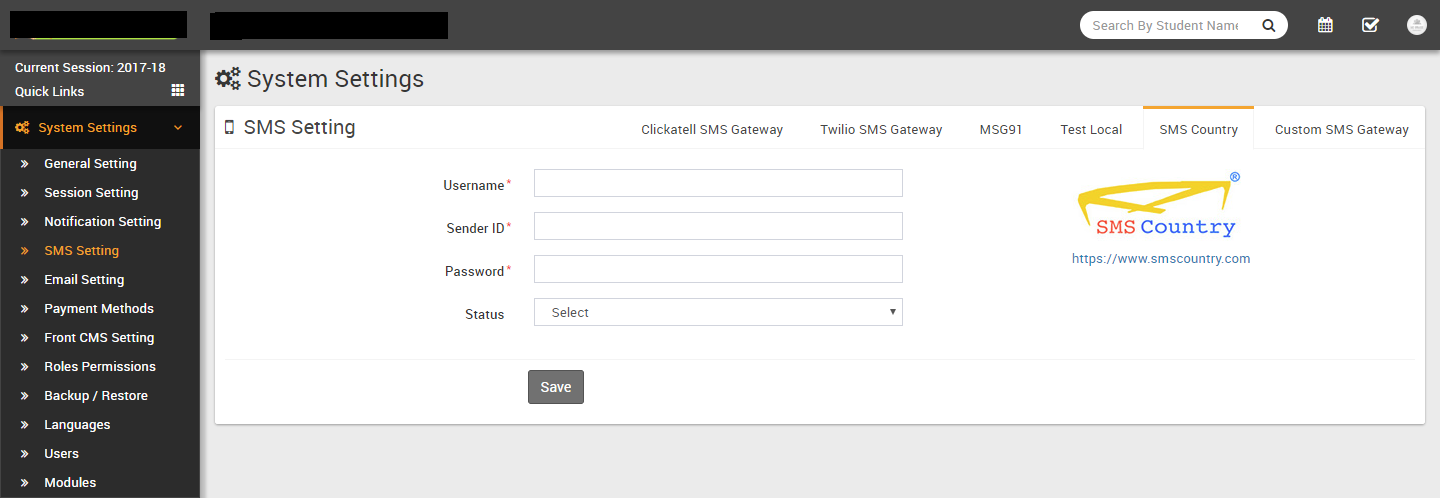
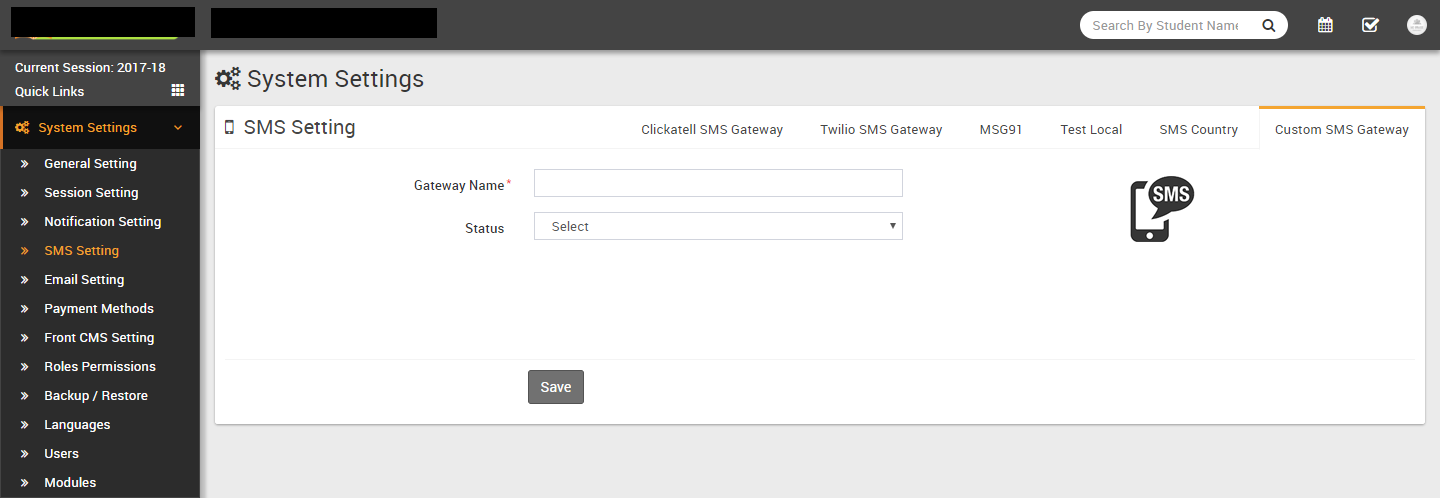
-
SMS Setting- Go to System Settings > SMS Setting for SMS
notifications to student, guardian and other users you must have to add SMS Gateway details
in Q Gurukul. Add Clickatell, Twilio,
MSG91, Text Local, SMS Country or
Twilio SMS Gateway with the required details. You can add multiple sms
gateways but only one can be enable at a time. You can also add any other http api based sms
gateways too through Custom SMS Gateway but it need to configure SMS Library in source code
and require PHP coding skills. Through this you can add any SMS Gateway which supports http
based api.

-
Email Setting- Go to System Settings > Email Setting To
send emails from Q Gurukul you need to configure Email Setting. Currently Email is available
for SendMail and SMTP delivery engine.
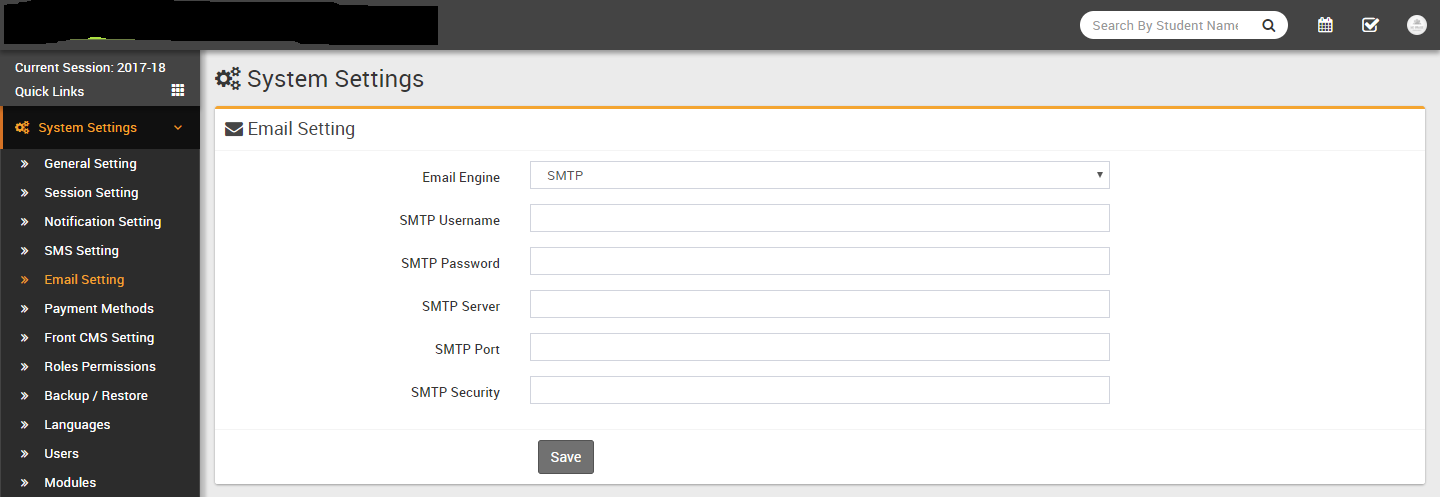
Select SendMail email engine to send emails through your Hosting SendMail program.
Select SMTP email engine to send email using any SMTP relay. You can use gmail smtp relay also by adding any gmail account details but your gmail account also seto for less secure device so SMTP engine can send email using gmail smtp relay.
Enter SMTP Username, SMTP Password, SMTP Server SMTP Port, SMTP Security and finally click on Save button to save your settings.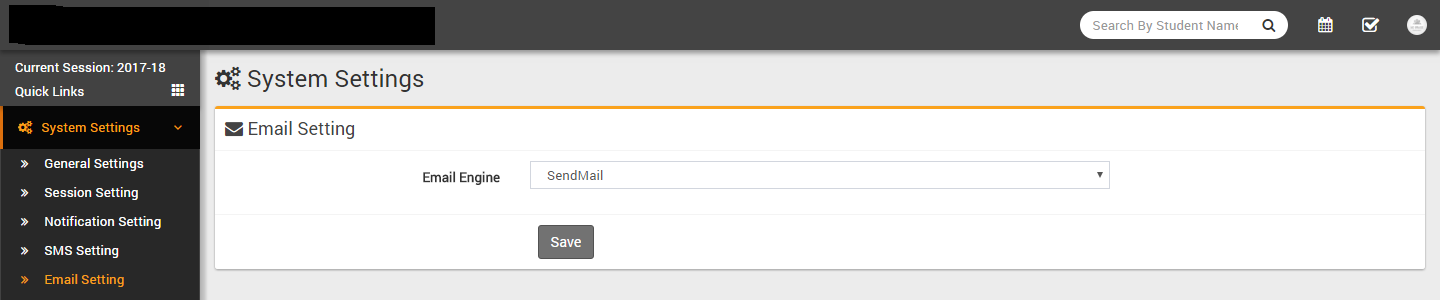
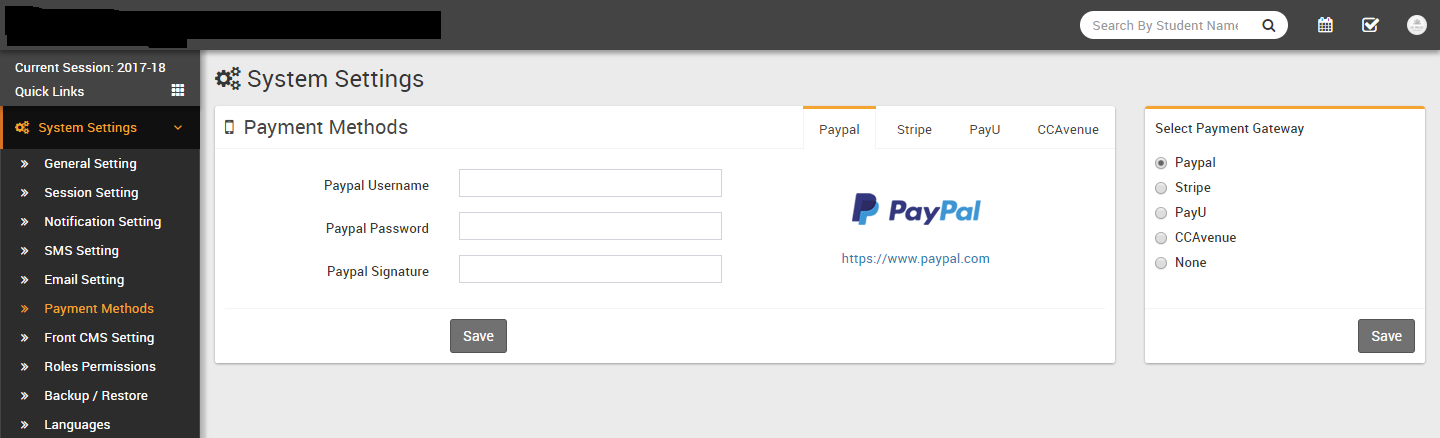
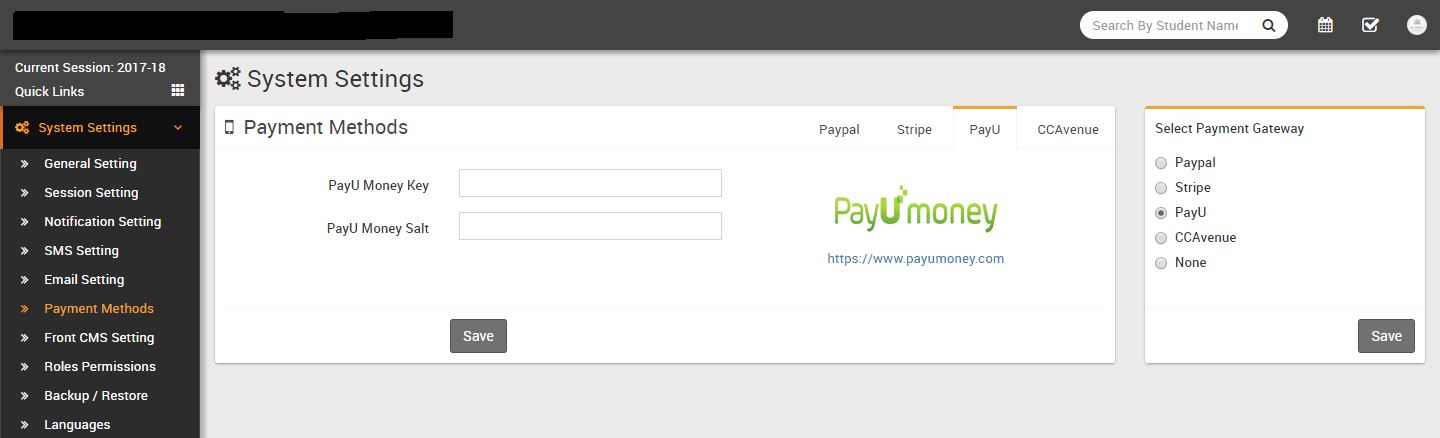
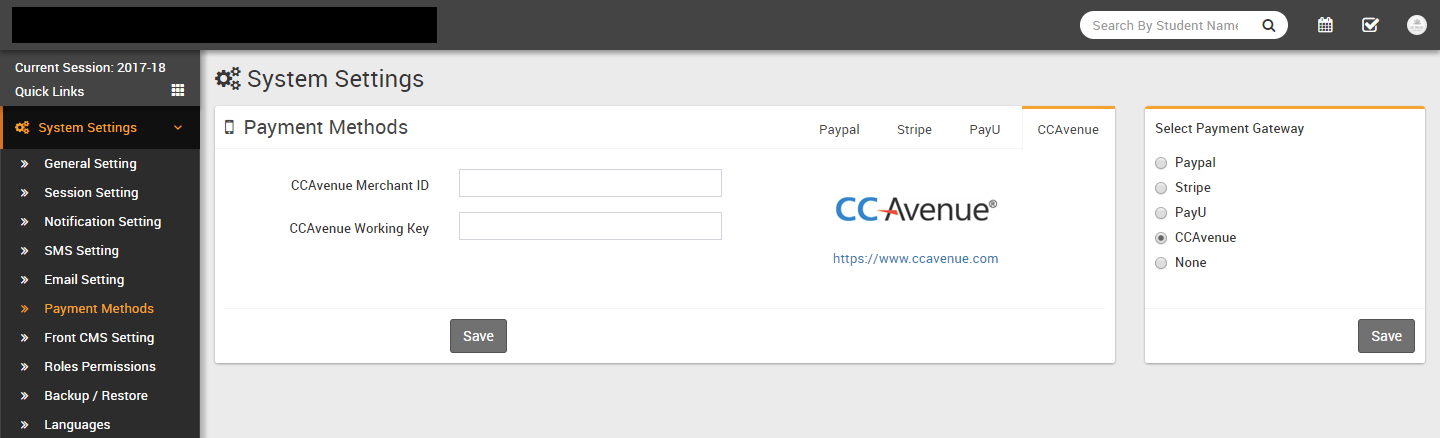
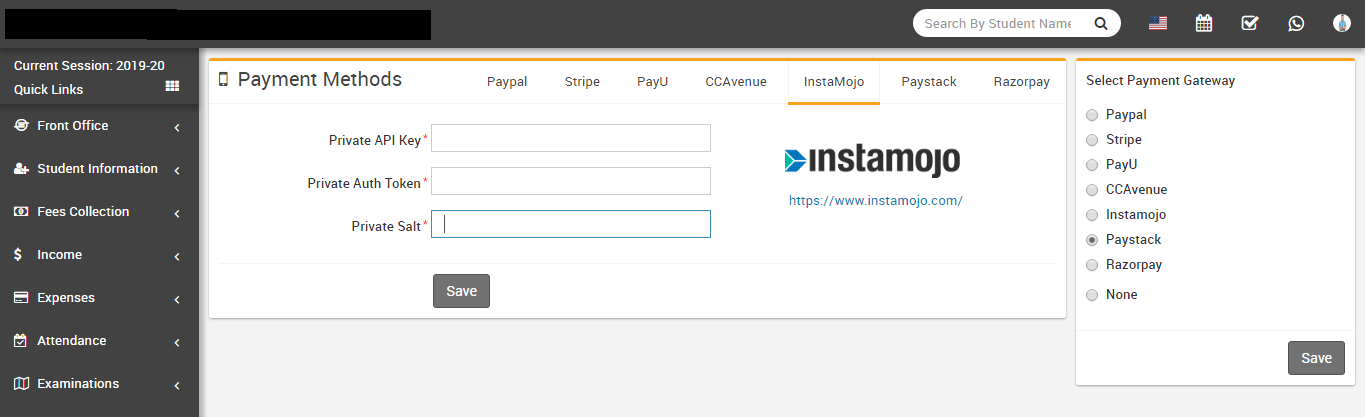
-
Payment Methods- Go to System Settings > Payment Methods
there are 7 payment gateways Paypal, Stripe, PayU, CCAvenue, Instamojo,
Paystack and Razorpay available in Q Gurukul. For enabling
parents/guardian to pay their children fees payment online through Parent Panel then you
must have to enter and enable any one of payment gateway. You can add multiple payment
gateways details but you can enable only one at a time. Add your payment gateway account
details in required fields, then enable that payment gateway.
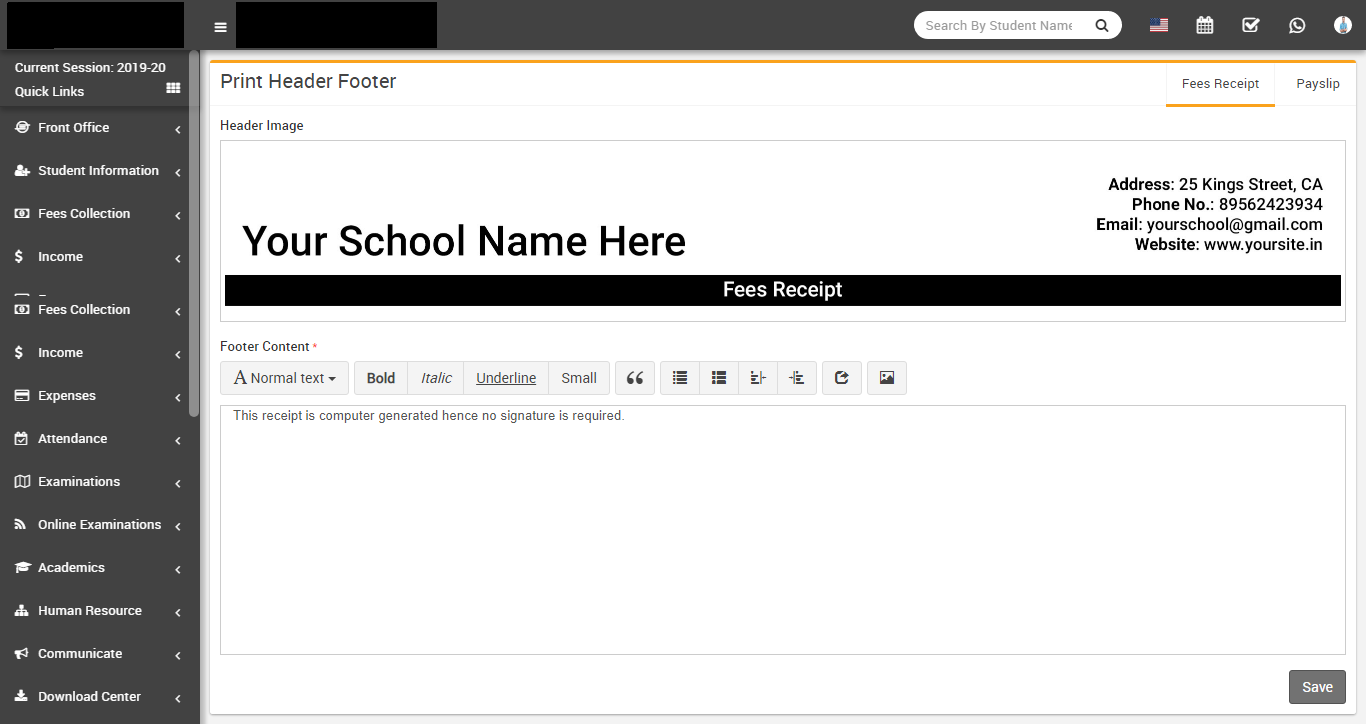
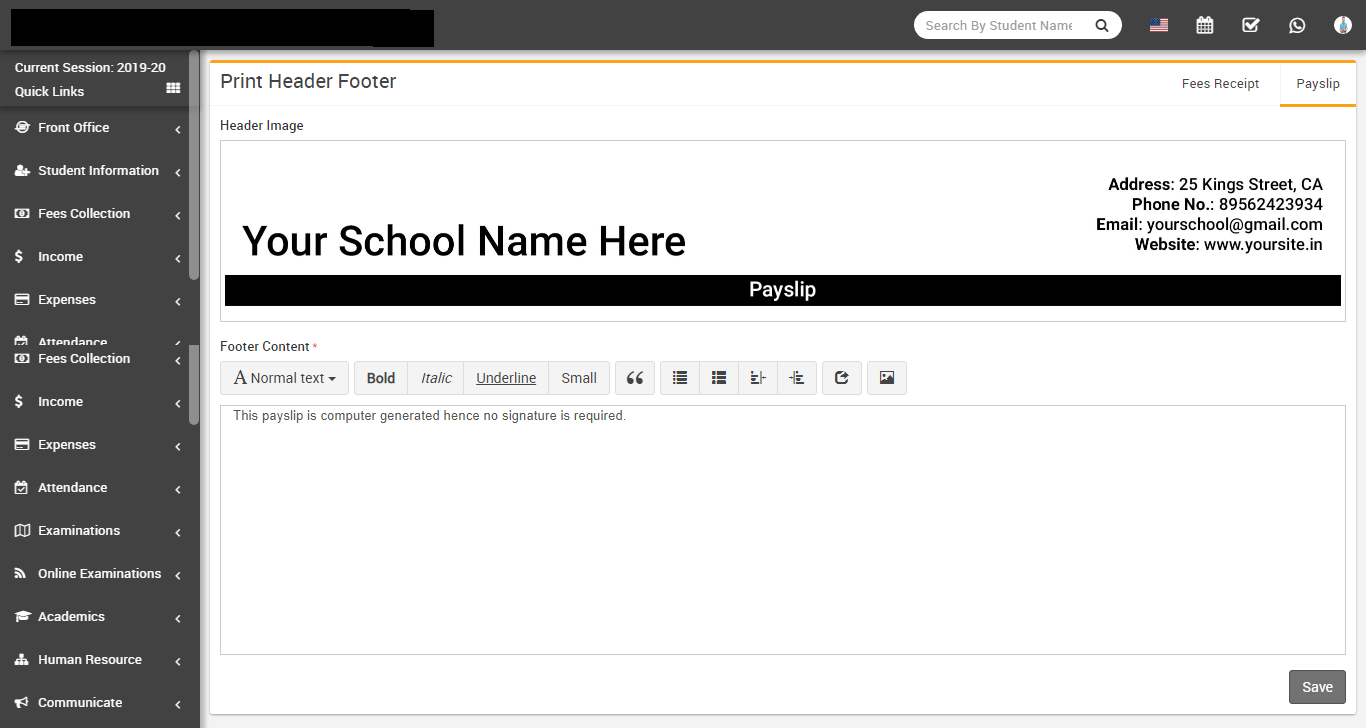
-
Print Header Footer- Go to System Settings > Print Header
Footer here you can add header footer for student fees receipt and staff
payslip. Just replace existing header image to your header image and enter your footer text.
-
Front CMS Setting- Go to System Settings > Front CMS
Setting here we can enable/disable Front CMS, Sidebar, Language RTL
Text Mode, check Sidebar Option, upload Logo, Favicon, enter Footer Text, Google
Analytics, Facebook URL, Twitter URL, Youtube URL, Google Plus, Linkedin URL, Instagram
URL, Pinterest URL and Current Theme (there are 3 default themes supplied with
Q Gurukul but you can create your own theme by copying "default" theme with your own name in
same folder. For themes /application/views/themes contains php view files and
/backend/themes folder contains css, js, images etc. files).
-
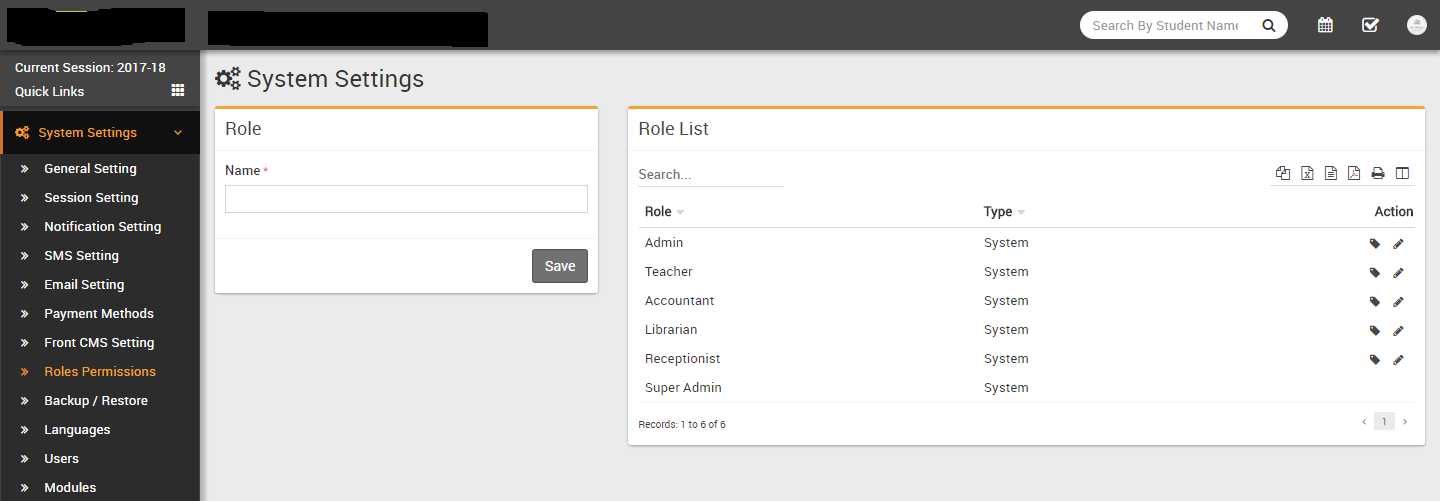
Roles Permissions- Go to System Settings > Roles
Permissions here we can create different Roles for staff users and then assign
different user permission to this Role. To add new role enter Role Name then click on Save
button all existing roles can be see from right side of this page. By default in Q Gurukul
you will get 6 user roles SuperAdmin, Admin, Teacher, Accountant, Librarian,
Receptionist. You can edit name or permission of these roles except SuperAdmin.
To assign permission click on Assign Permission button from
Action column. At this page you can see Module wise different Features and
their different Permissions. Carefully assign different permissions on roles. After
assigning permission, check where it is effecting in system. There are 4 types of
permissions present here View, Add, Edit and Delete. Here note that
if you are assigning Add/Edit or Delete permission then View permission should be
given obviously if you have not given View permission then system can behave
inconsistent so in best practice if you are giving Add/Edit/Delete any one permission then
give View permission too.
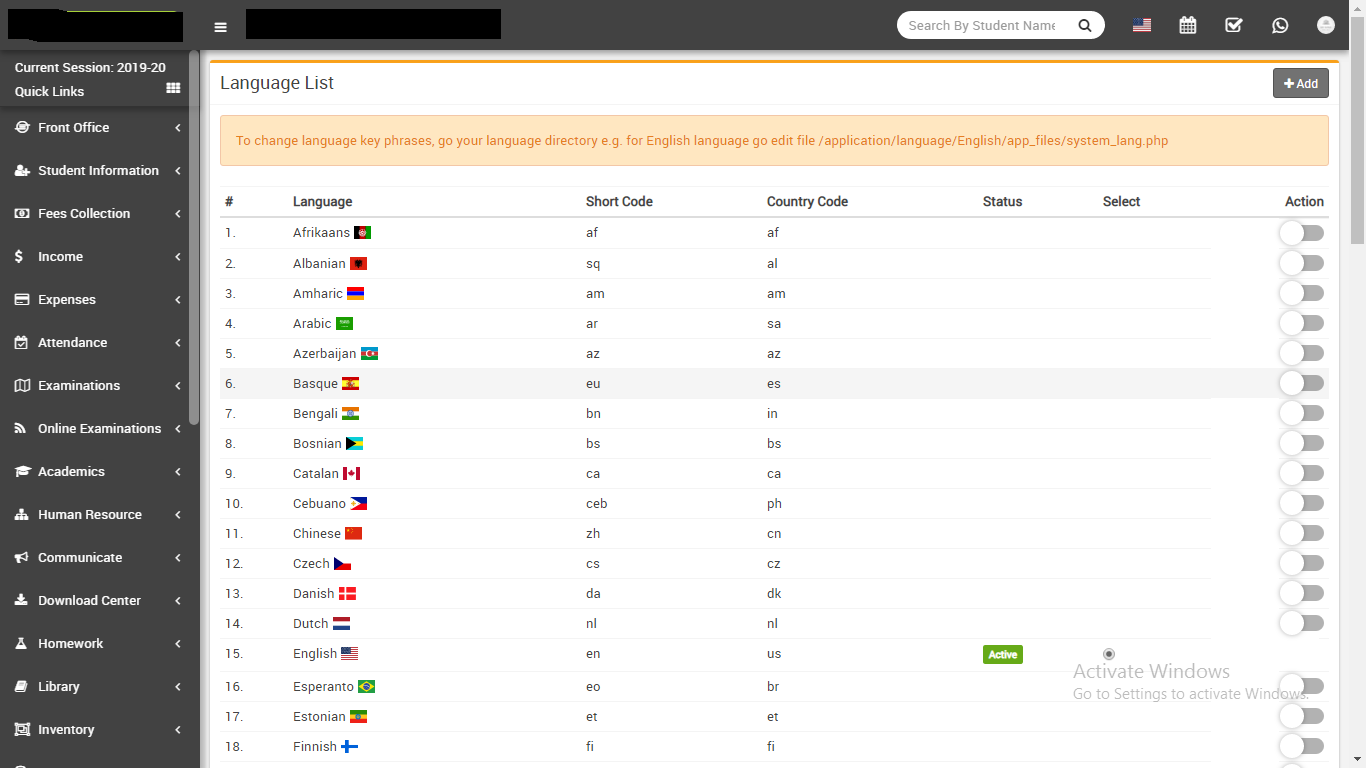
- Languages- Go to Systems Settings > Languages since ver. 4.0.0 Q Gurukul language module has been migrated to file based languages for better performance and easy to manage. You can enable multiple languages and select your default language. To change language key phrases, go your language directory e.g. for English language go to edit file /application/language/English/app_files/system_lang.php . Where as /application/language/English/form_validation_lang.php file is used for validation message text. Below you can find the list of all 74 languages.
- Afrikaans
- Albanian
- Amharic
- Arabic
- Azerbaijan
- Basque
- Bengali
- Bosnian
- Catalan
- Cebuano
- Chinese
- Czech
- Danish
- Dutch
- English
- Esperanto
- Estonian
- Finnish
- French
- Galician
- Georgian
- German
- Greek
- Gujarati
- Haitian (Creole)
- Hebrew
- Hindi
- Hungarian
- Icelandic
- Indonesian
- Irish
- Italian
- Japanese
- Javanese
- Kannada
- Korean
- Latin
- Latvian
- Lithuanian
- Macedonian
- Malagasy
- Malay
- Malayalam
- Maltese
- Maori
- Marathi
- Mongolian
- Nepali
- Norwegian
- Persian
- Polish
- Portuguese
- Punjabi
- Romanian
- Russian
- Scottish
- Sinhala
- Slovakian
- Slovenian
- Spanish
- Sundanese
- Swahili
- Swedish
- Tagalog
- Tamil
- Telugu
- Thai
- Turkish
- Urdu
- Uzbek
- Vietnamese
- Welsh
- Xhosa
- Yiddish
-
For adding new languages click on
Add button from top right side of page on next page enter your
Language Name & click Save button. Active language can
also be select from
System Settings > General Setting.
-
Users- Go to System Settings > Users All the users like
Student, Parent and Staff can be see here and you can enable or disable them from login to
User Panel. To enable or disable user click on toggle button in
Action column.

-
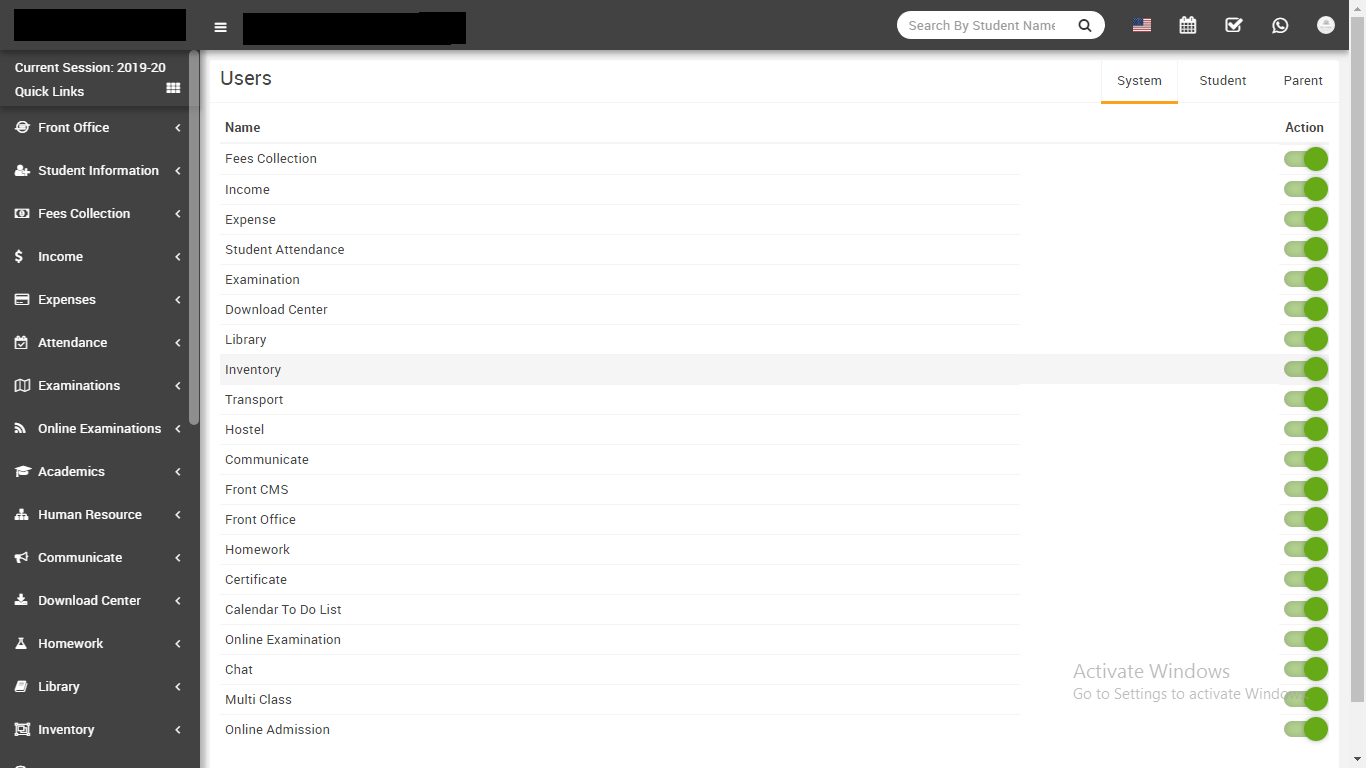
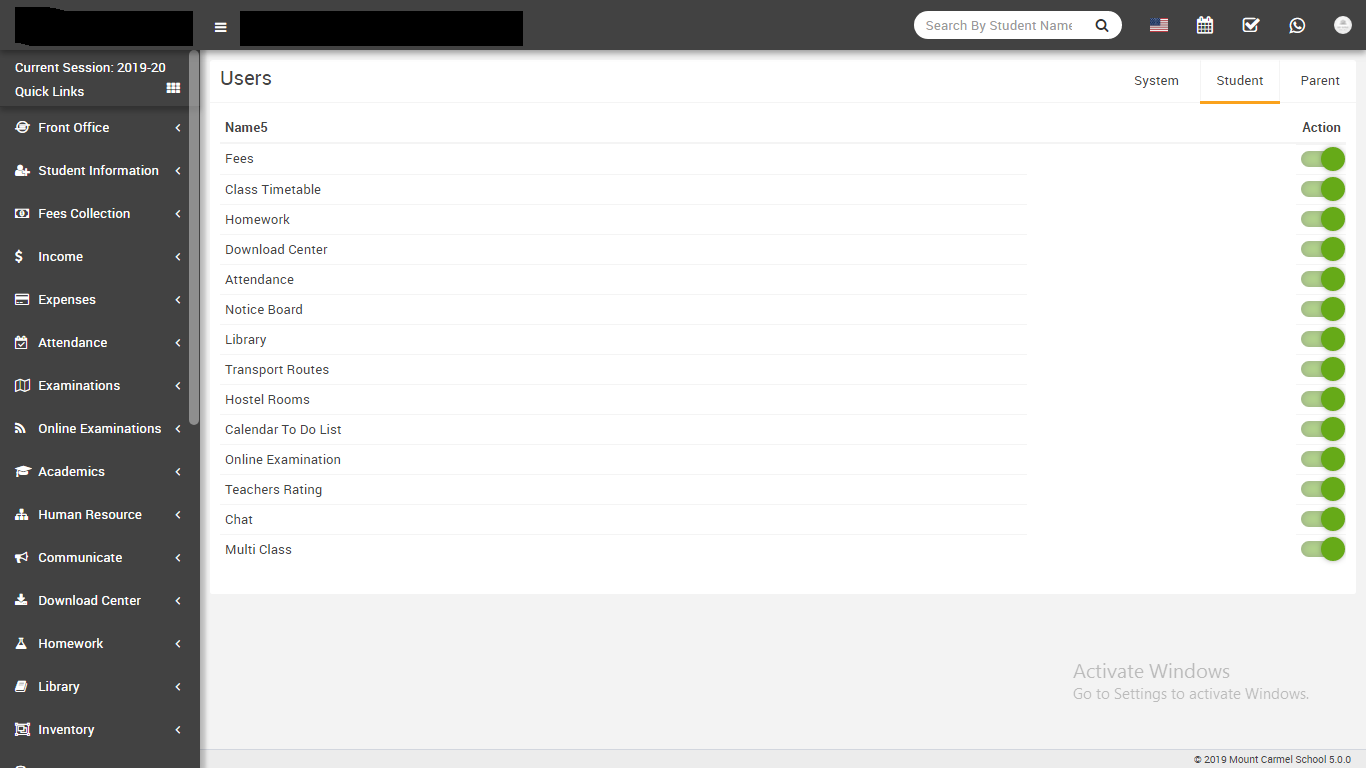
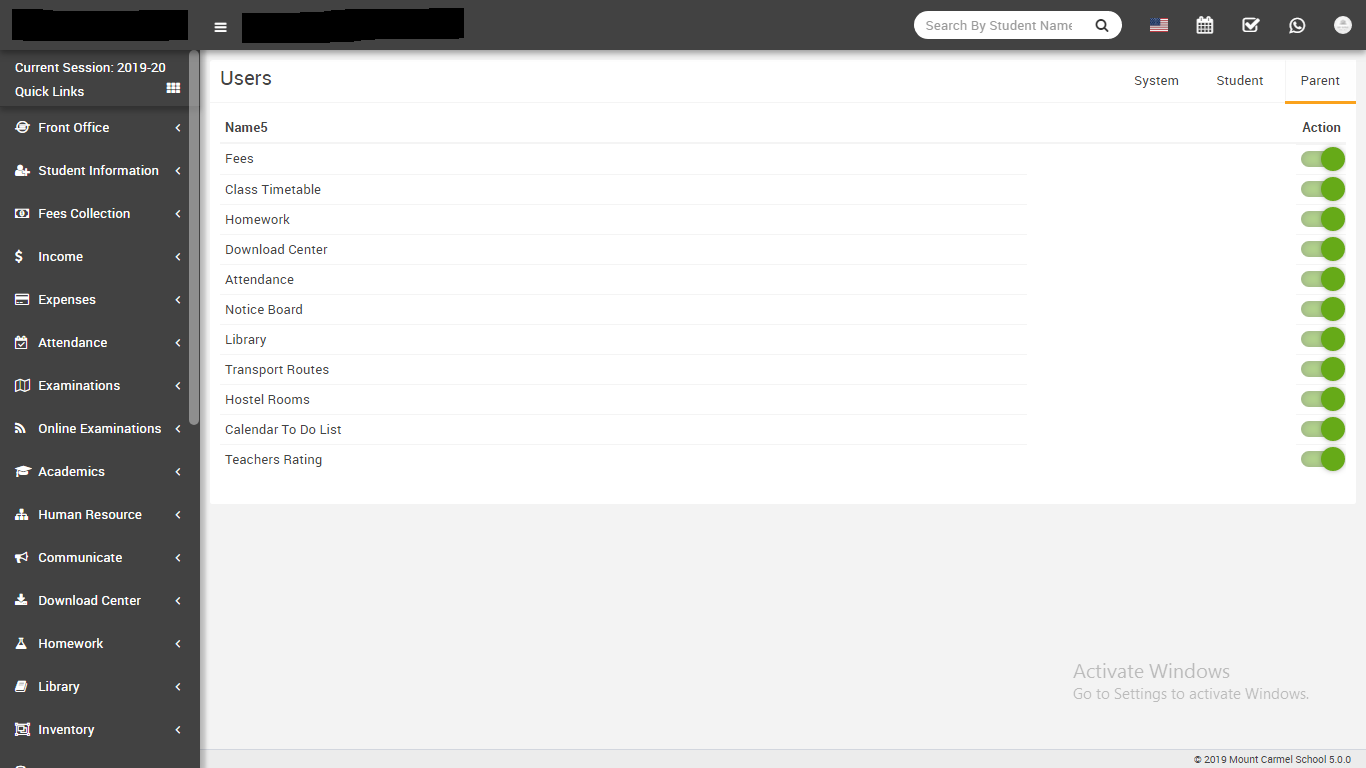
Modules- Go to System Settings > Modules Q Gurukul comes
with 30+ modules but there are 20 modules available to enable/disable from whole system.
Disabling any module will be disabled from Admin/Student and Parent panel at once it works
over Roles Permission module so even you have given permission for module but after
disabling module will be disabled from whole system. To enable/disable simply click on
toggle button present in Action column. To enable/disable modules/features from Student and
Parent panel use respective tab.
-
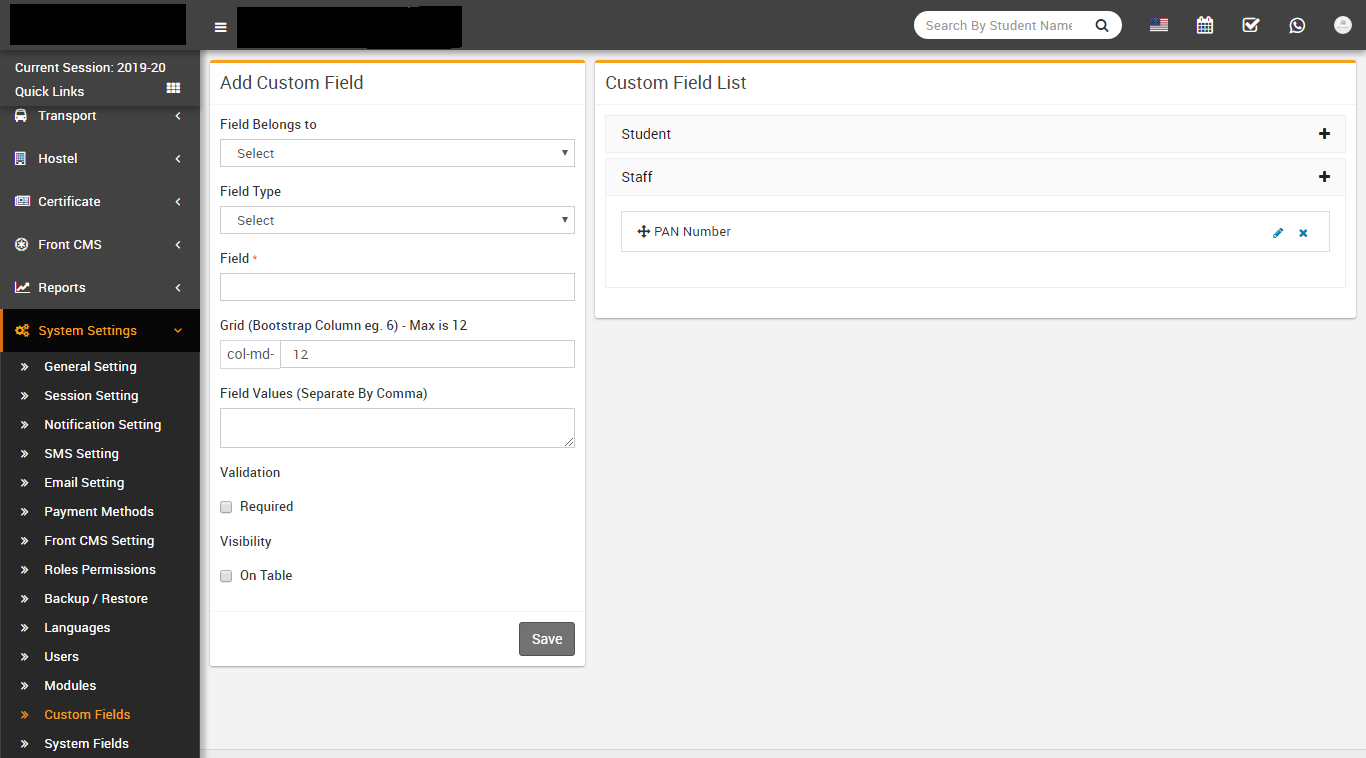
Custom Fields- Go to System Settings > Custom Fields If
you want to add any extra field in student or staff then you can add that fields from here.
To add new custom field select Field Belongs to, Field Type, Field Name, Grid column, Field
Values then check for Validation and Visibility then click on Save button.
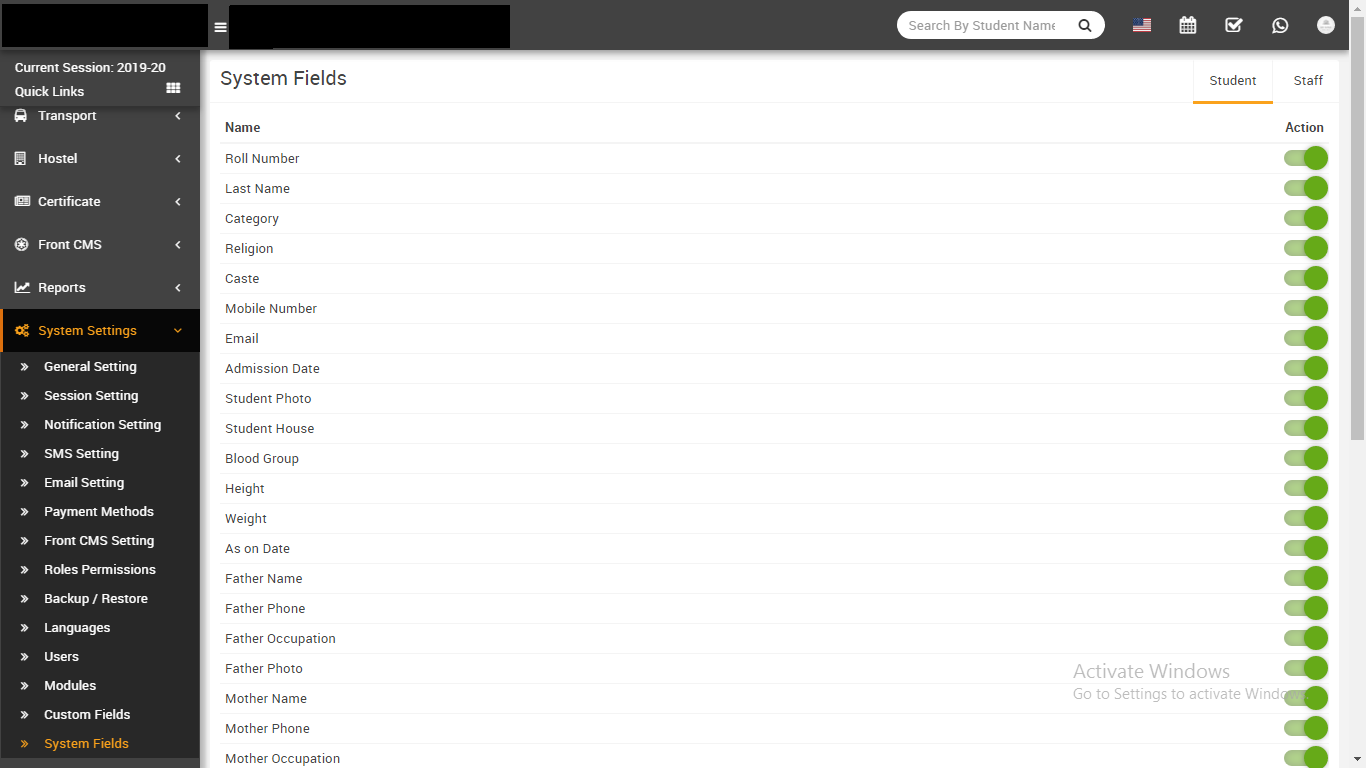
-
System Fields- Go to System Settings > System Fields Here
you can disable/enable any system fields in student or staff.To enable or disable user click
on toggle button in Action column.
Student Panel
Login to Student Panel through URL https://gurukul.qodeigence.com/site/userlogin. If student belongs to multiple classes then he can switch class from top right corner Class Switcher. Student Panel has 13 sections -
- My Profile
- Fees
- Class Timetable
- Homework
- Online Exam
- Apply Leave
- Download Center
- Attendance
- Notice Board
- Teachers Review
- Library Books
- Transport Routes
- Hostel Rooms
- My Profile- after login student can see their complete profile including
fees, exams & documents
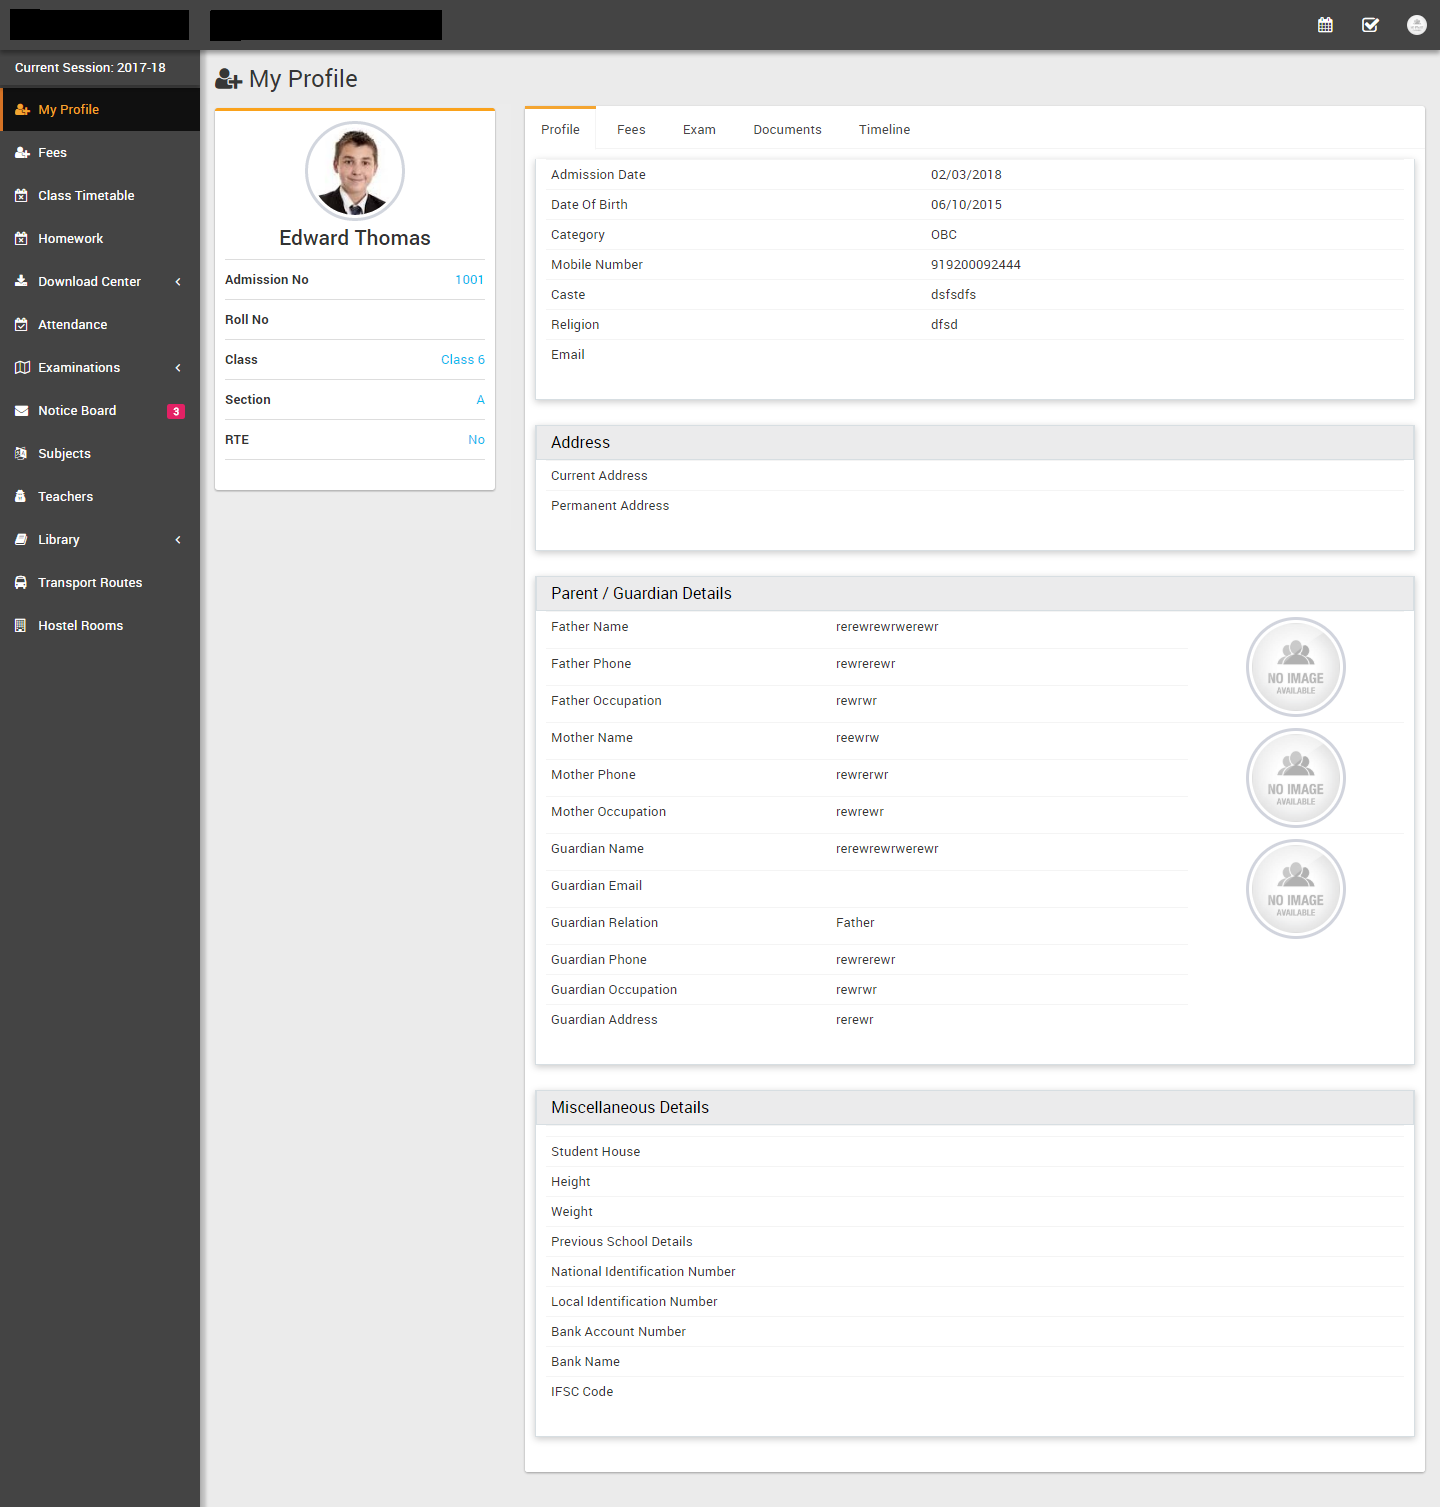
- Fees- student can see their fees details and if online payment gateway is
enabled then student can pay their online fees from here.
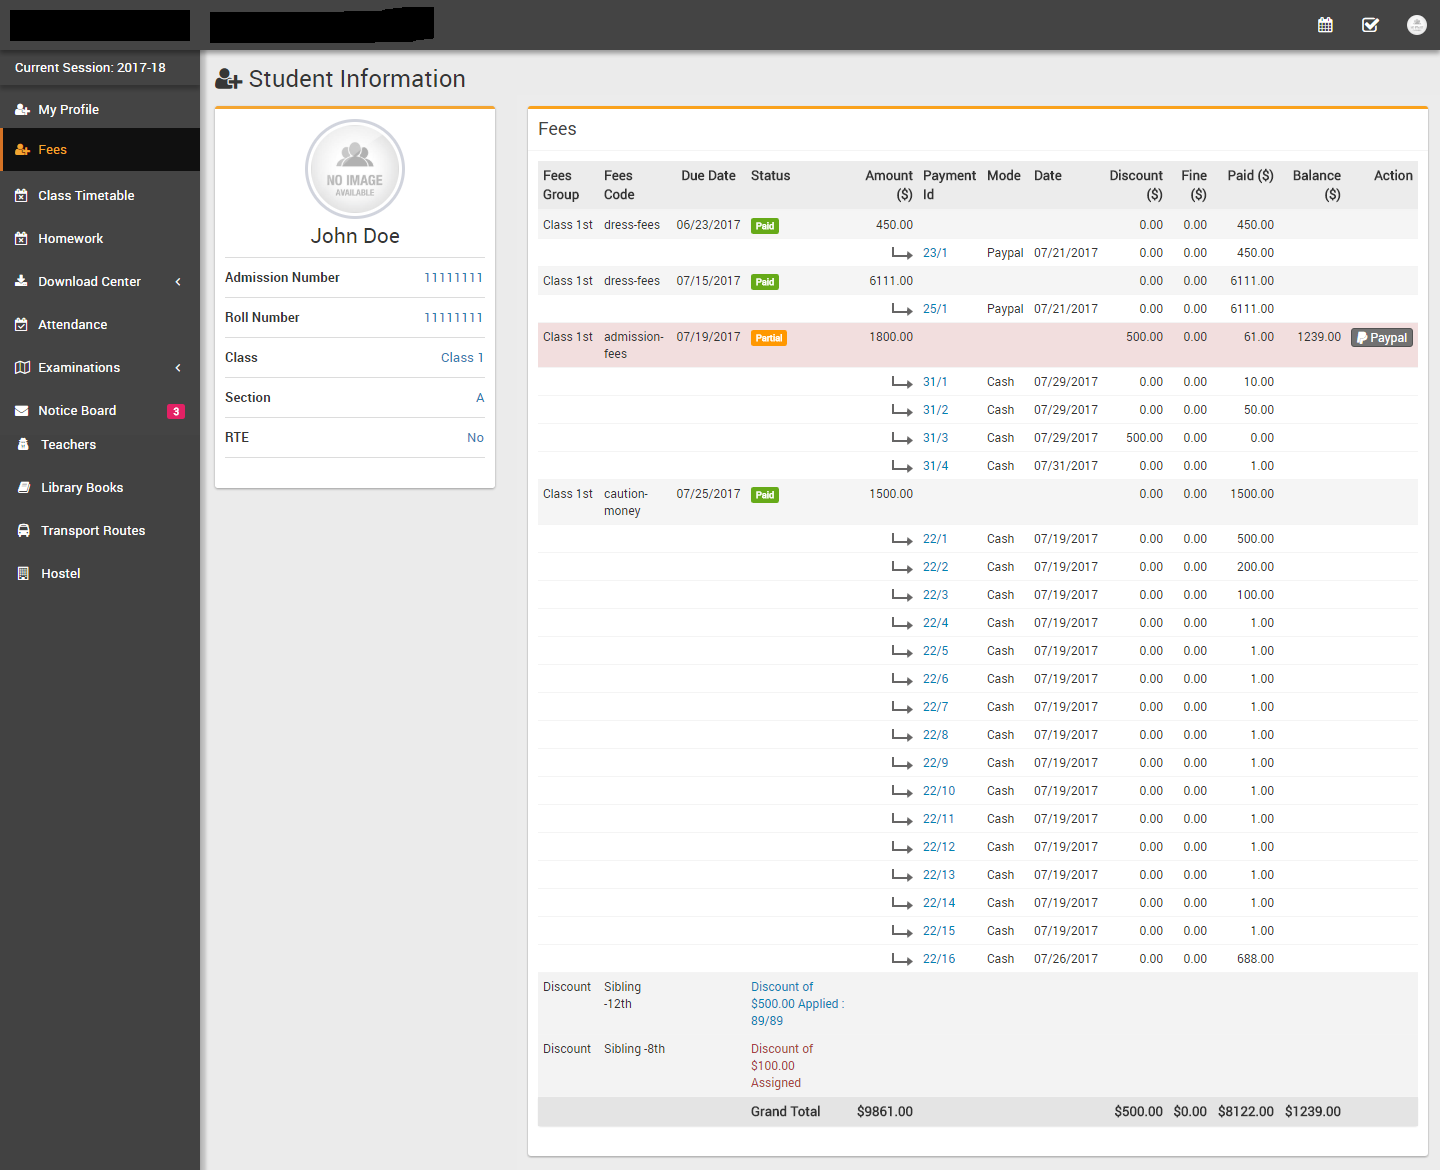
- Class Timetable- student can see their weekly class timetable here
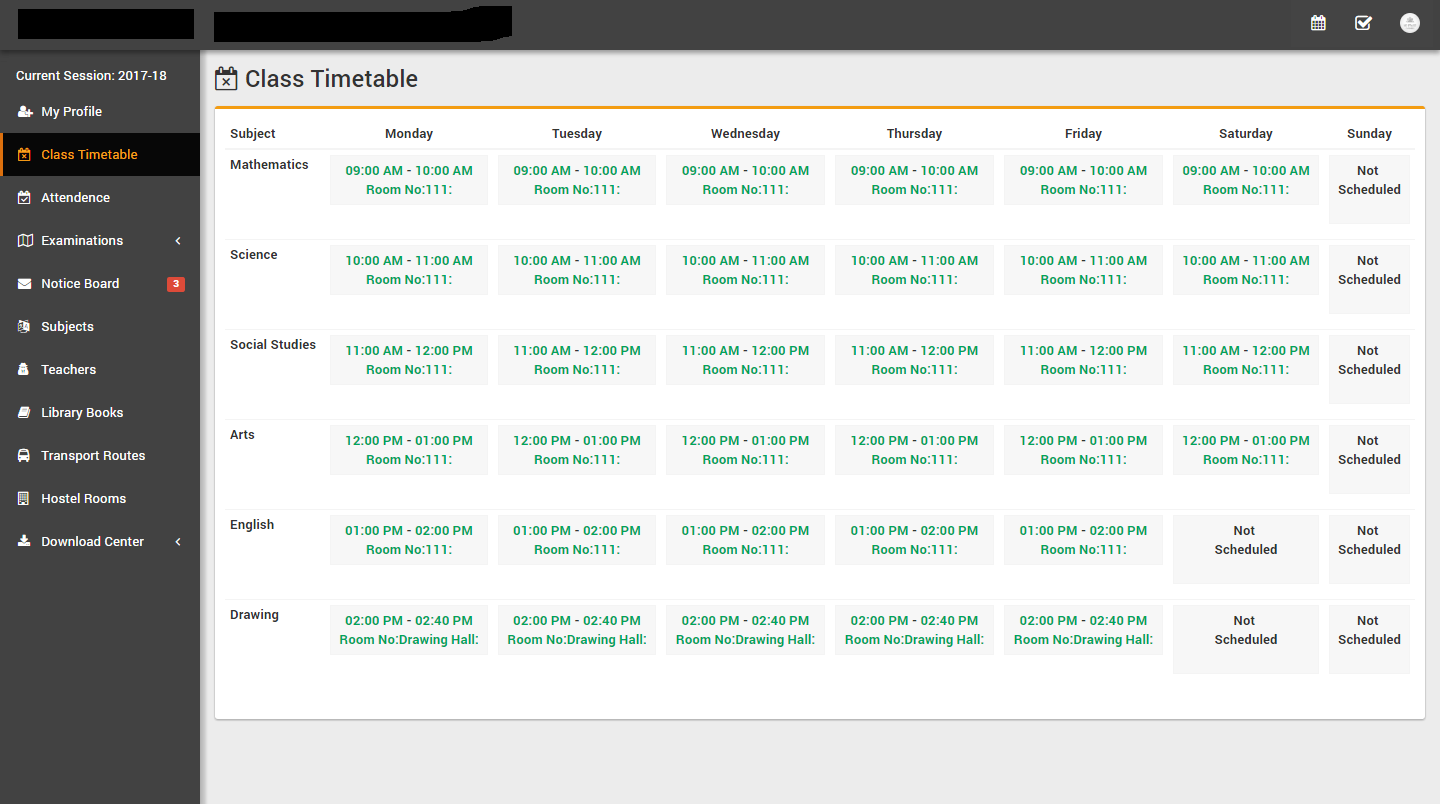
- Homework- student can see their class homework here
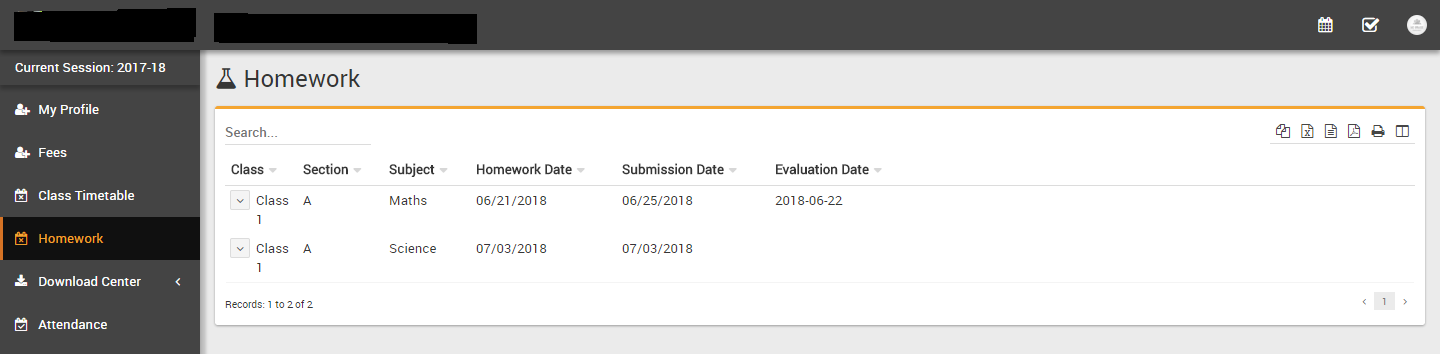
- Online Exam- student can take available online exams here
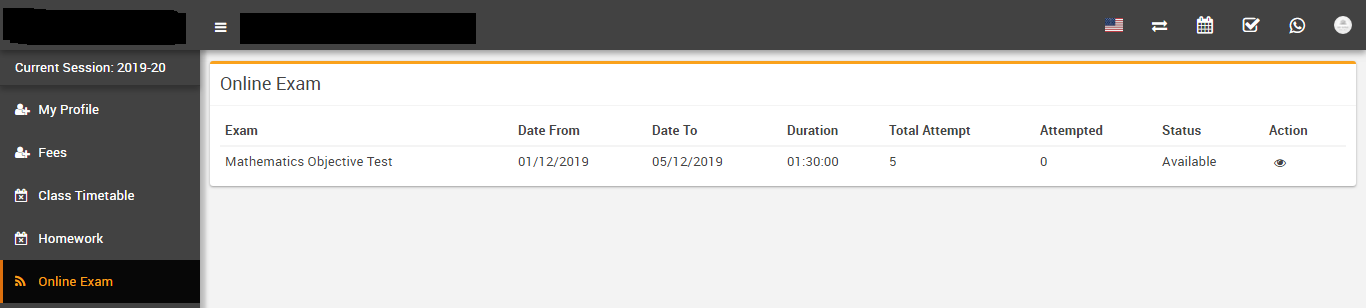
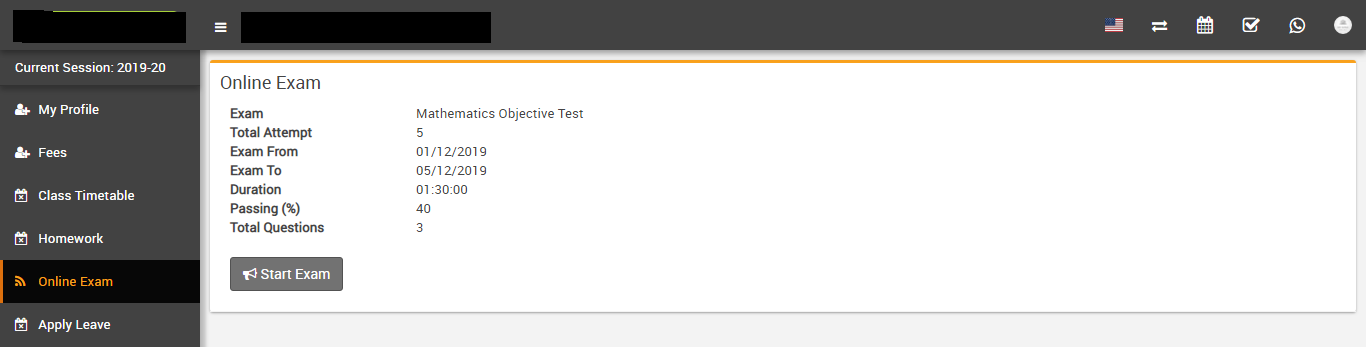
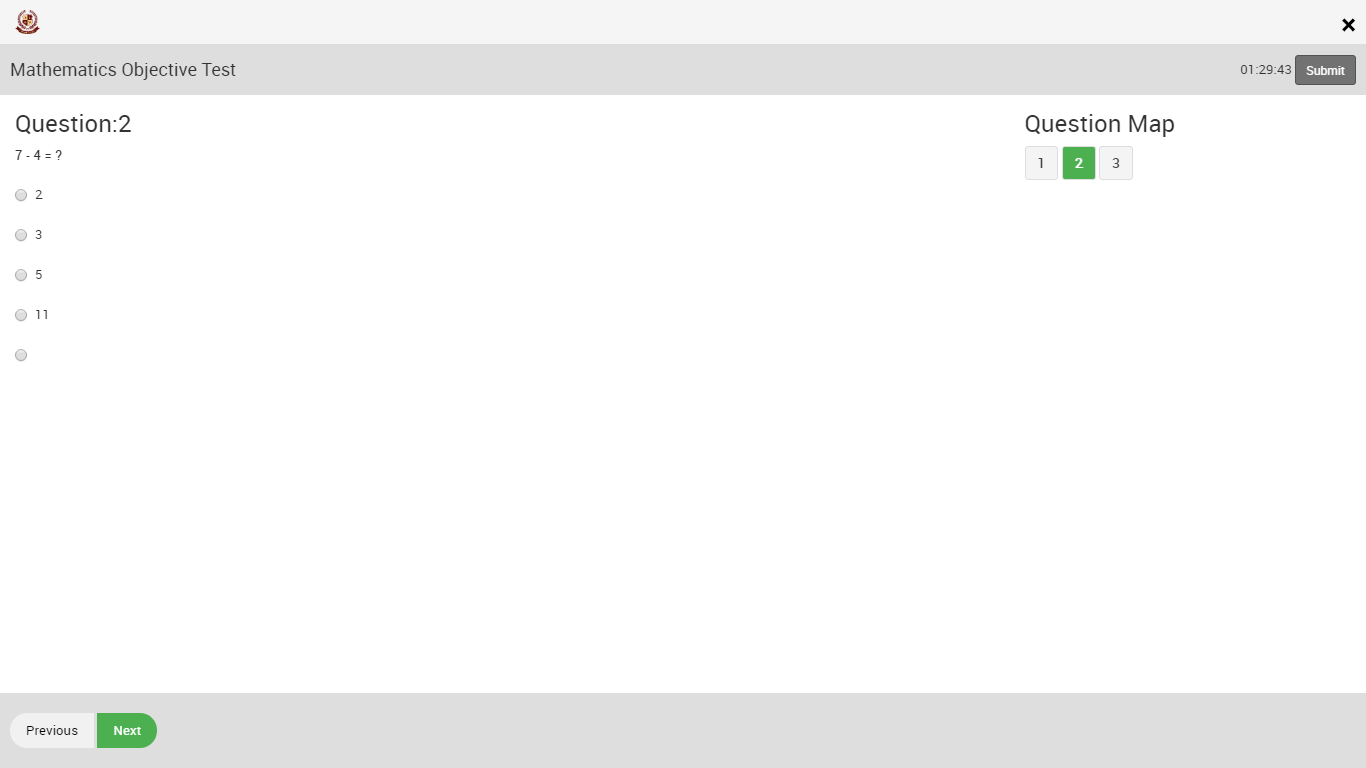
- Apply Leave- student can apply leave and check their applied leave status
here
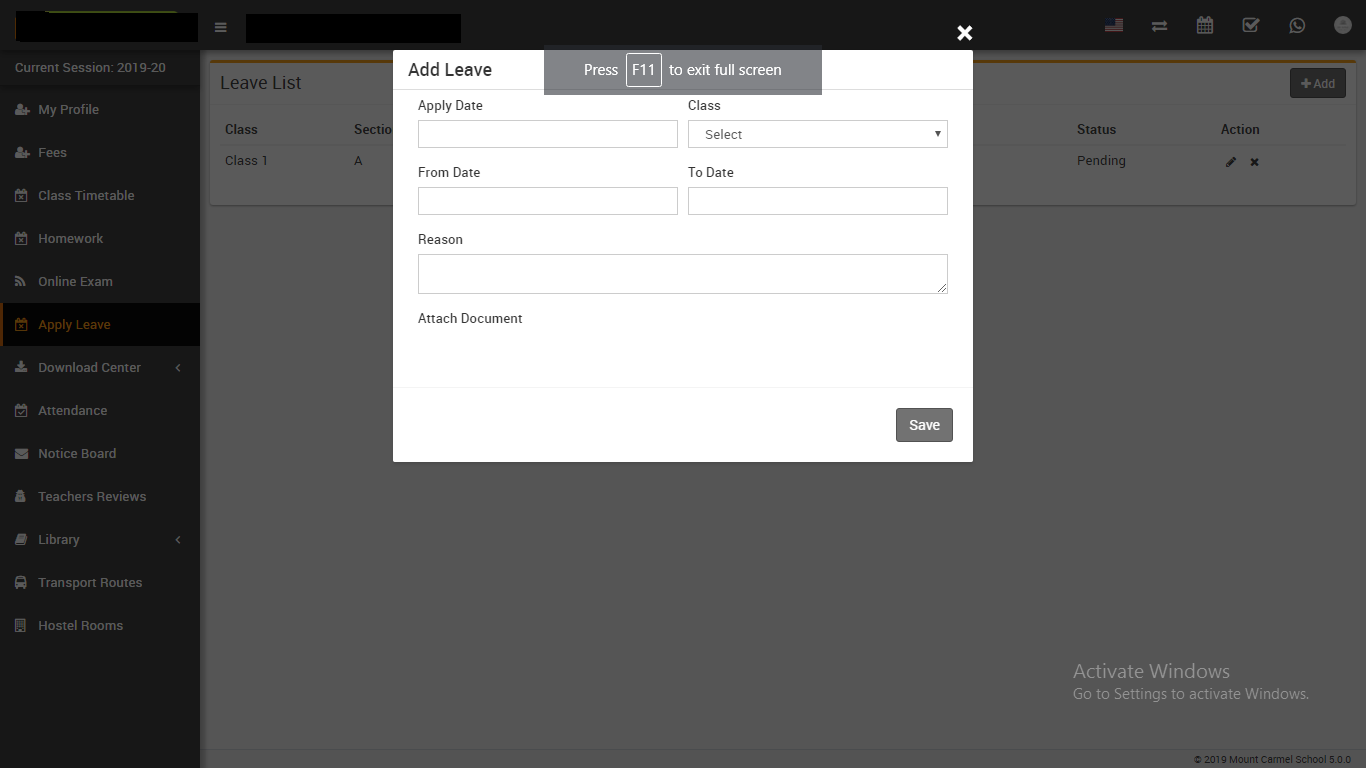
- Download Center- student can download Assignments, Study Material, Syllabus
& Other Download content here
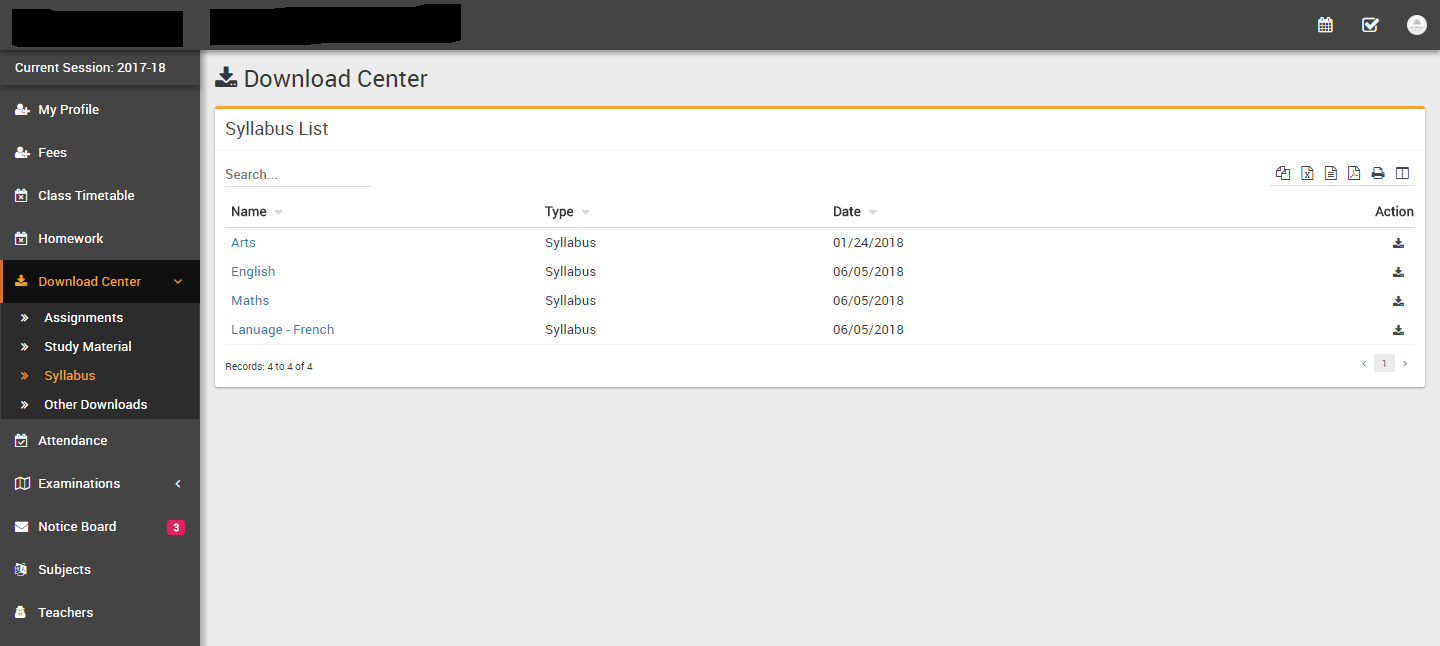
- Attendance- student can see their monthly attendance here
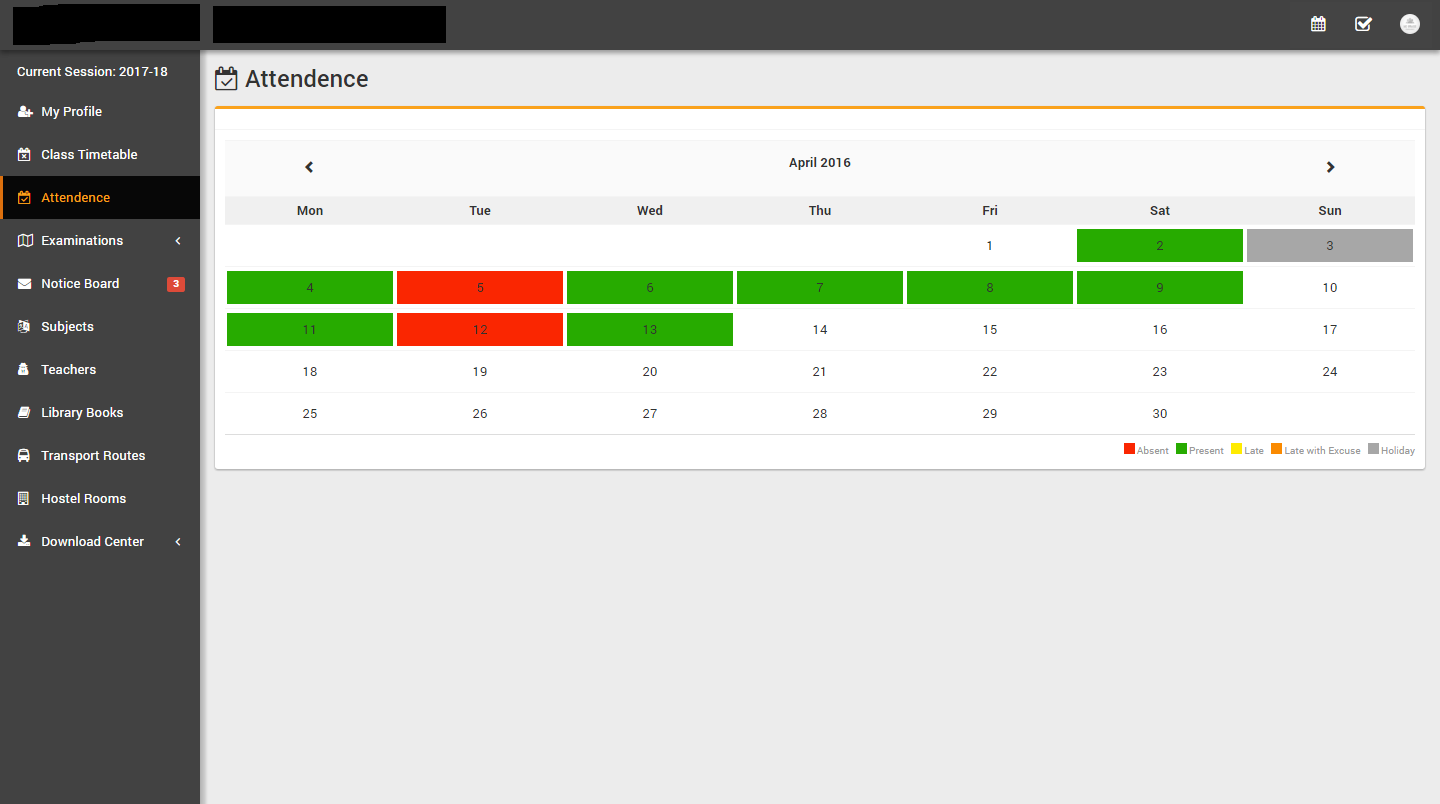
- Notice Board- student can see their messages sent by Admin & Teachers
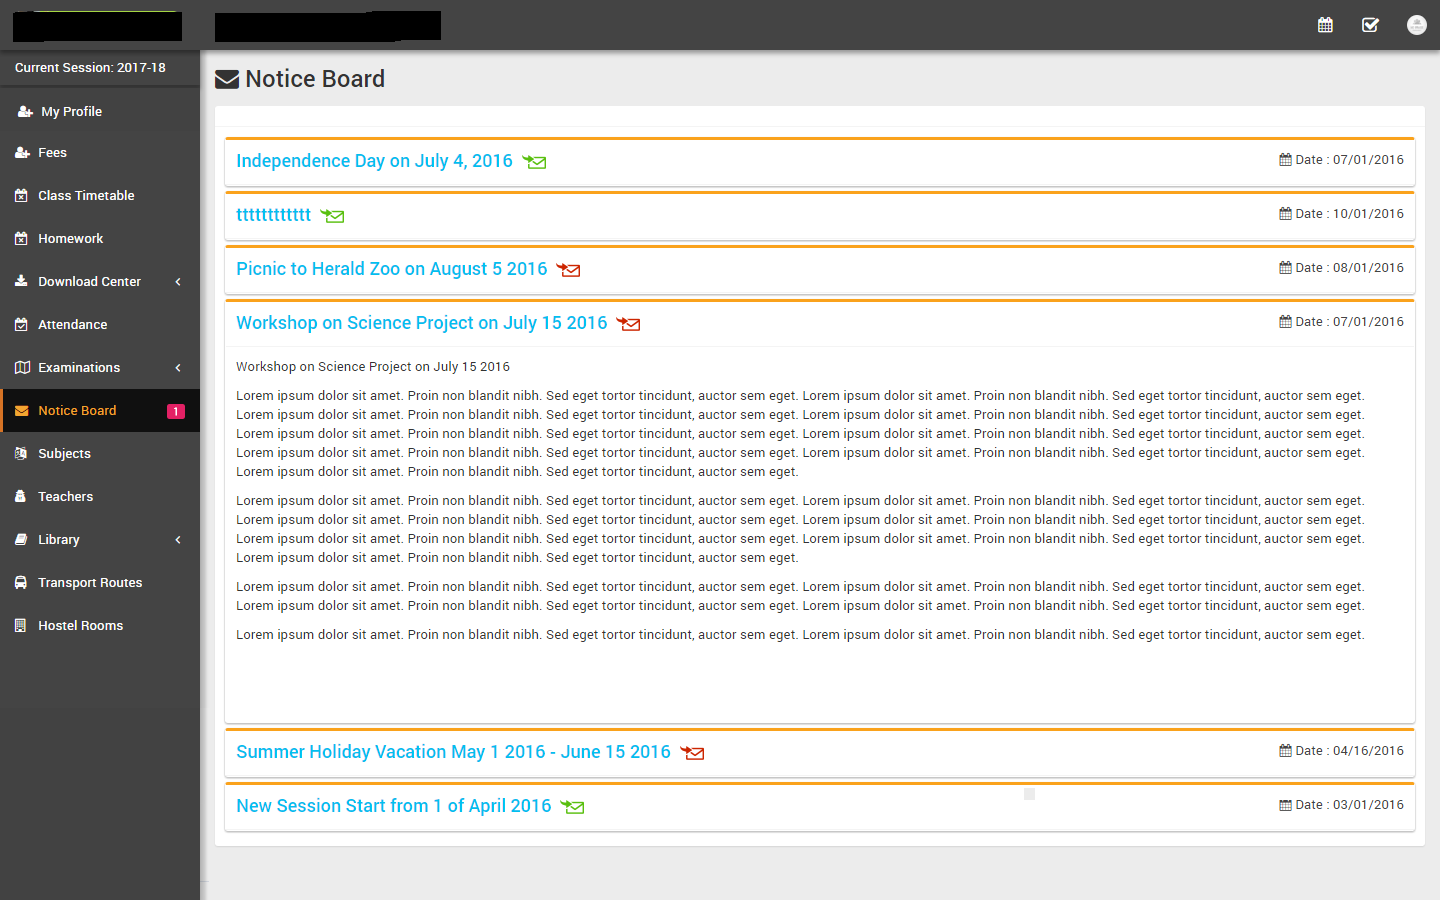
- Teachers Review- student can rate and review their teachers
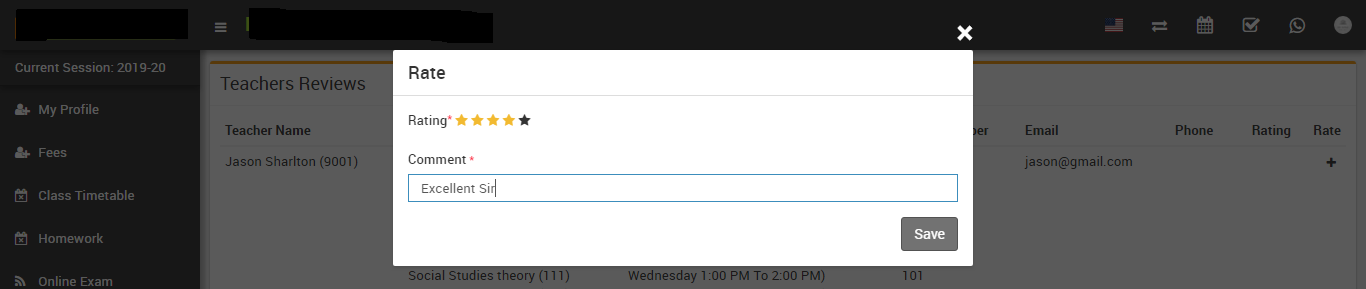
- Subjects- student can see their study subjects here
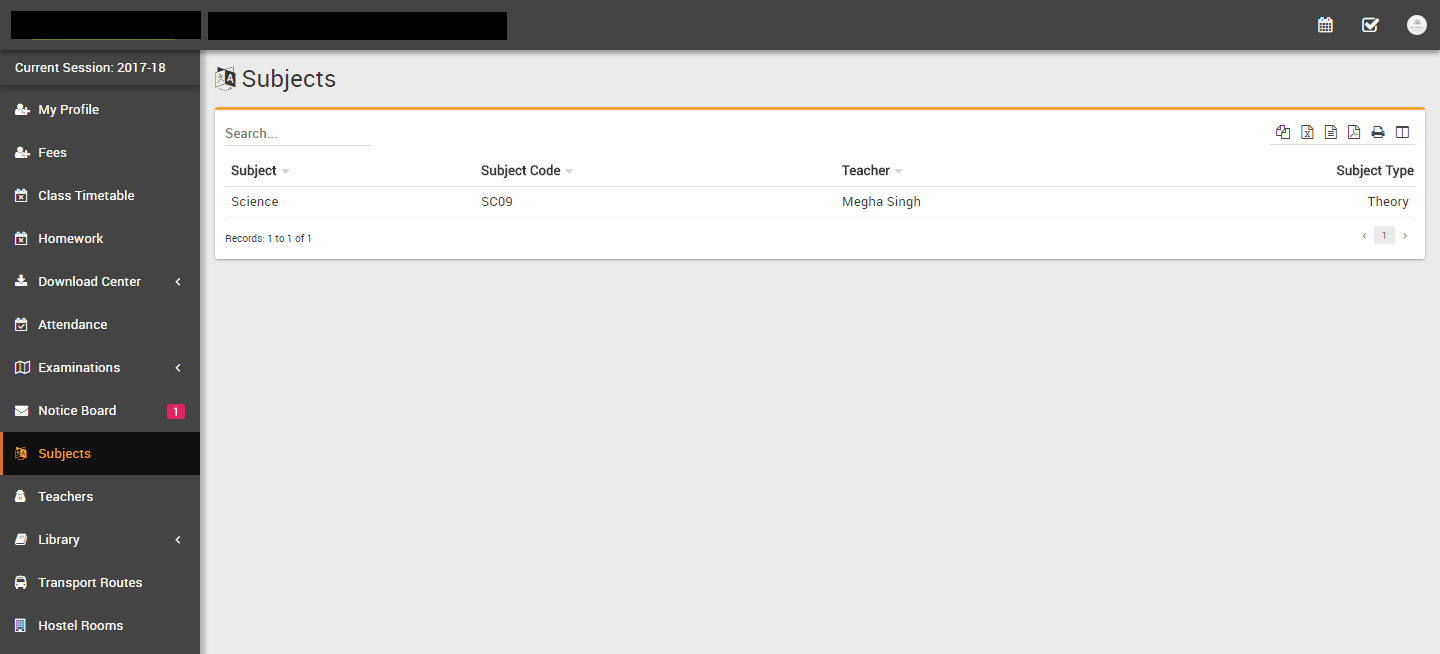
- Teachers- student can see all teachers list here
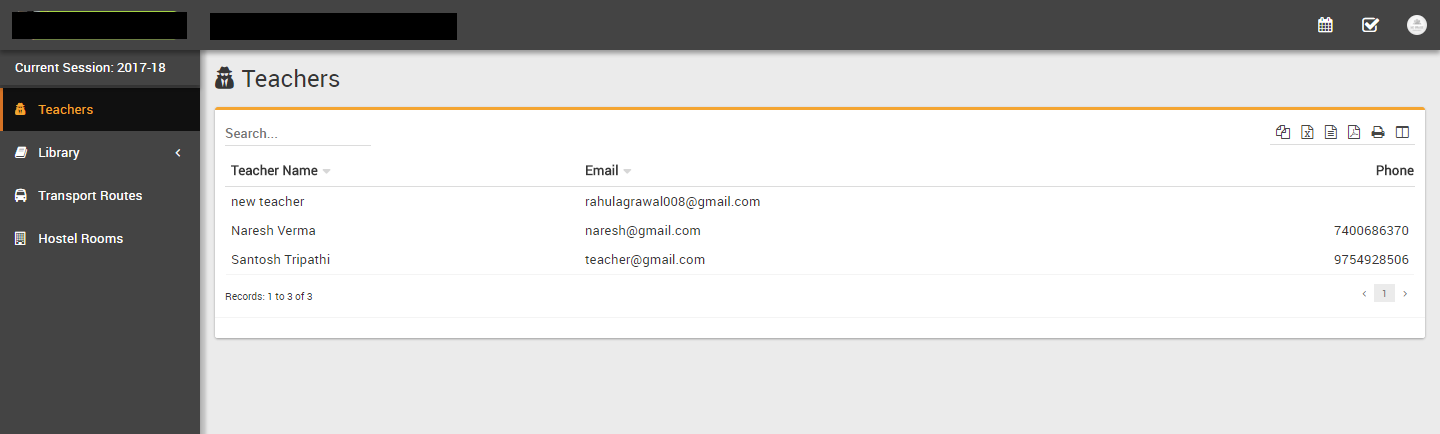
- Library > Books- student can see all books & their status here
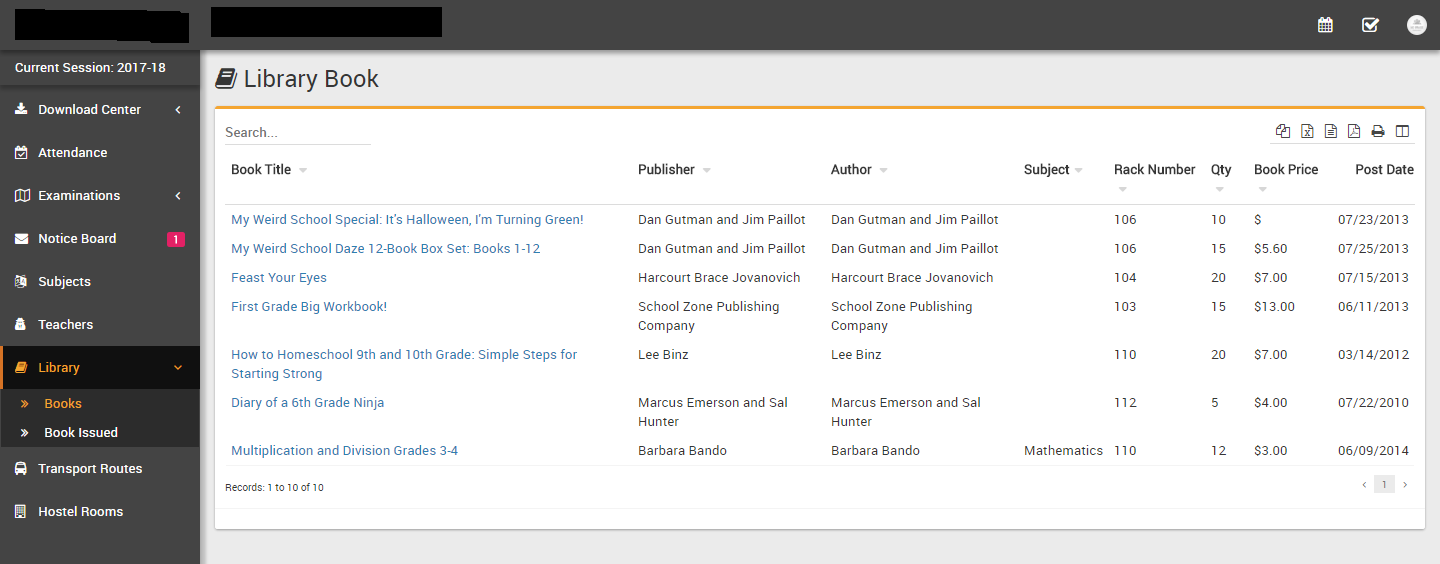
- Library > Book Issued- student can see all their issued books & their
status here
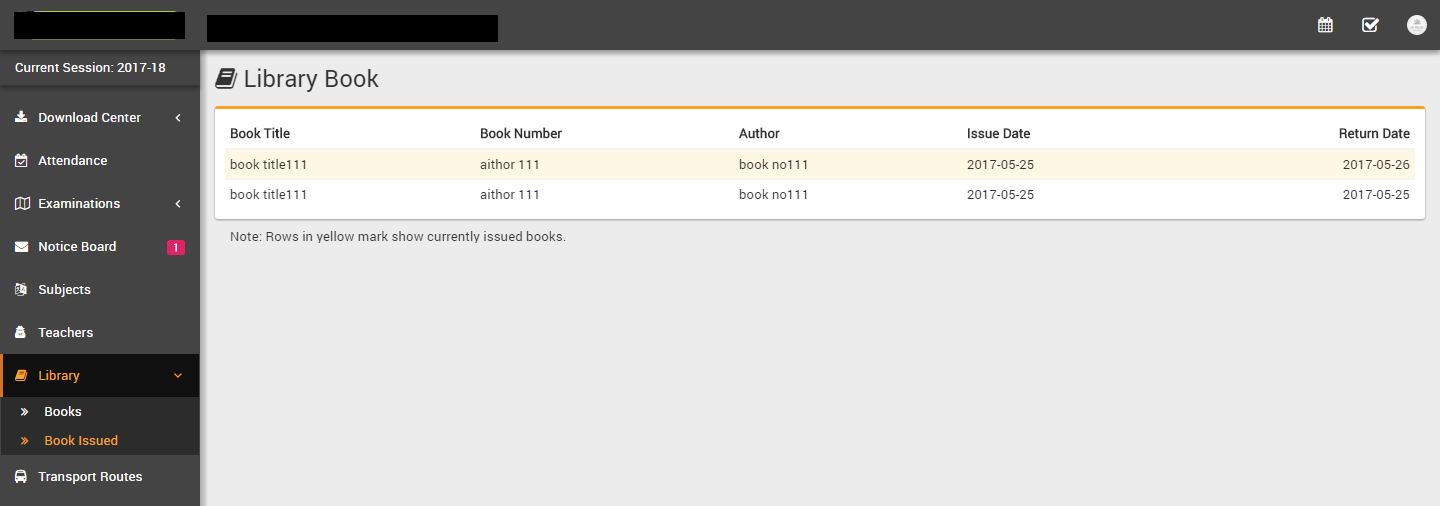
- Transport Routes- student can see all transport routes list here
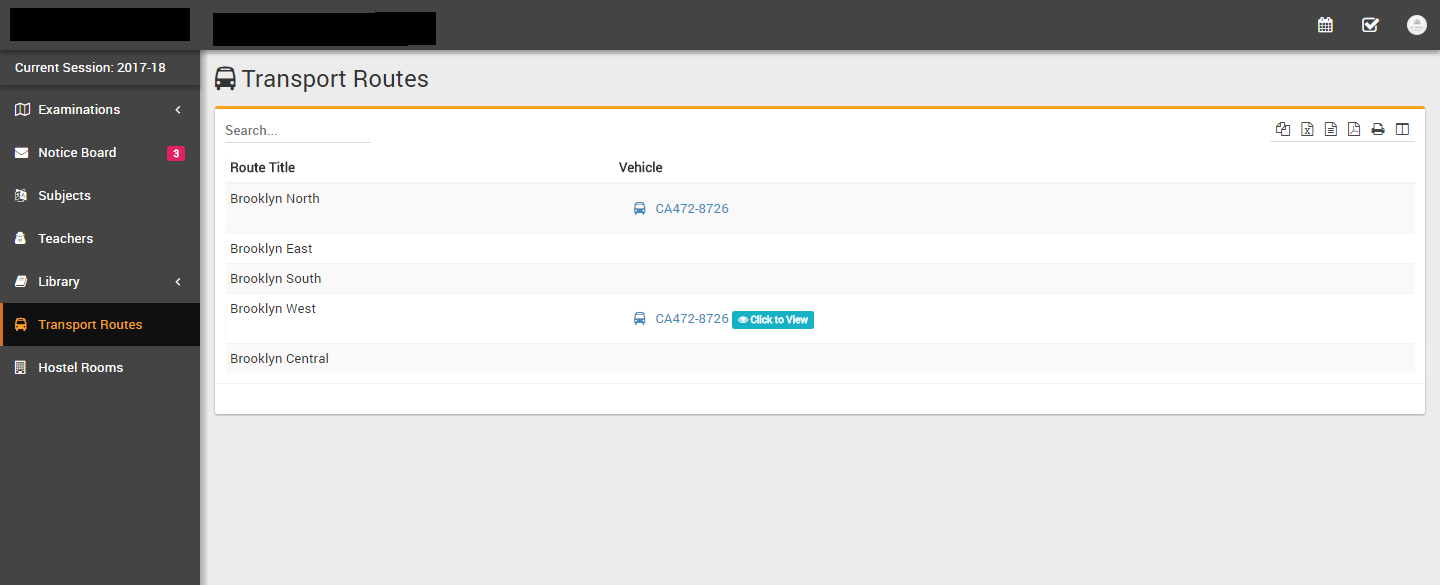
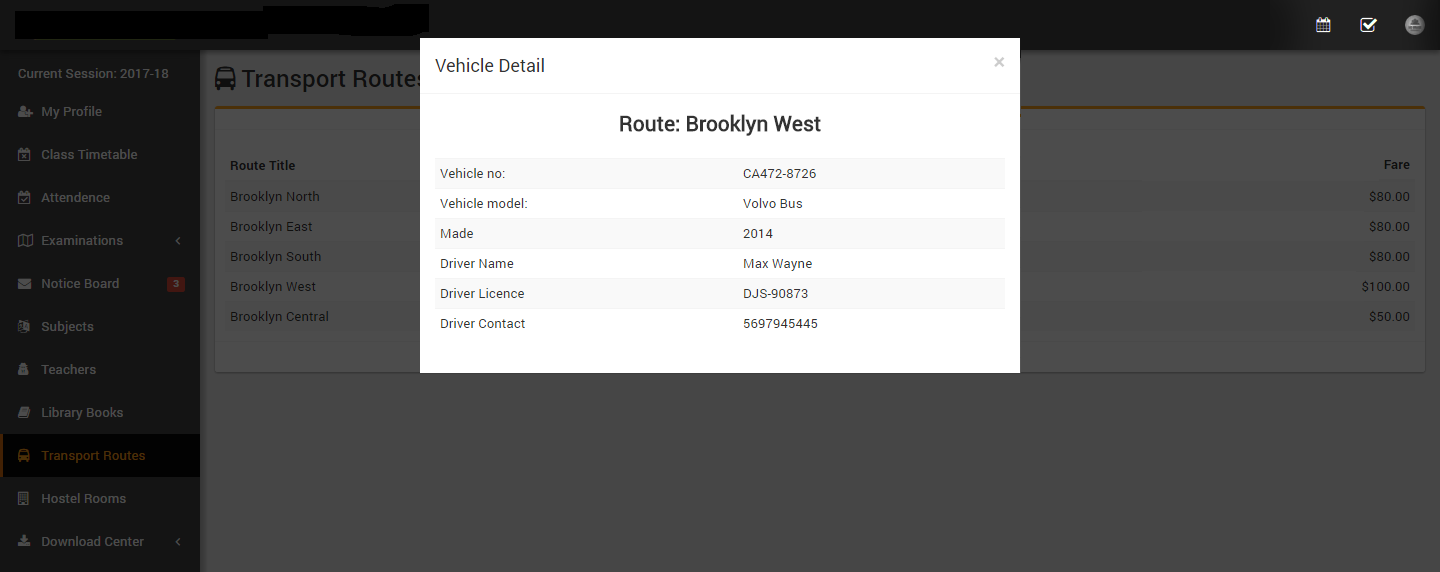
- Hostel Rooms- student can see all hostel rooms details here
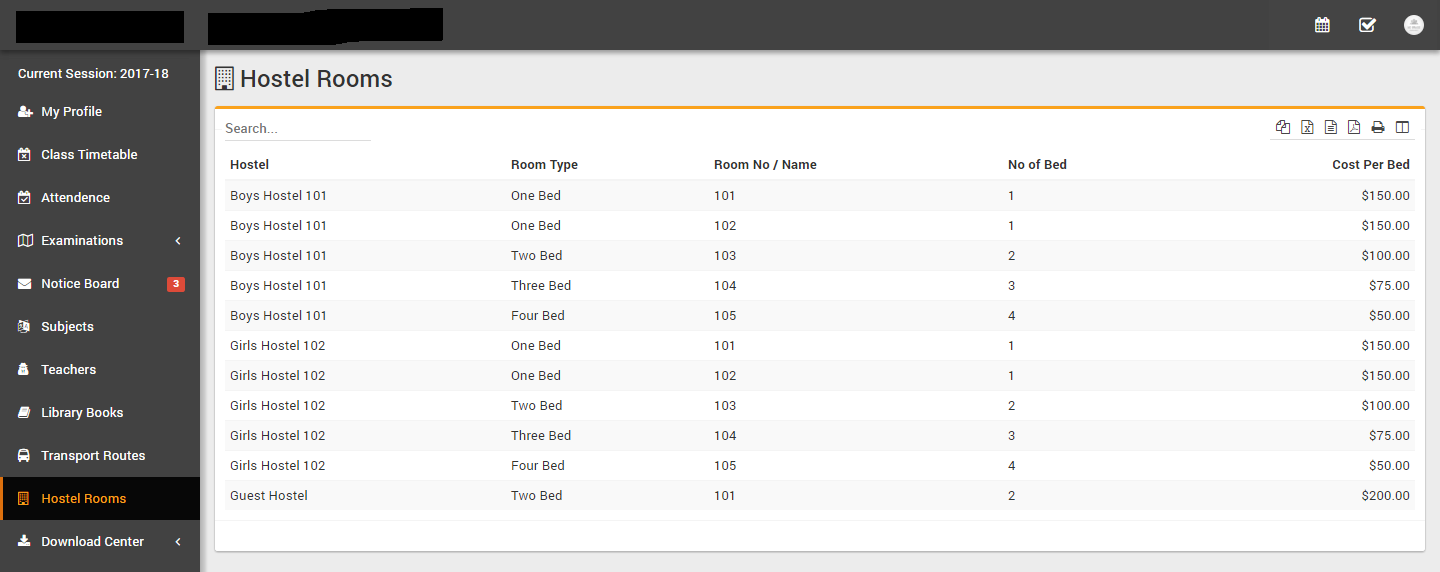
Parent Panel
Login to Parent Panel through URL https://gurukul.qodeigence.com/site/userlogin. Parent Panel is almost similar to student panel but with following differences listed below-
- Parent can see their all children details at once in their Parent Panel
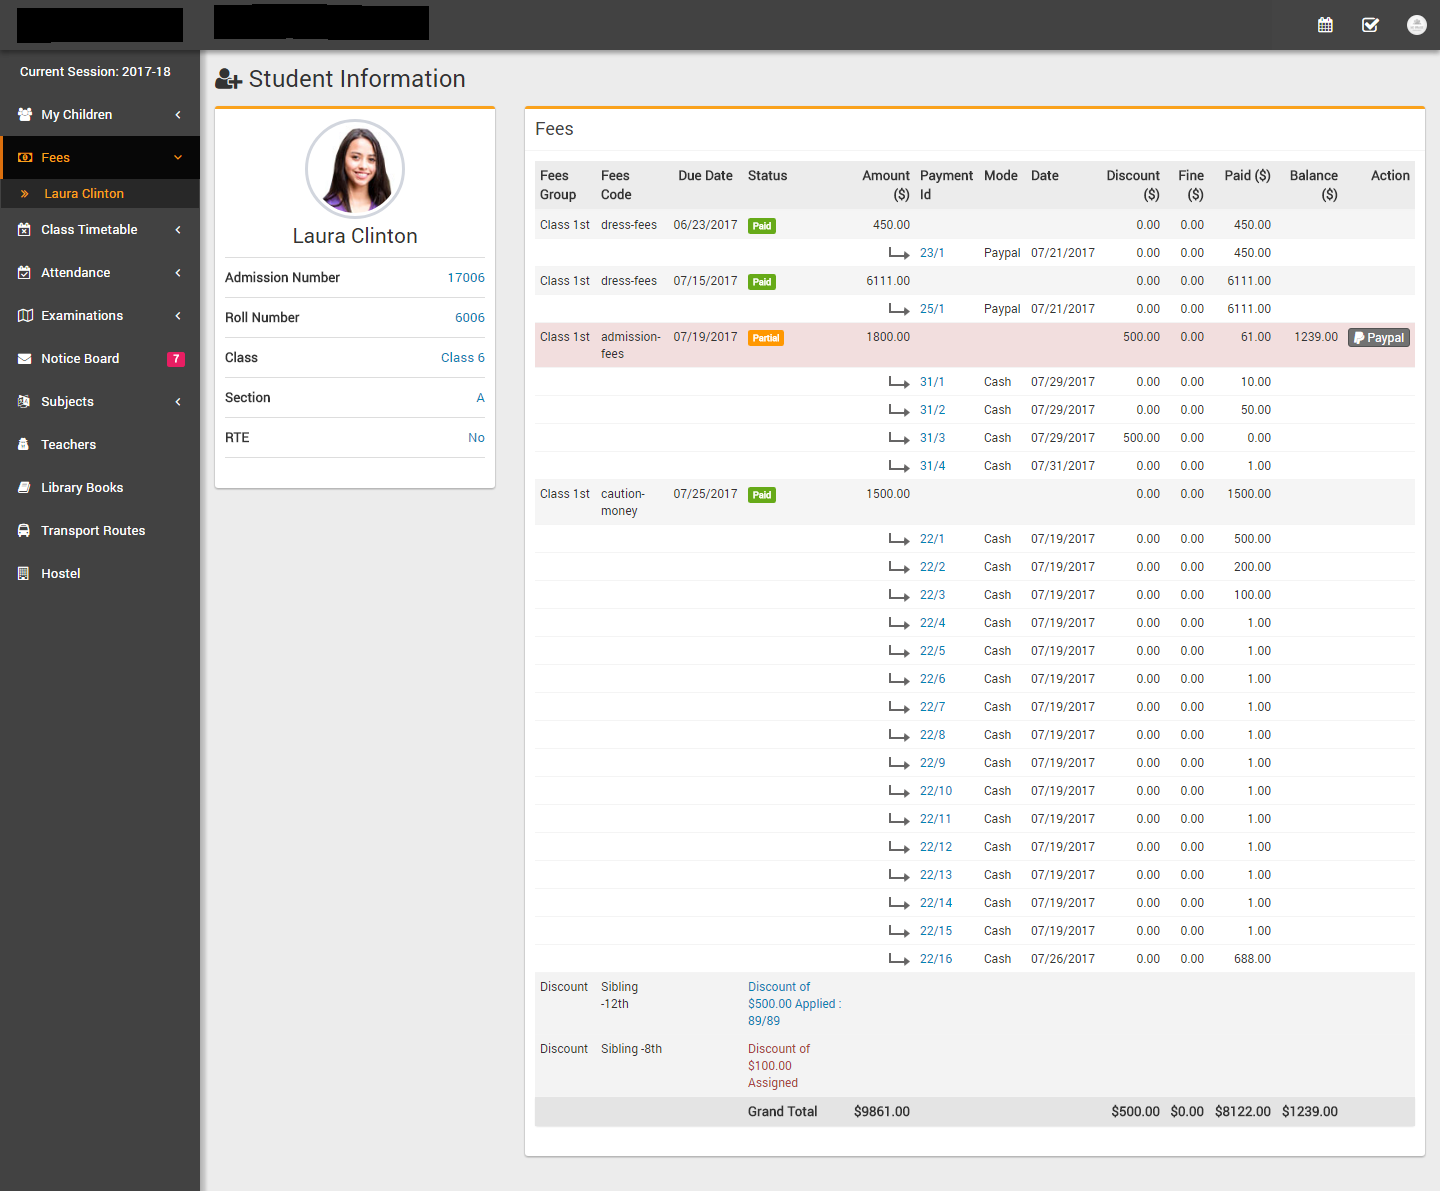
- Parent panel currently does not have Multi Class and Chat feature, these features will be added in future updates.